Self-adhesive wall sealing set for dry wall and floor sealing.
1 waterproof membrane 1 m x 30 m; 2 spray primer; 3 corner adhesive tape 120 mm x 50 m; 4 base sealing tape 50 m; 5 installation aid: squeegee; 6 2x 1/2″ pipe collars; 7 drip protection collar; 8 installation instructions.
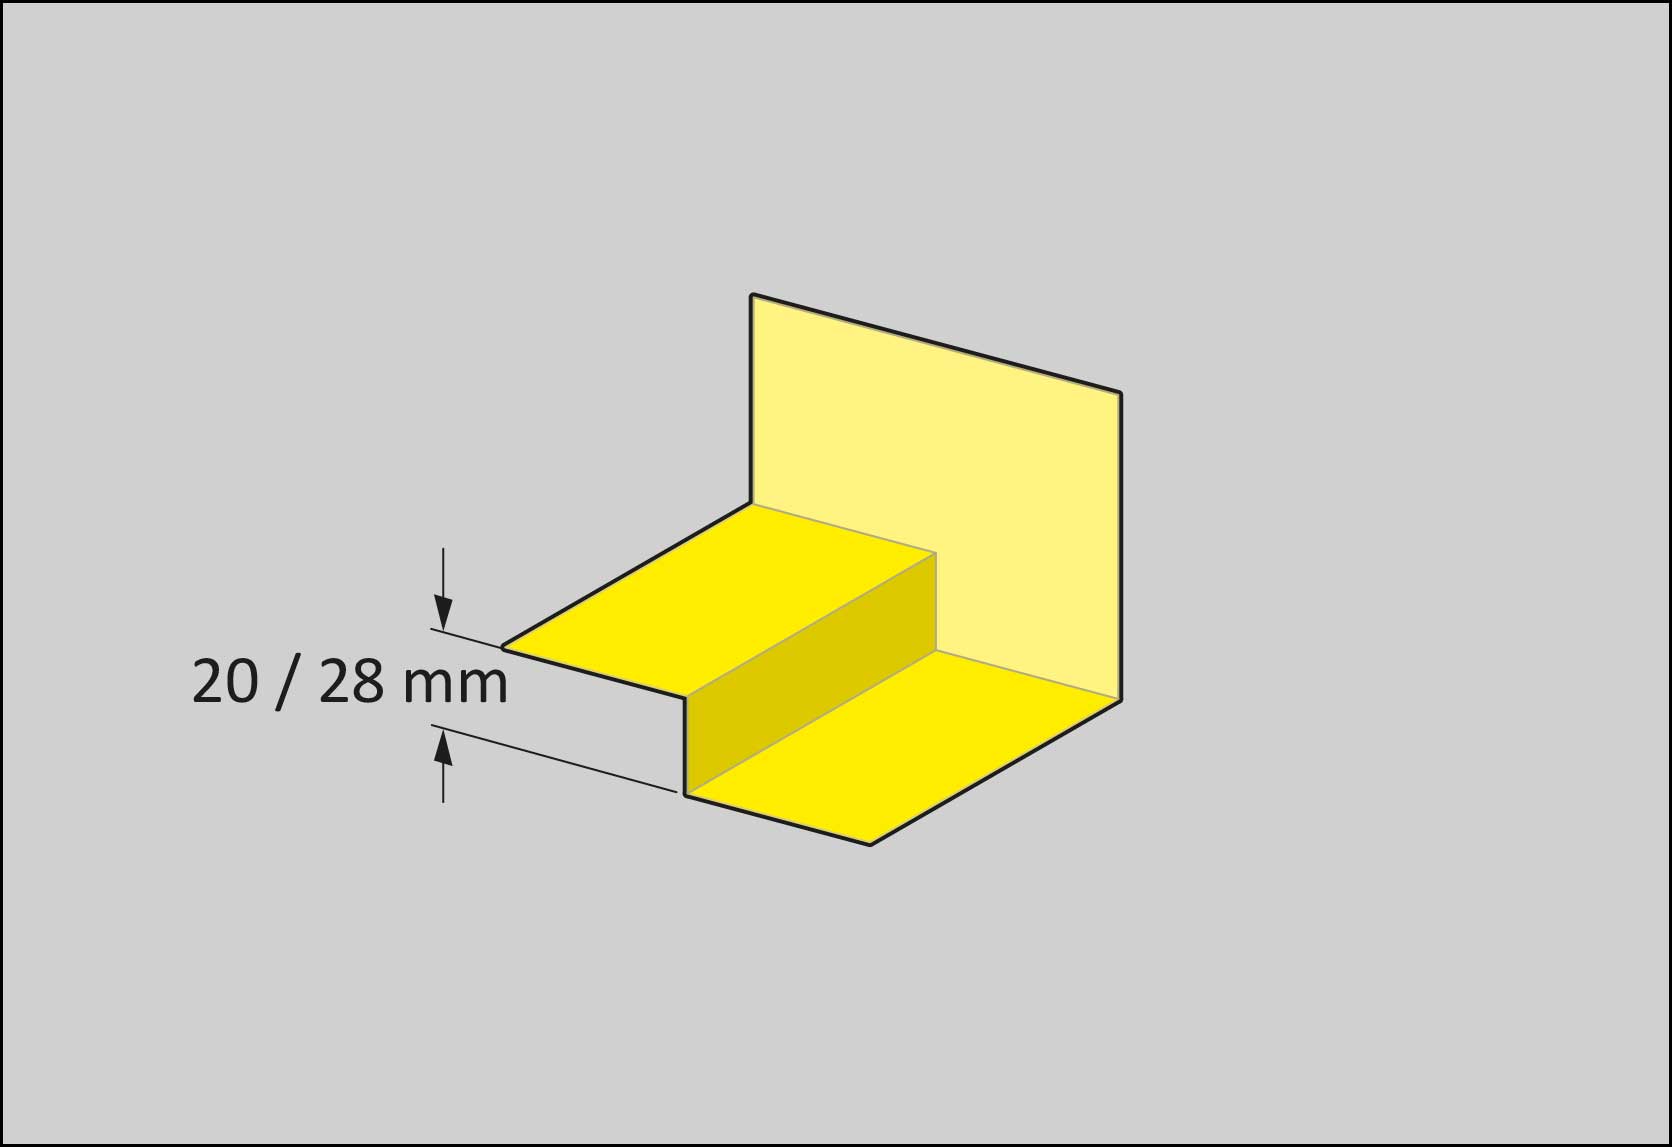
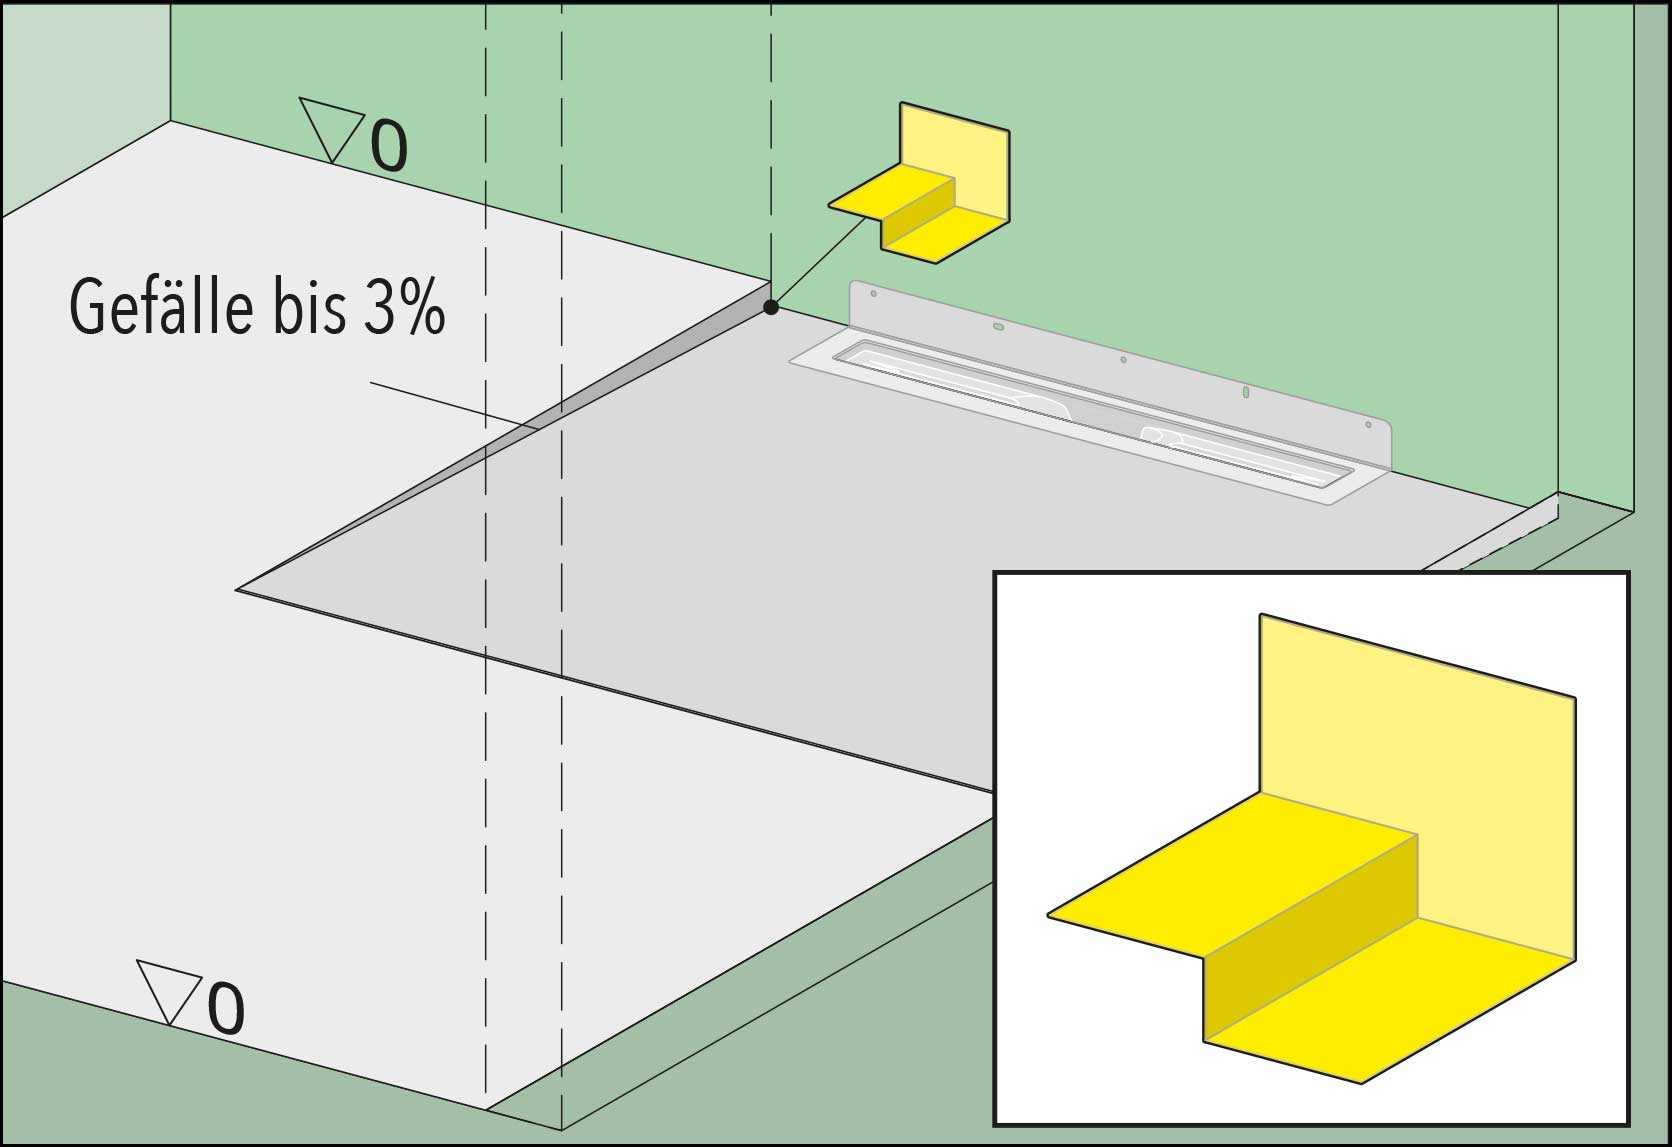
Wedge-shaped corner on floor-level shower
with corner adhesive tape + trowel protection
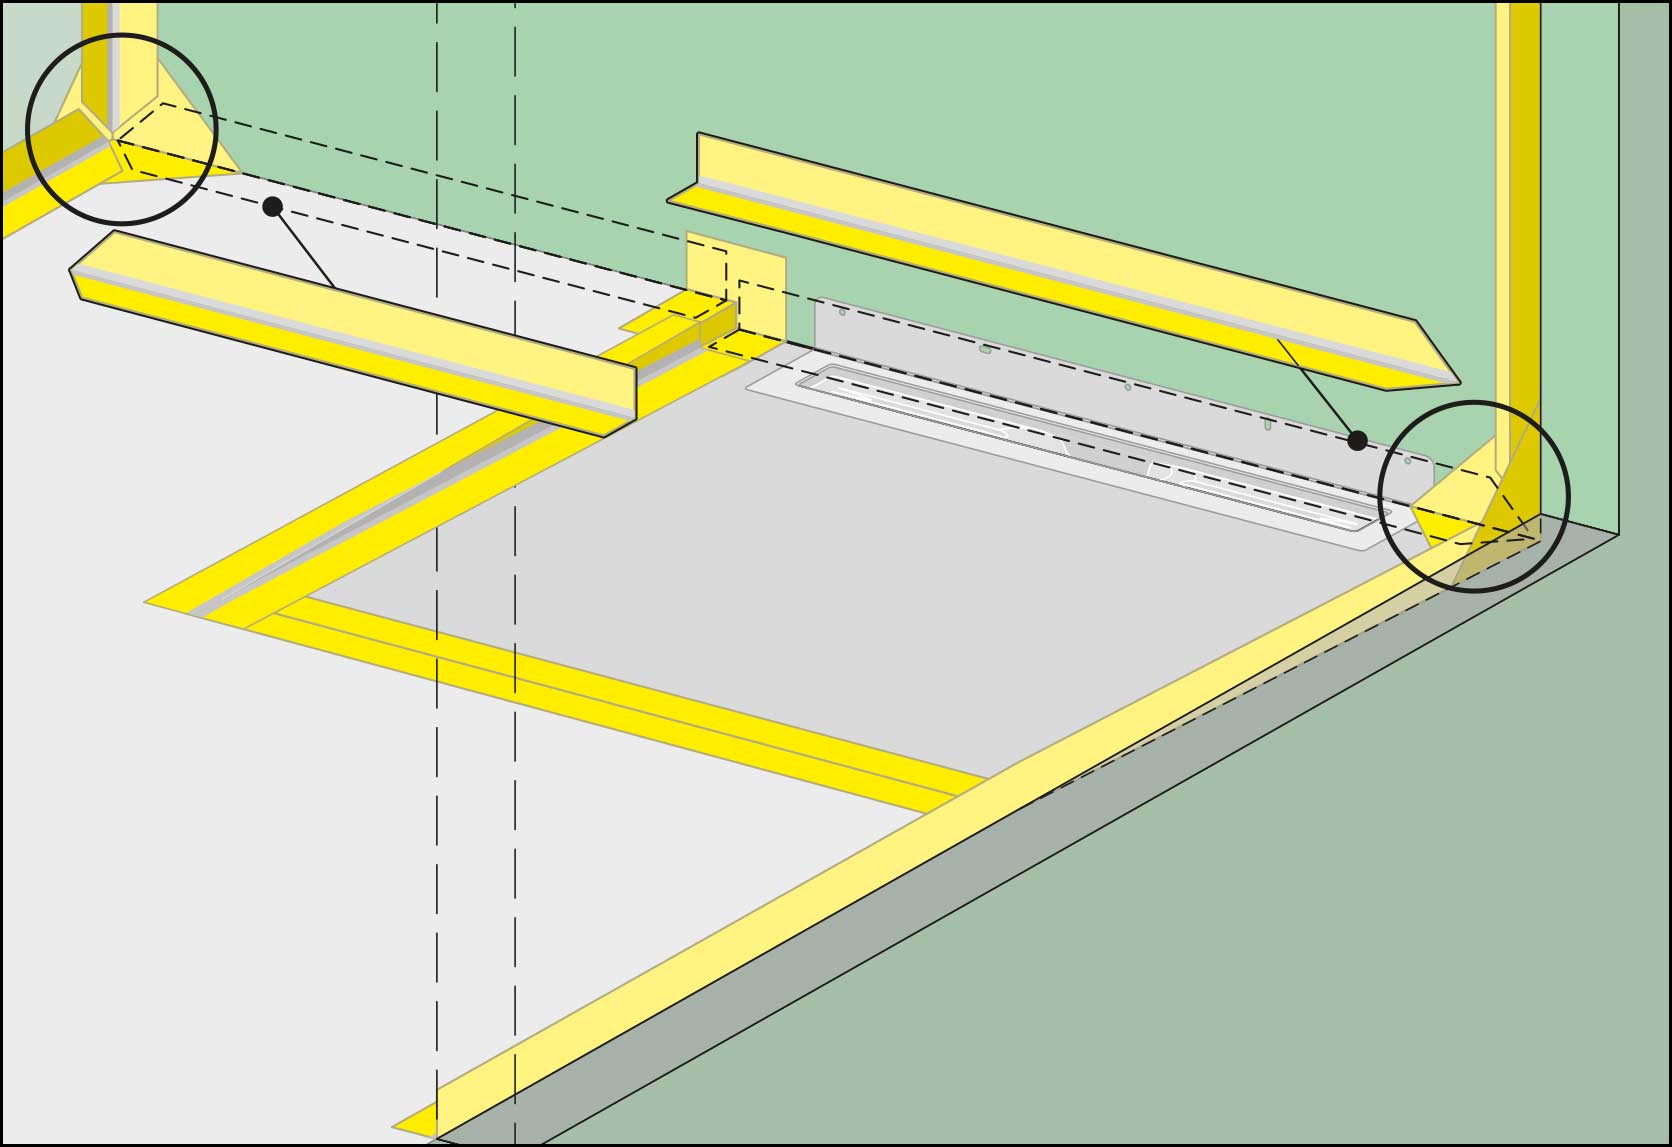
1. sealing wedge (step 20 or 28 mm)
2. sealing wedge for floor-level showers (corner installation).
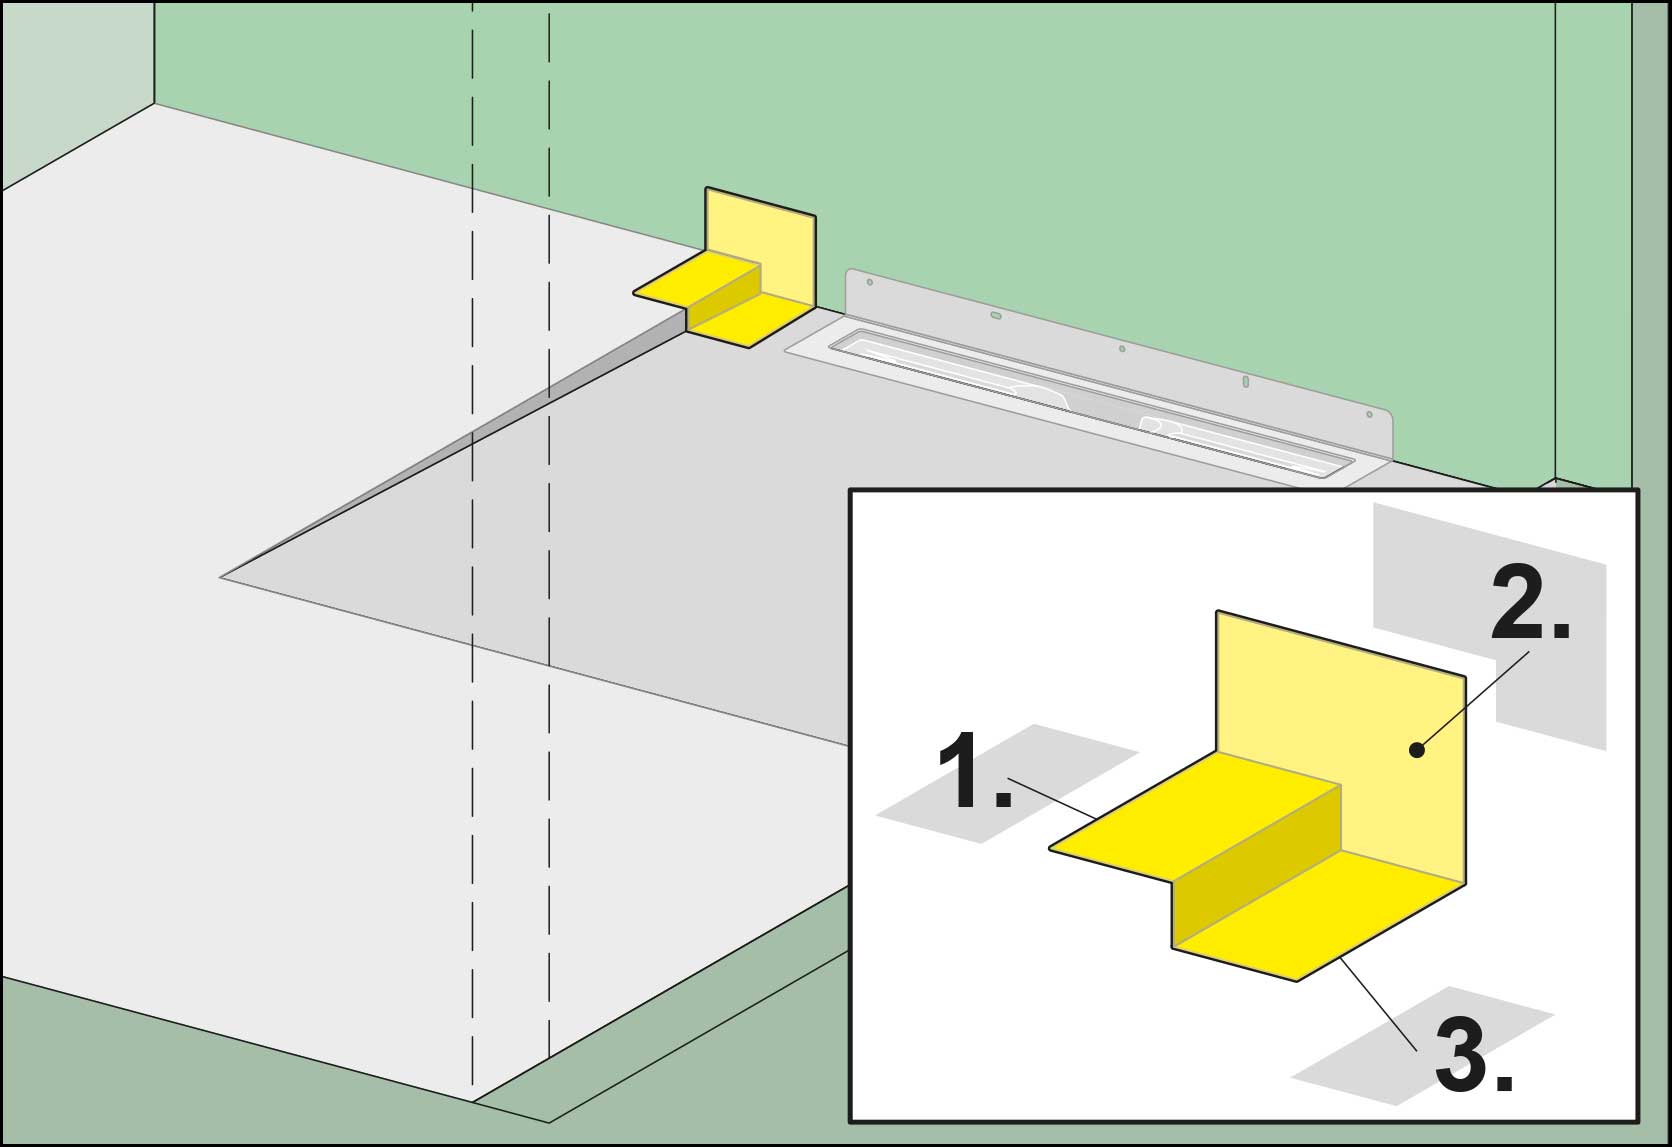
3 . installation of the wedge at the transition from wall/shower, wall/floor and shower/floor. To do this, peel off the protective films one at a time in the order 1-3 and stick them in place.
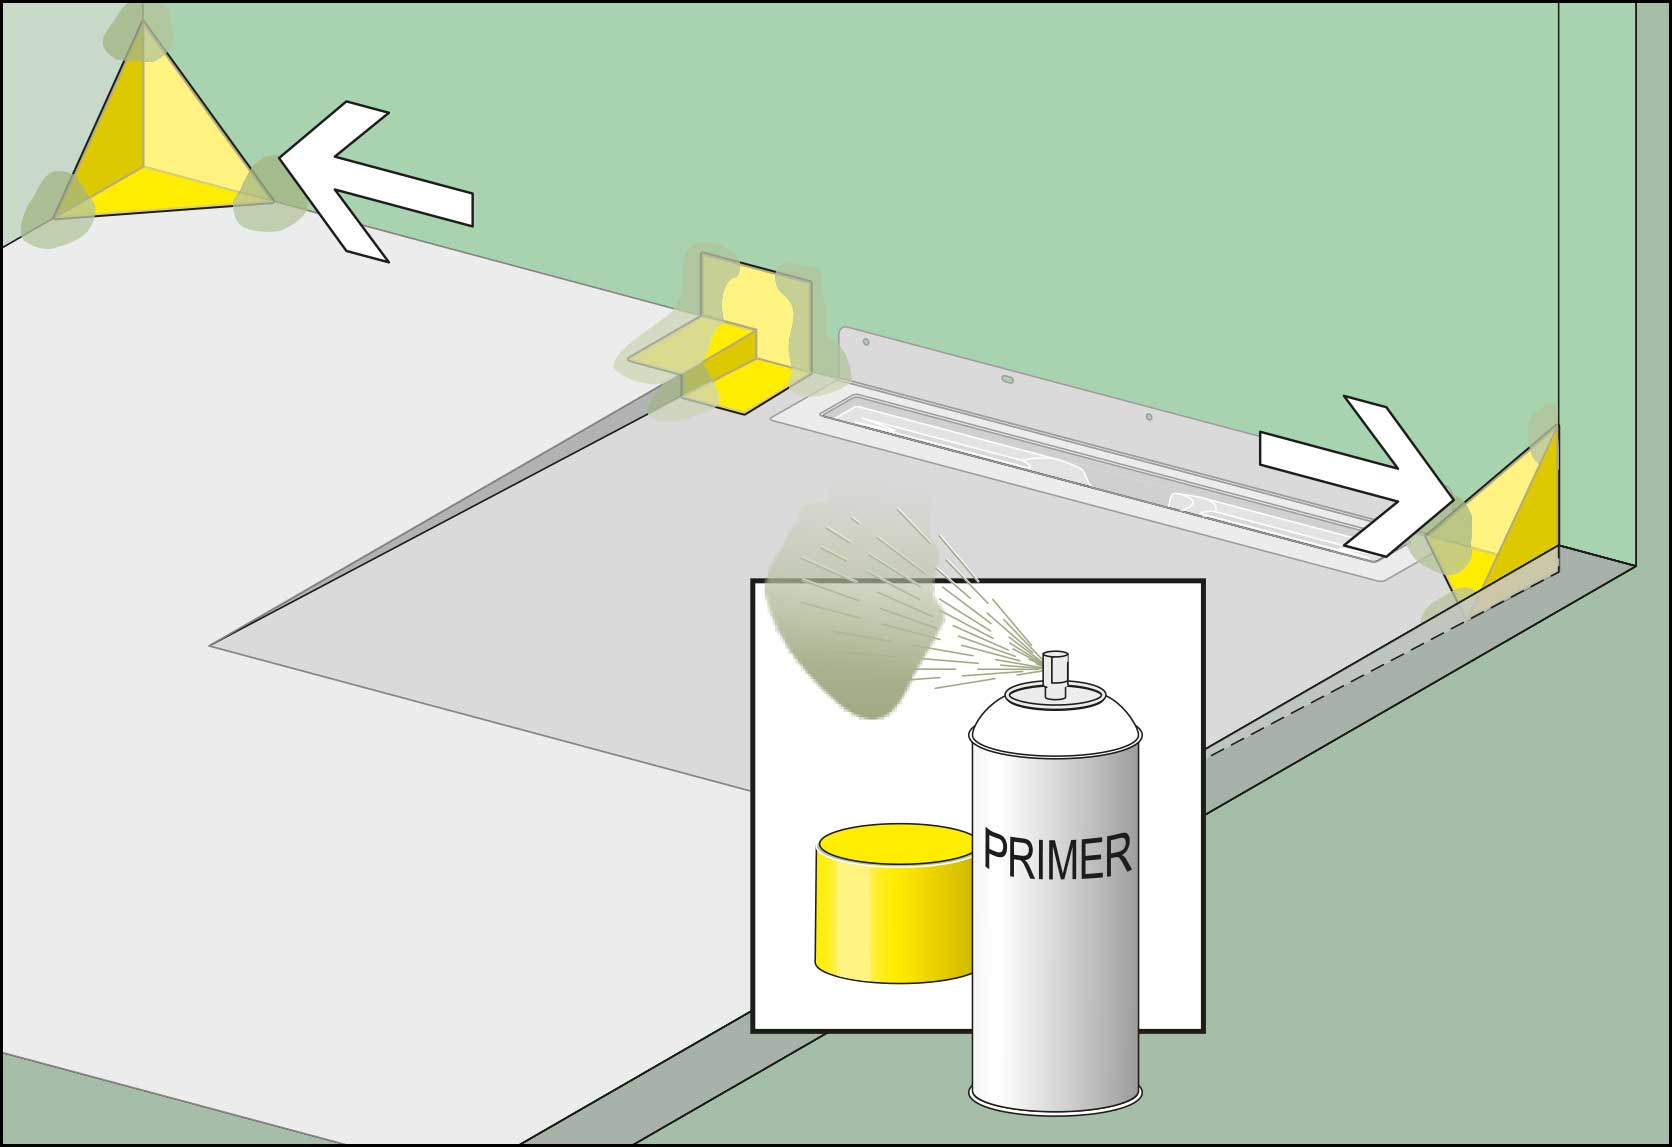
4. attach the internal corners and connector with corner tape.
5. prime internal corners and sealing wedge on wall/floor with primer spray.
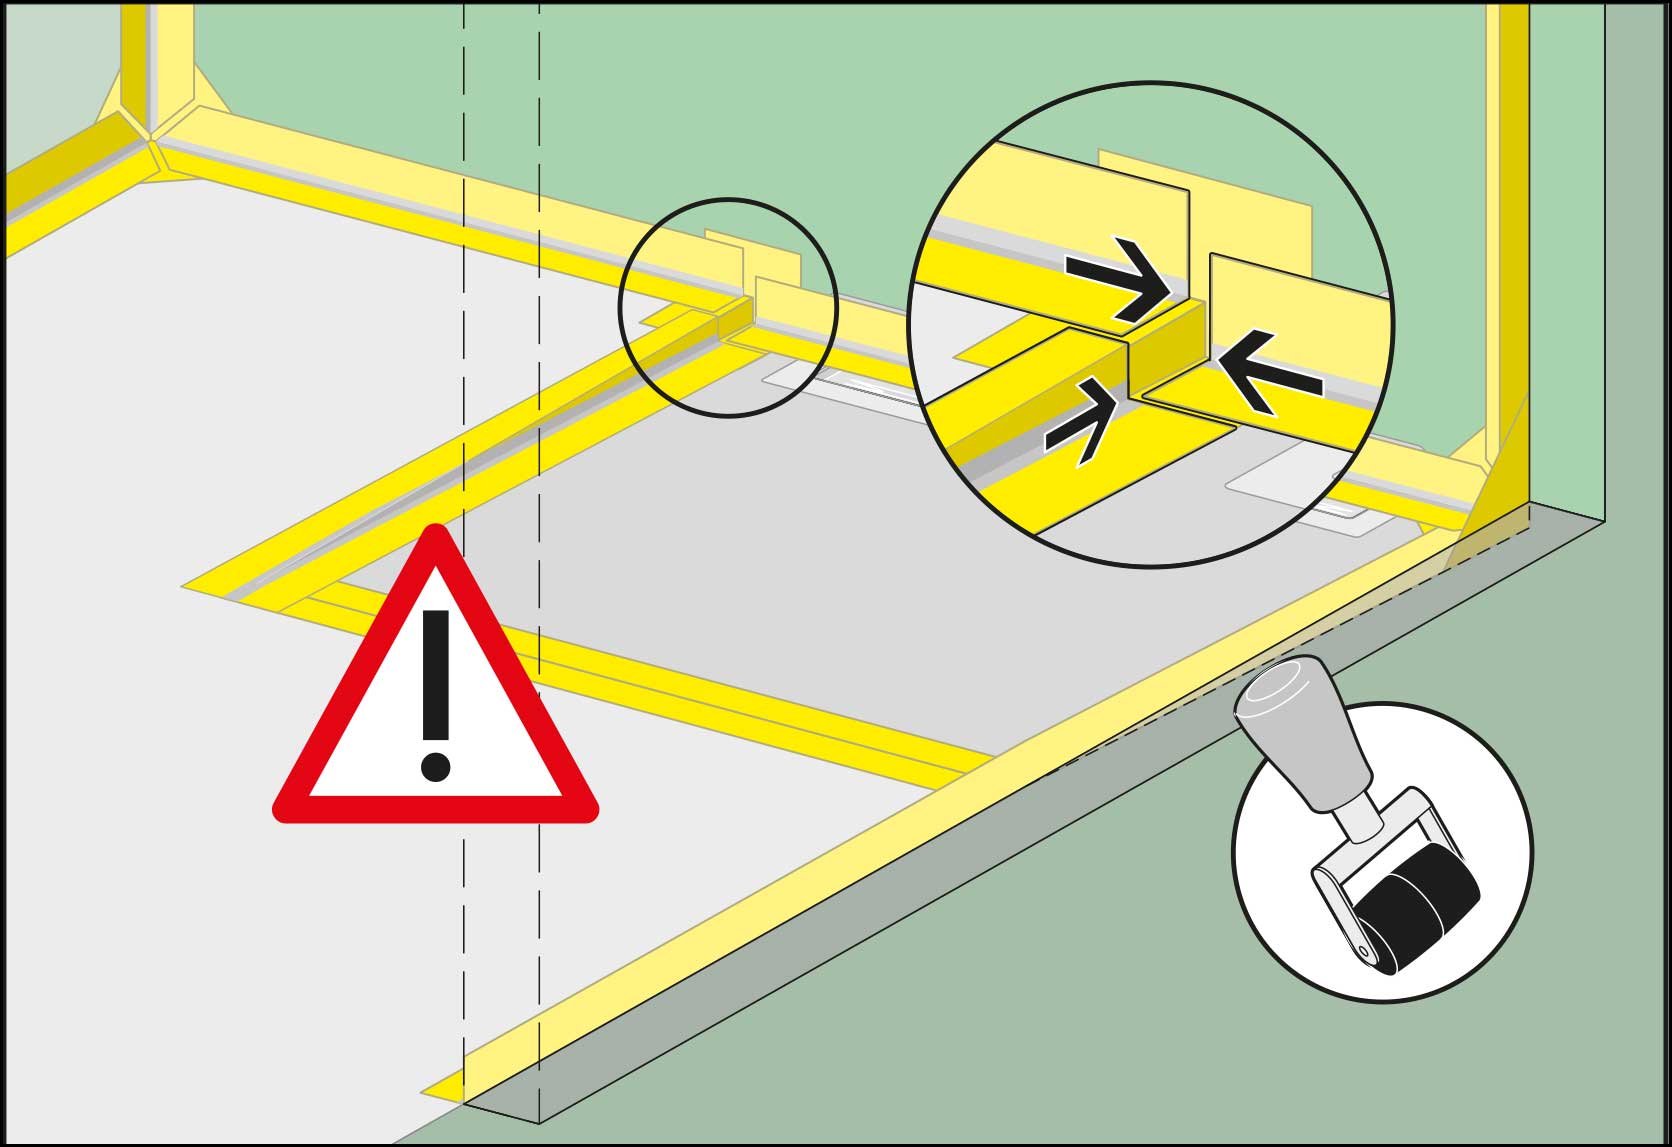
6. preparation and application of the corner adhesive tape: The ends of each of the three corner adhesive tapes must be mitered at the internal corners (see Figures B 1 and B 8). The corner adhesive tapes must not overlap! (Too high installation height!)
7. attaching the corner adhesive tape to the sealing wedge: The corner adhesive tapes must not overlap! (Too high installation height!) Roll on all corner tapes firmly.ee
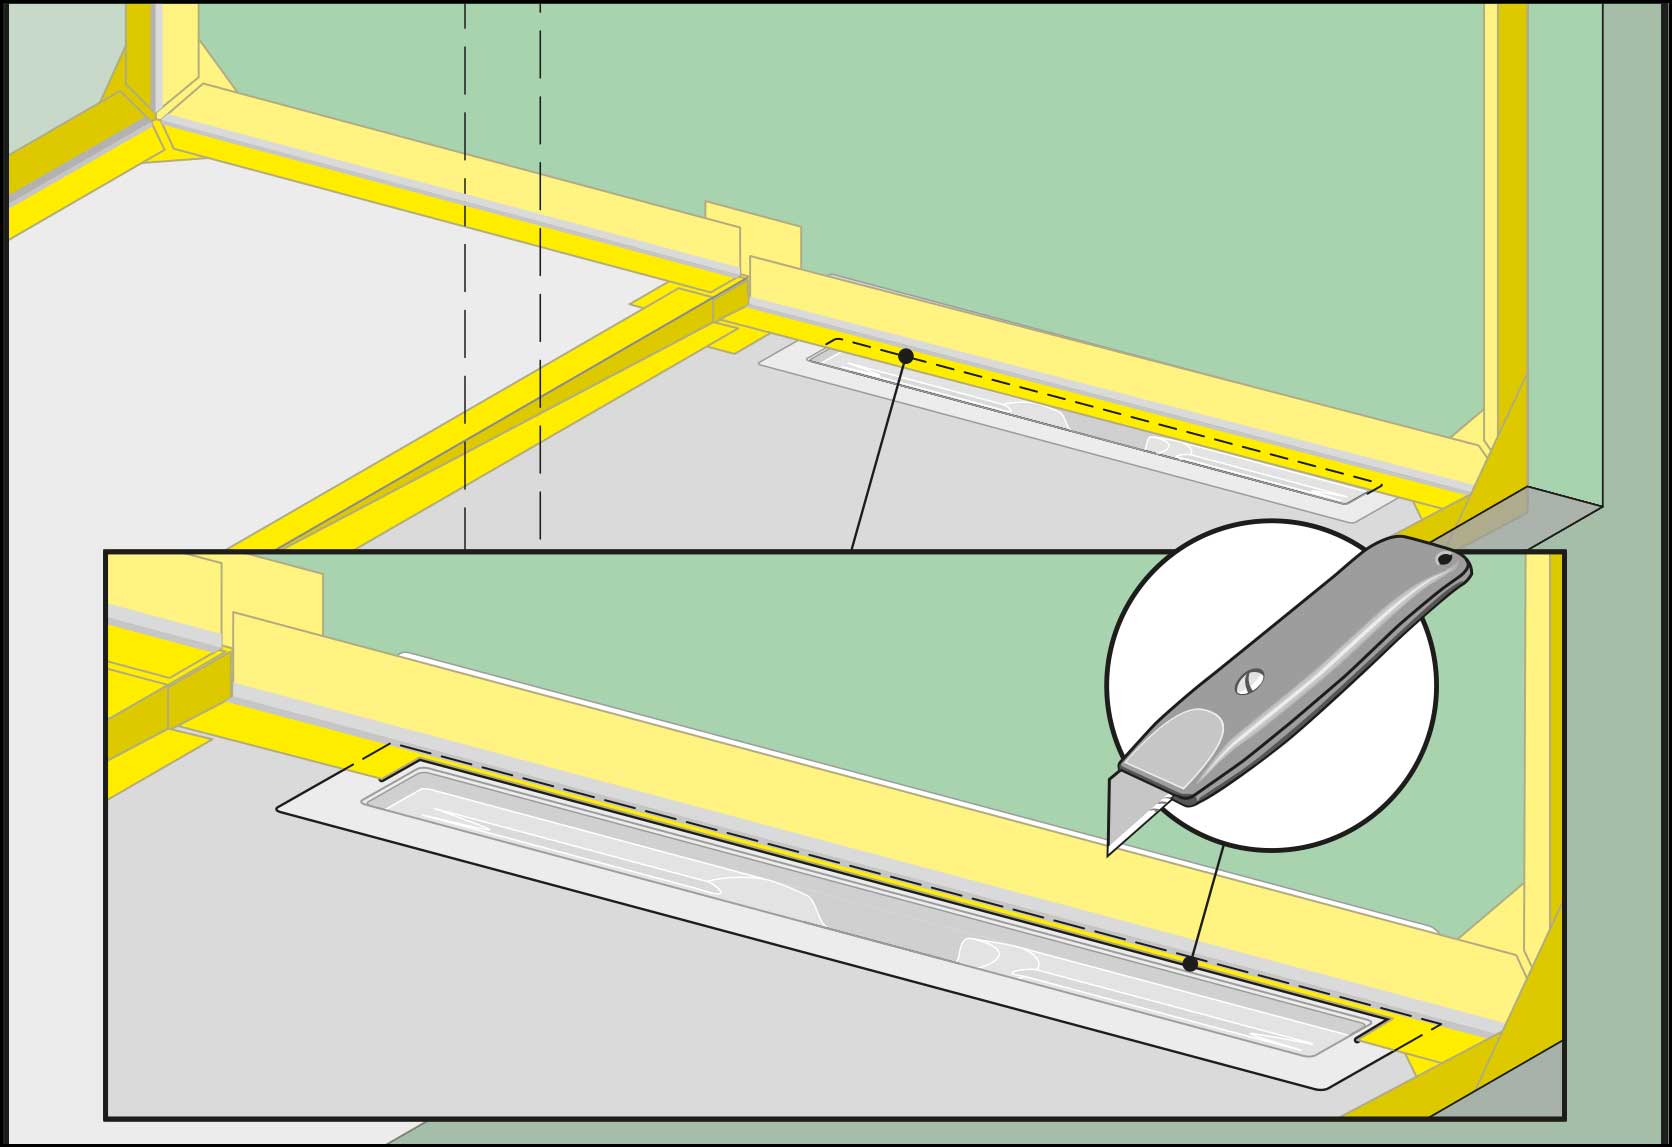
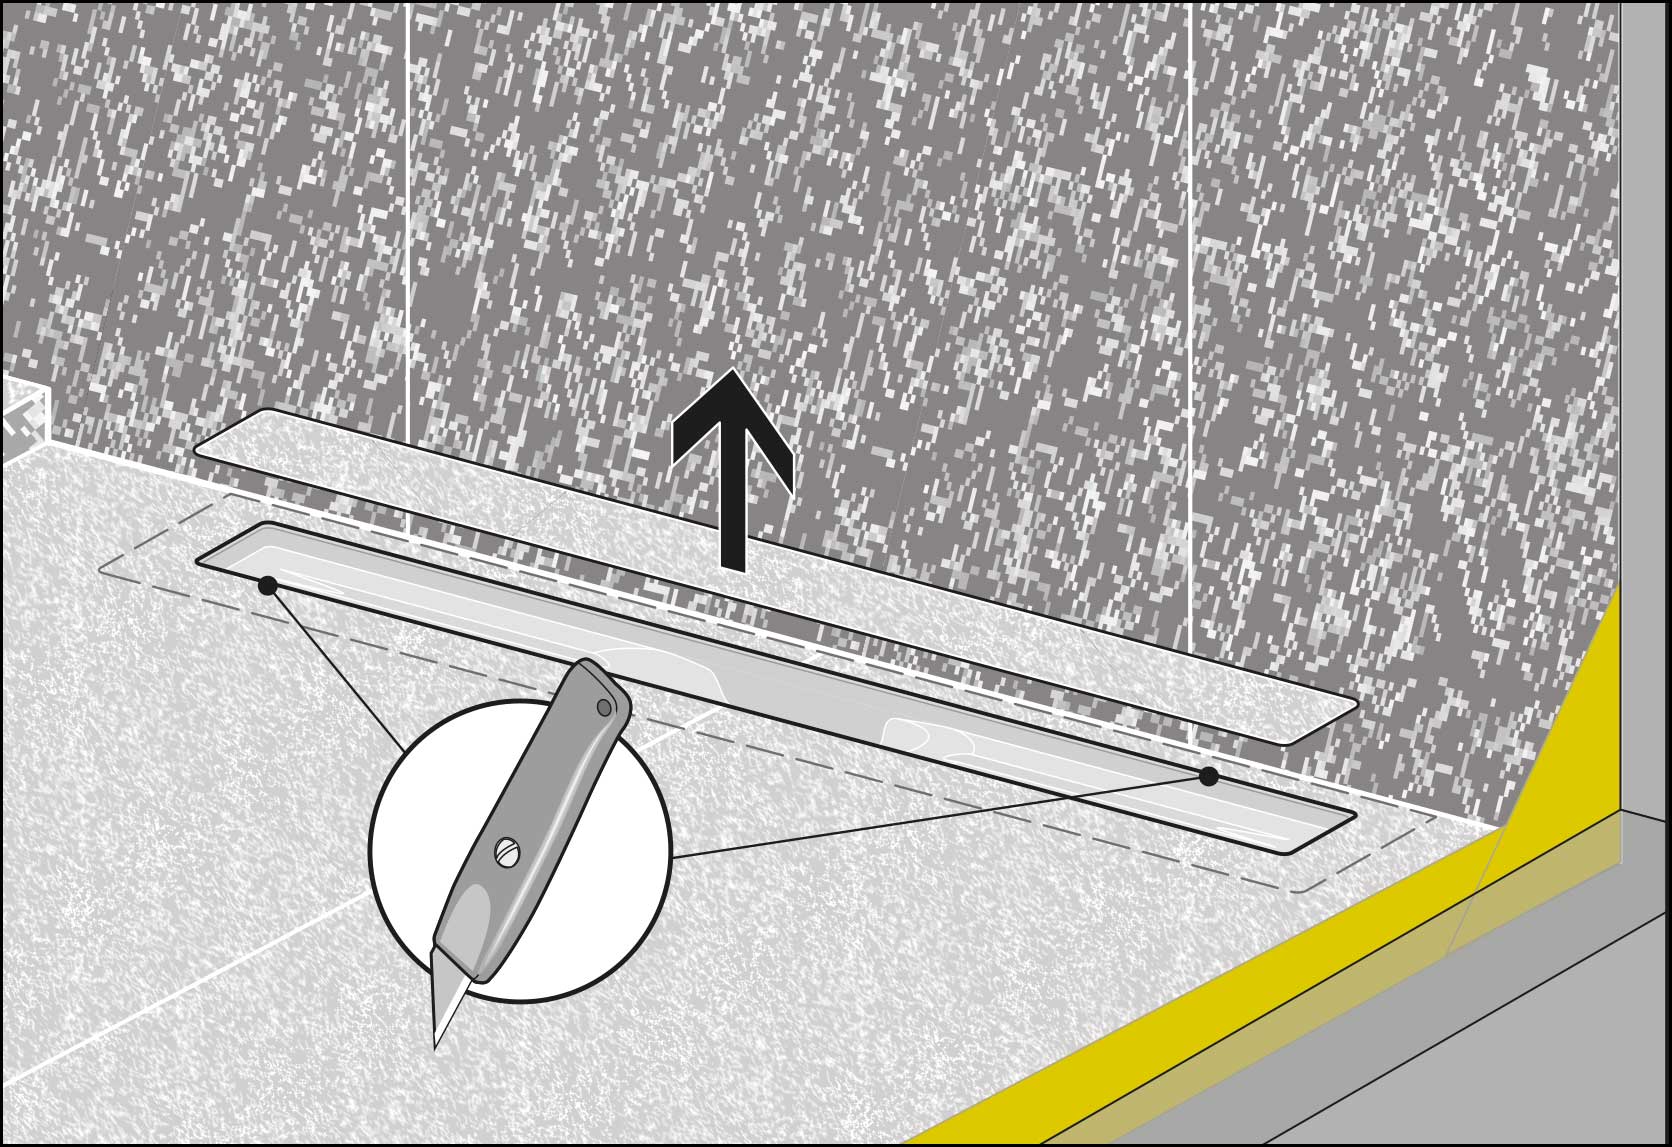
8. corner adhesive tape on the shower channel: Cut out the inner body with a knife.
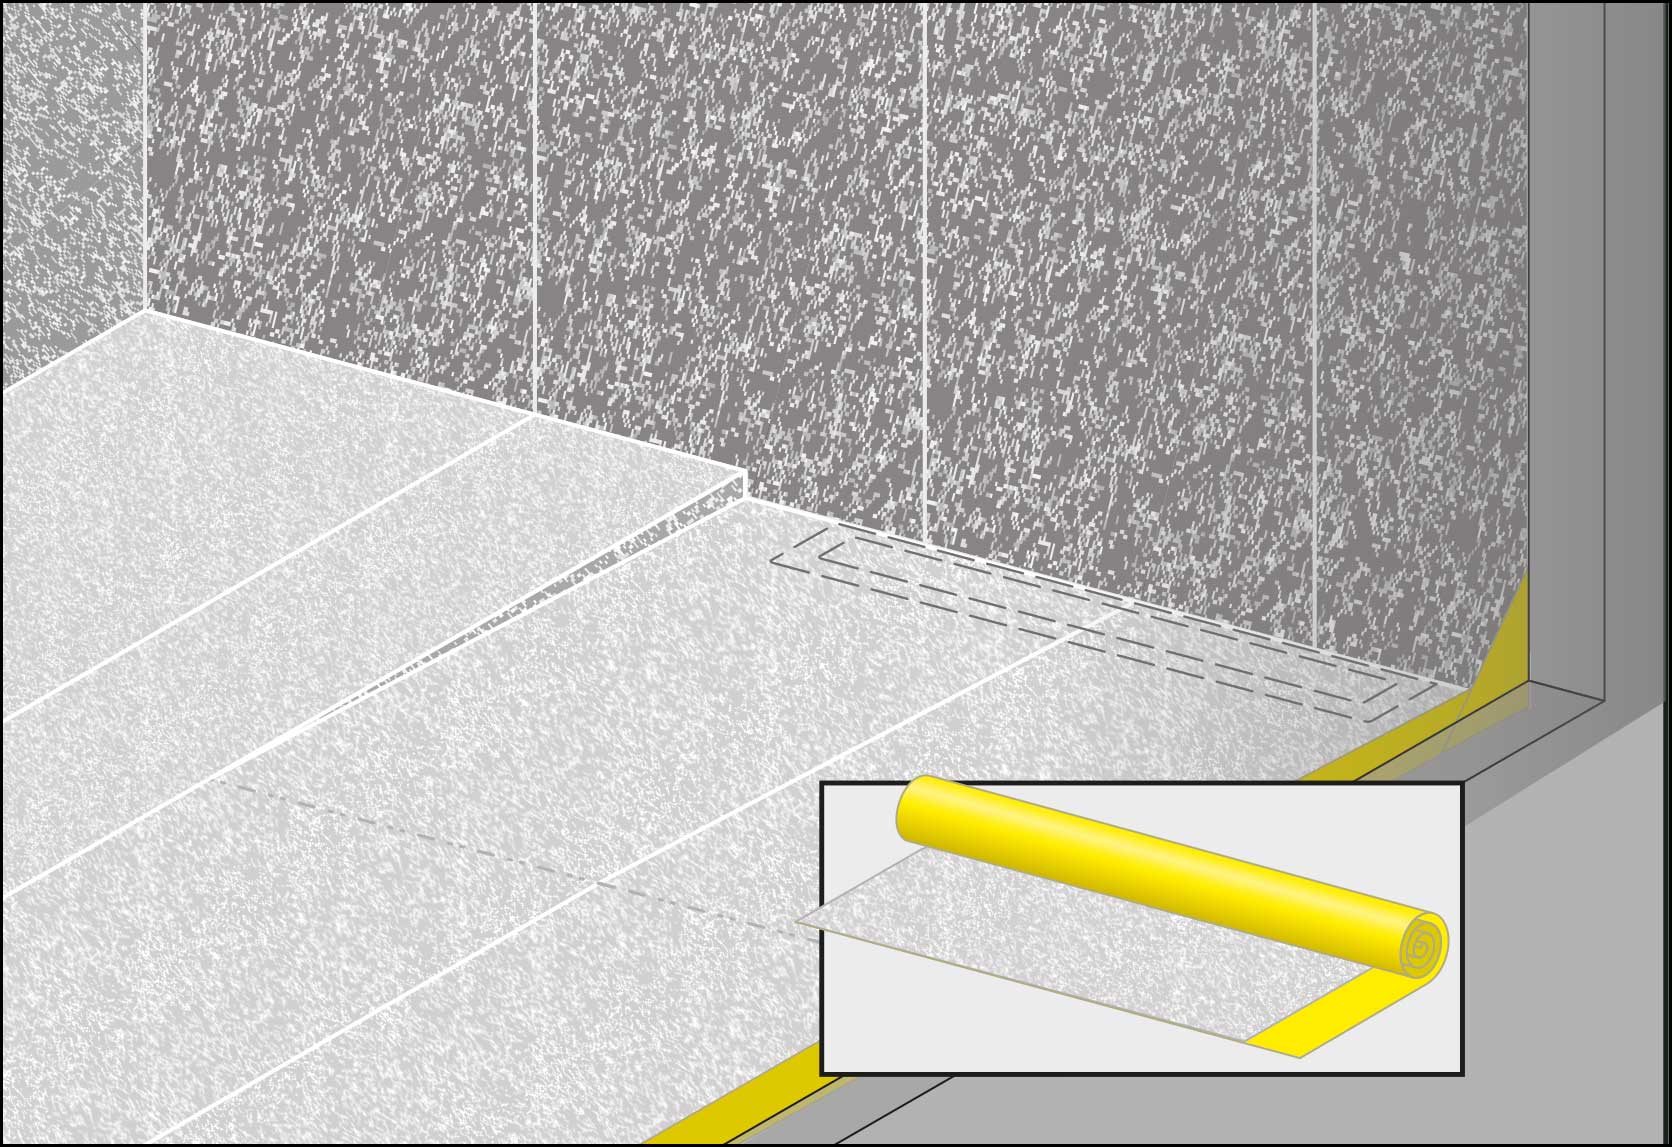
9. provide the entire wet area on the wall and floor with waterproof membranes.
F 10. Cut out the waterproof membrane on the inside of the shower channel body with a knife.
DO NOT MISS ANY NEWS
EXCITING PRODUCTS
0+
ASSORTMENTS
0+
#Frag Thierry
Wir helfen Ihnen bei allen Fragen rund um unsere Produkte und antworten Ihnen während unserer Geschäftszeiten umgehend.
#Ask Thierry
We will help you with any questions you may have about our products and will respond promptly during our business hours.