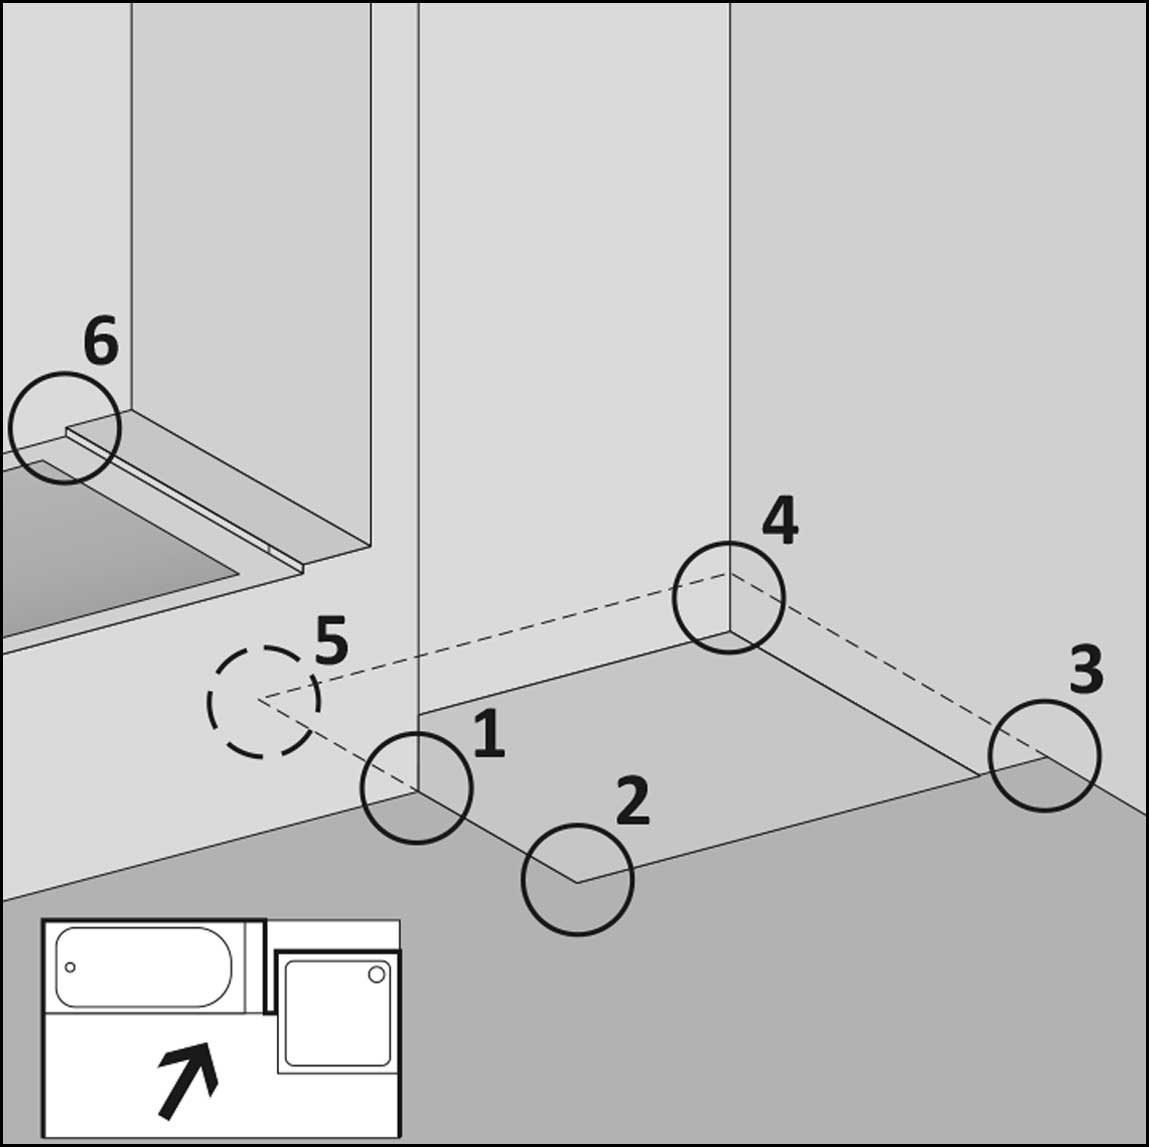
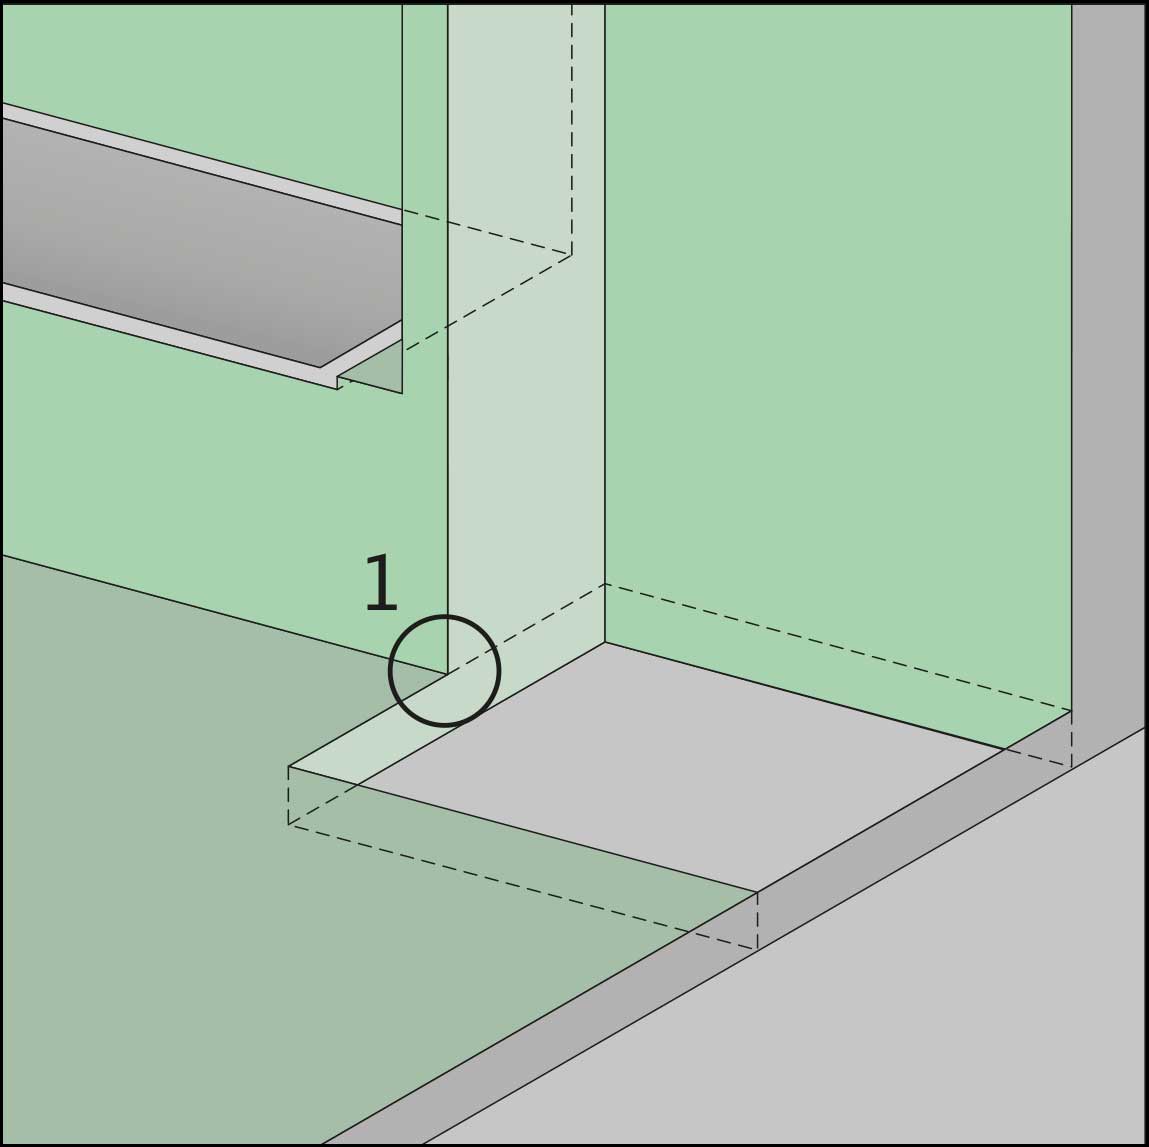
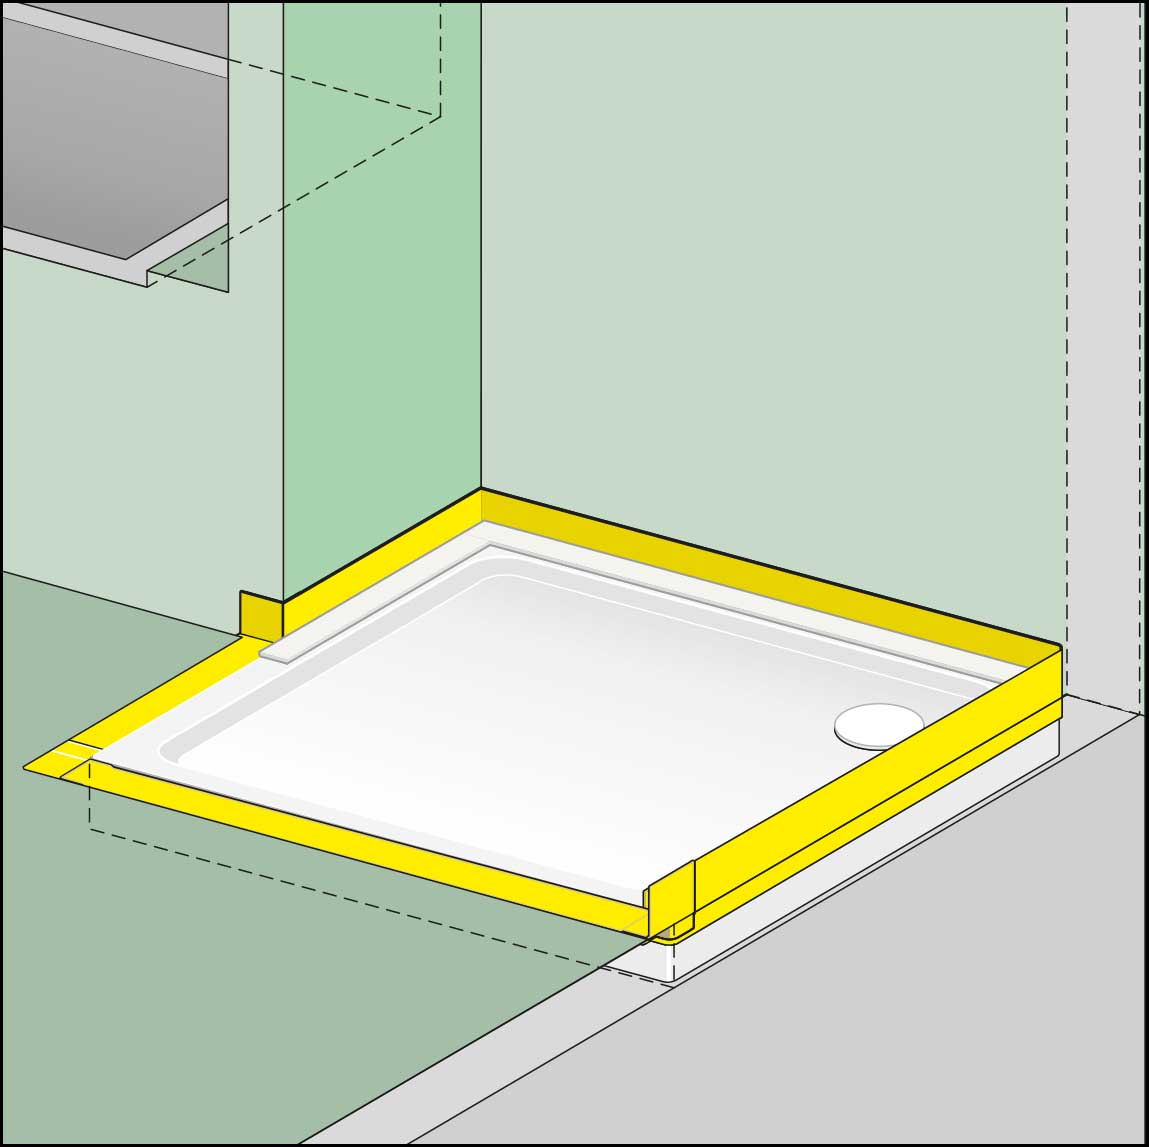
Installation situation: alcove, View from the right.
Installation situation: alcove, View from left.
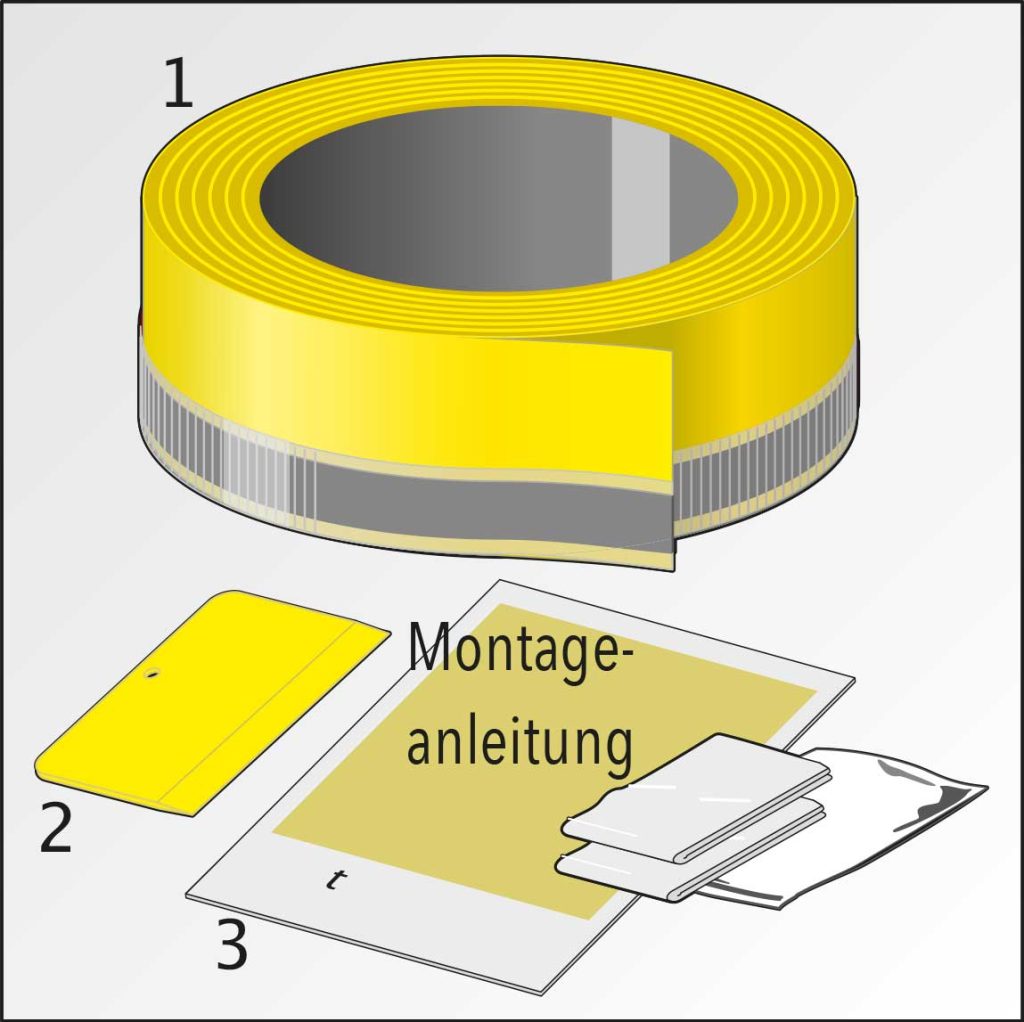
Shower tray installation situation
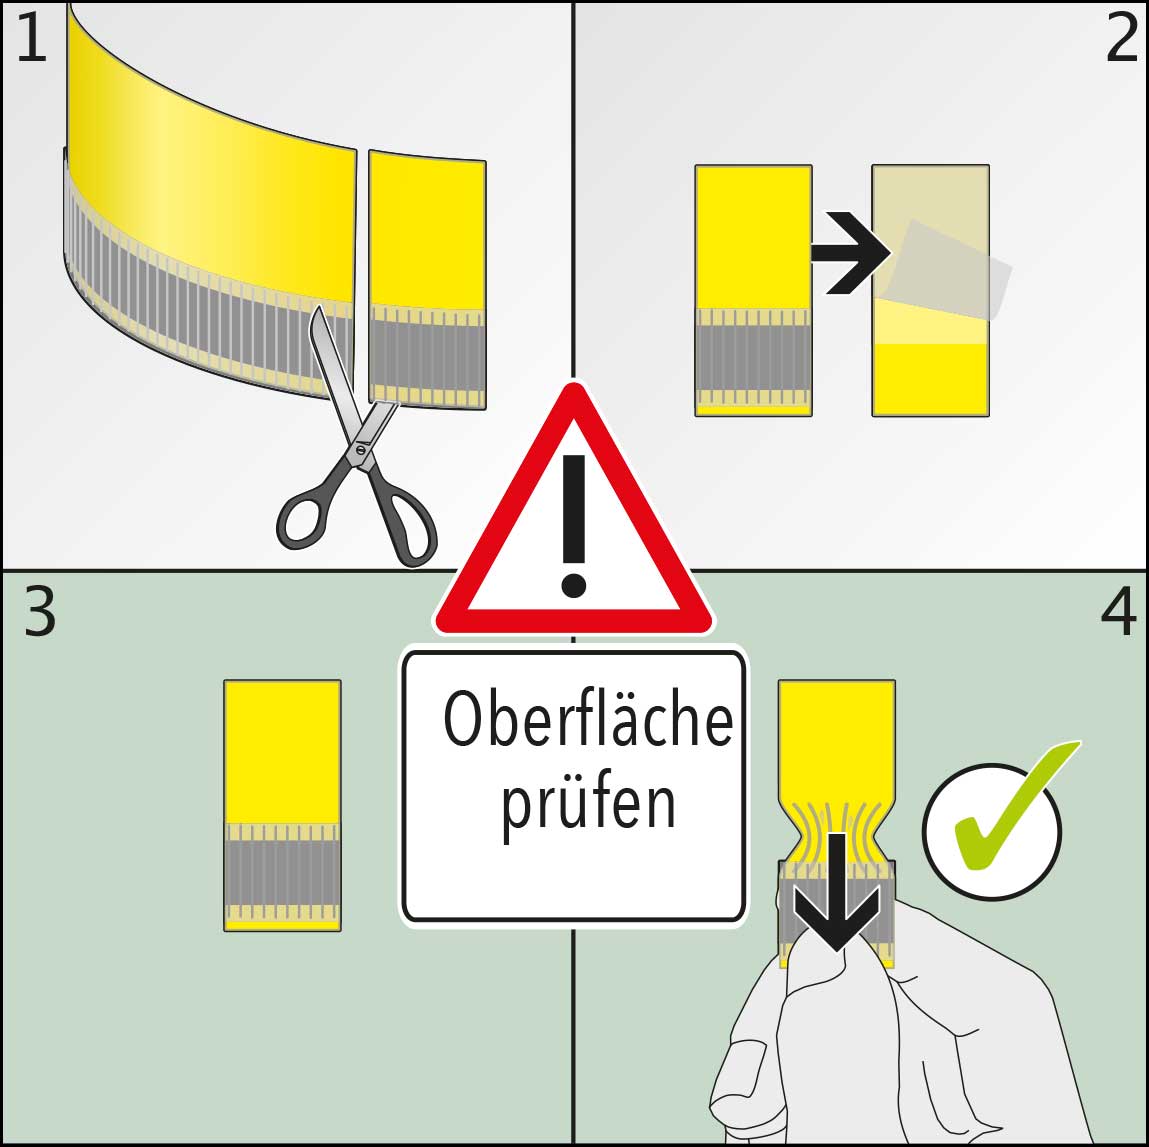
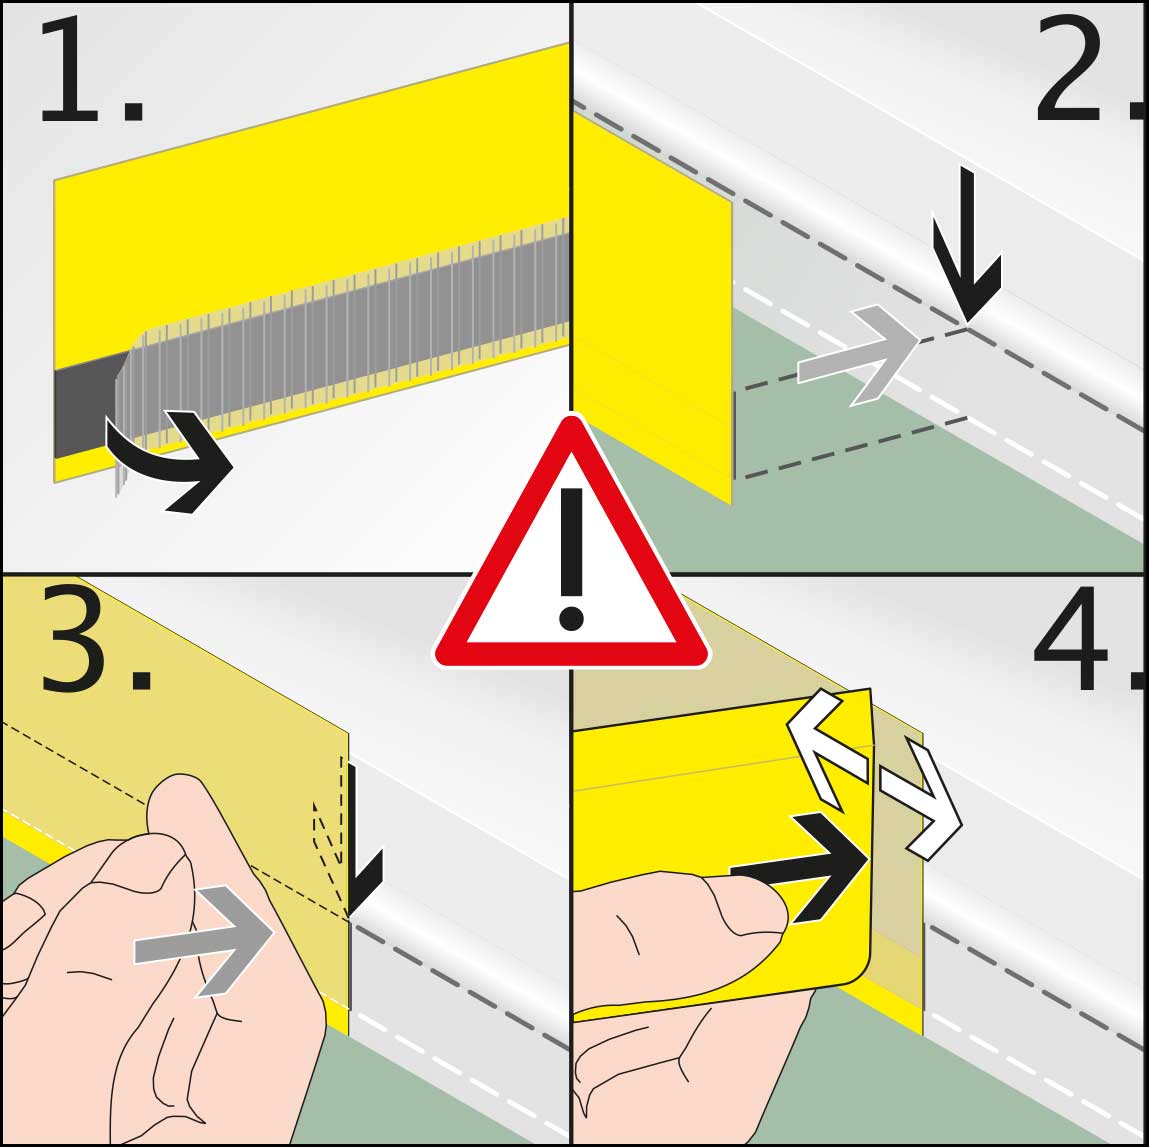
Check the surface with test strips (1). ⁄Remove the cover film (2). Press the test strip onto the wall surface (3) and pull it downwards from the wall (4) so that the foam tears off and sticks to the wall surface. If the foam can be removed from the wall surface, the surface of the wall must be treated further.
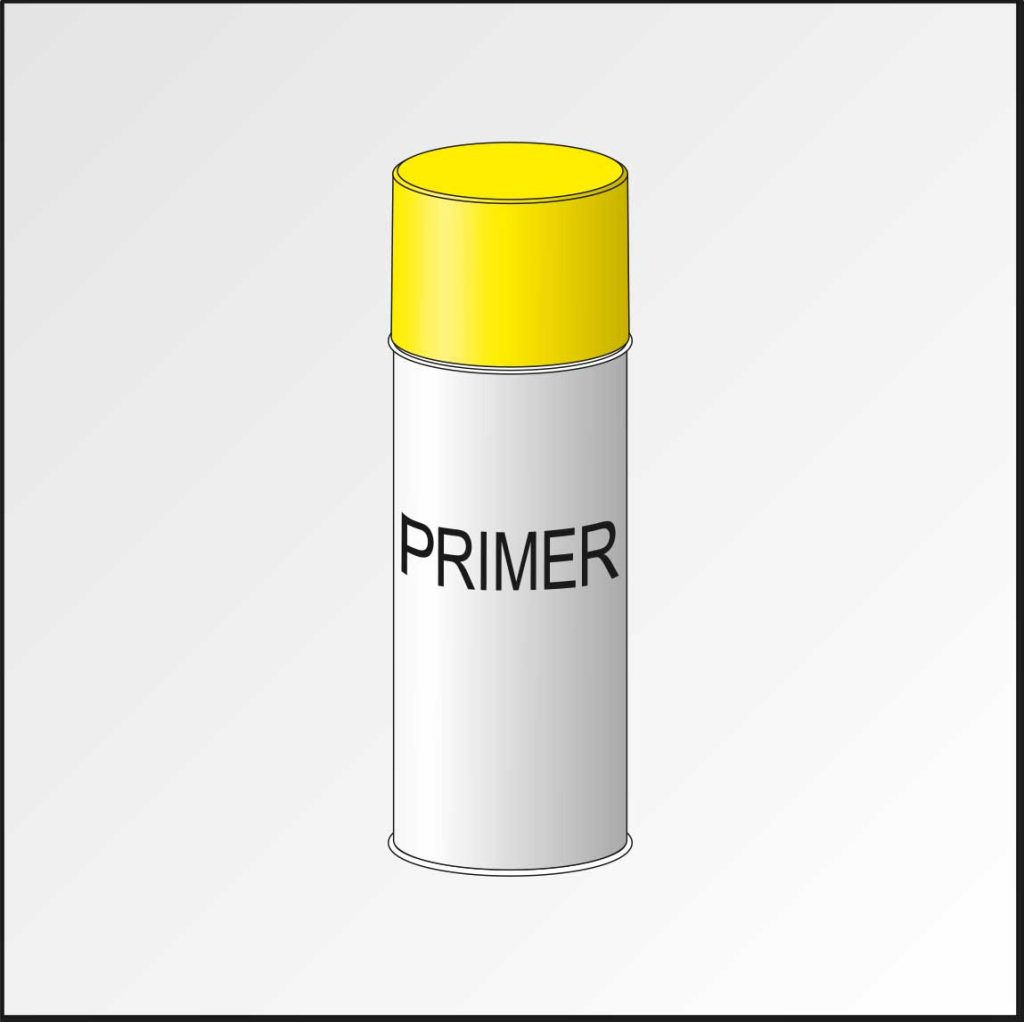
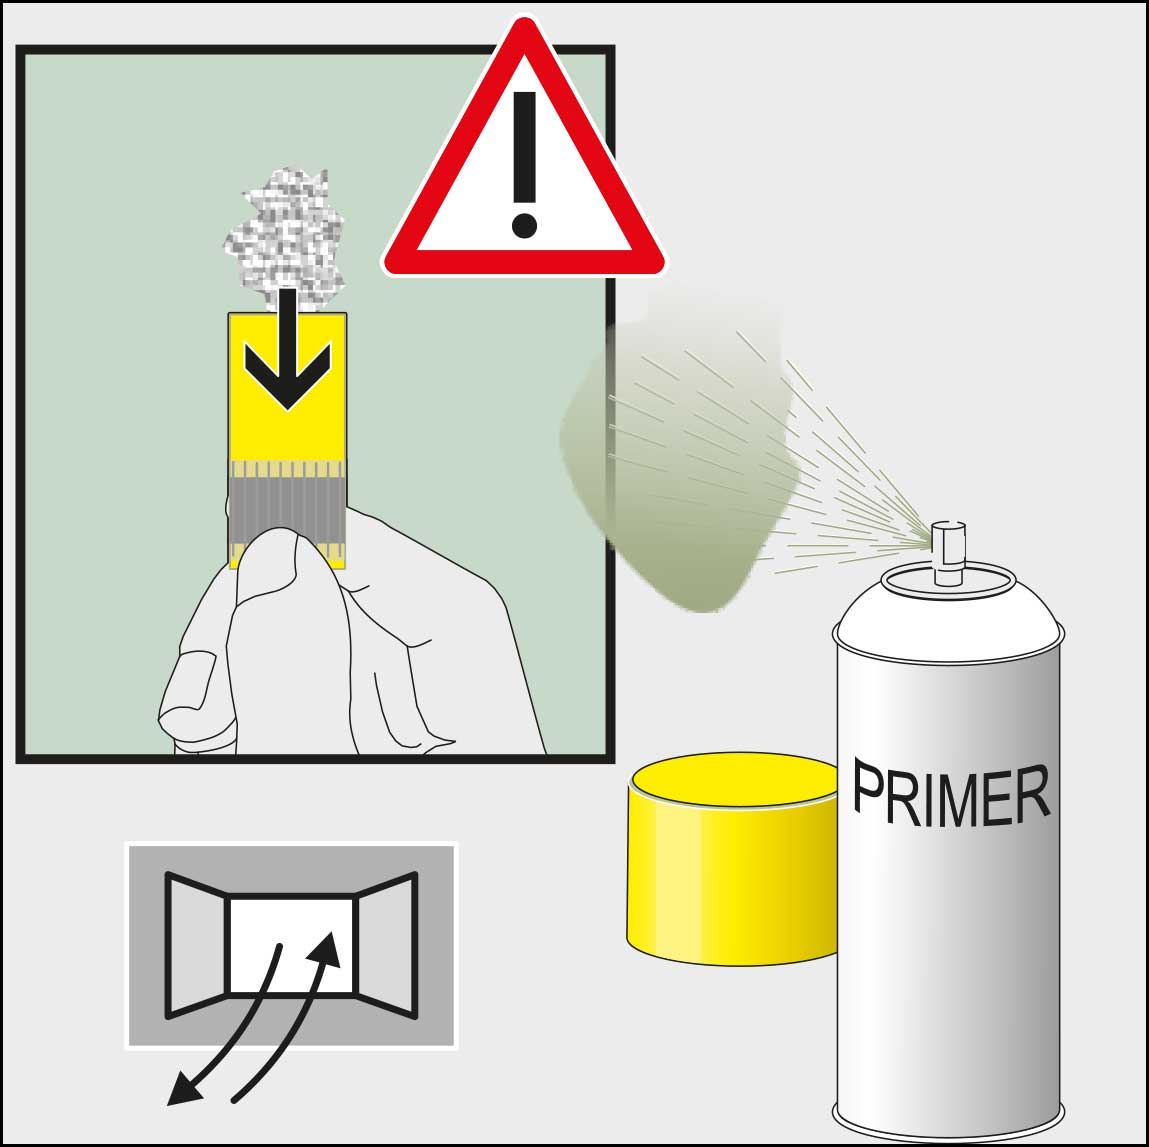
If the bonding test is negative, the spray primer can be used. Spray primer on lightly at a distance of 5-10 cm with the window or door open. (Observe the manufacturer’s processing instructions!) New! Craftsman-friendly priming (10 min. drying time).
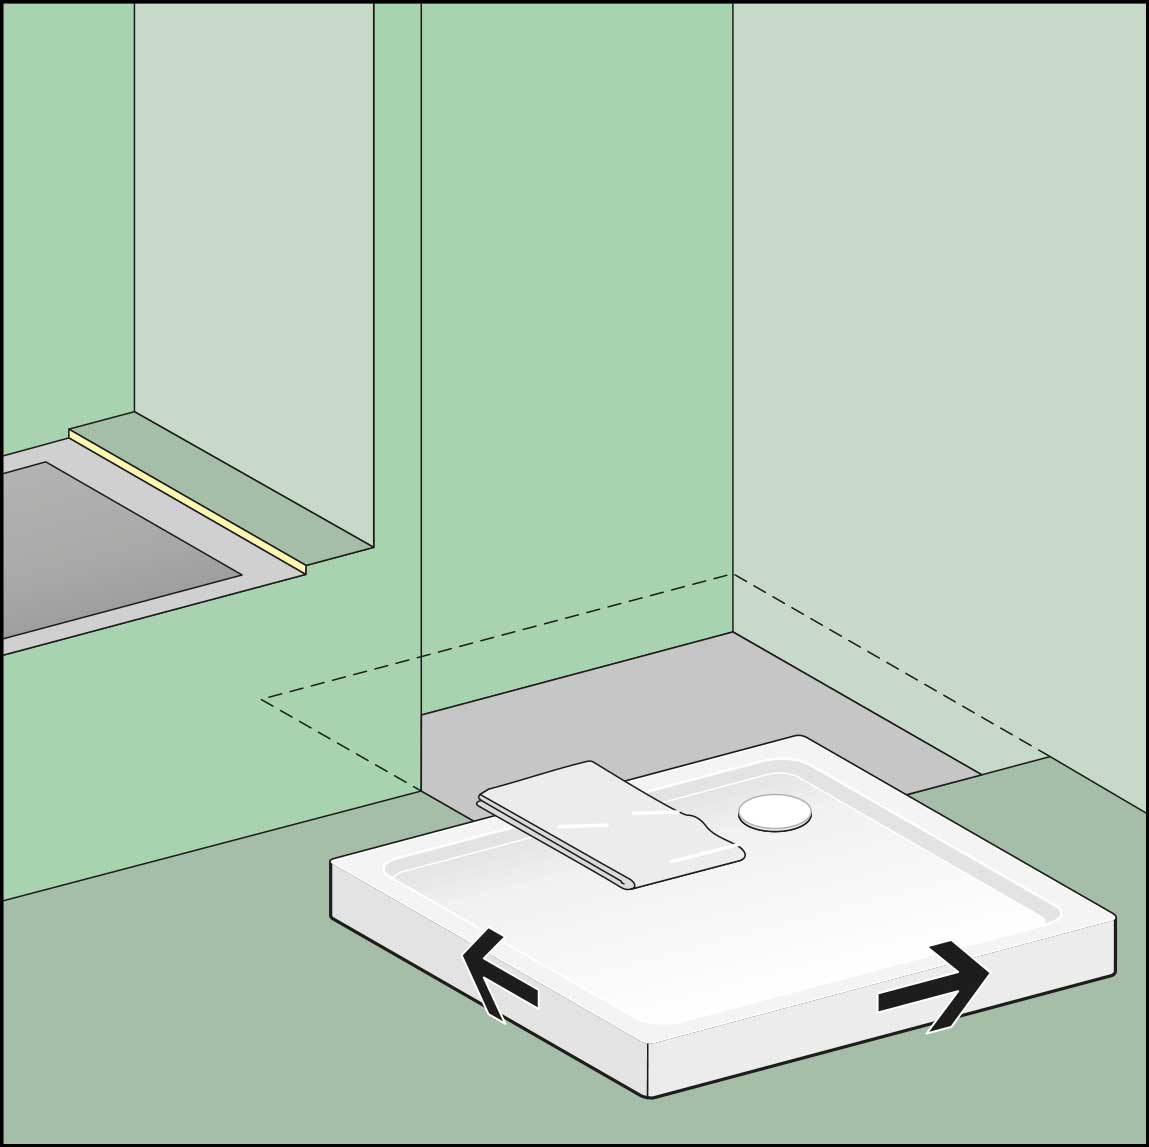
Preparing the shower tray
1) Clean the edge of the bathtub with the cleaning cloth.
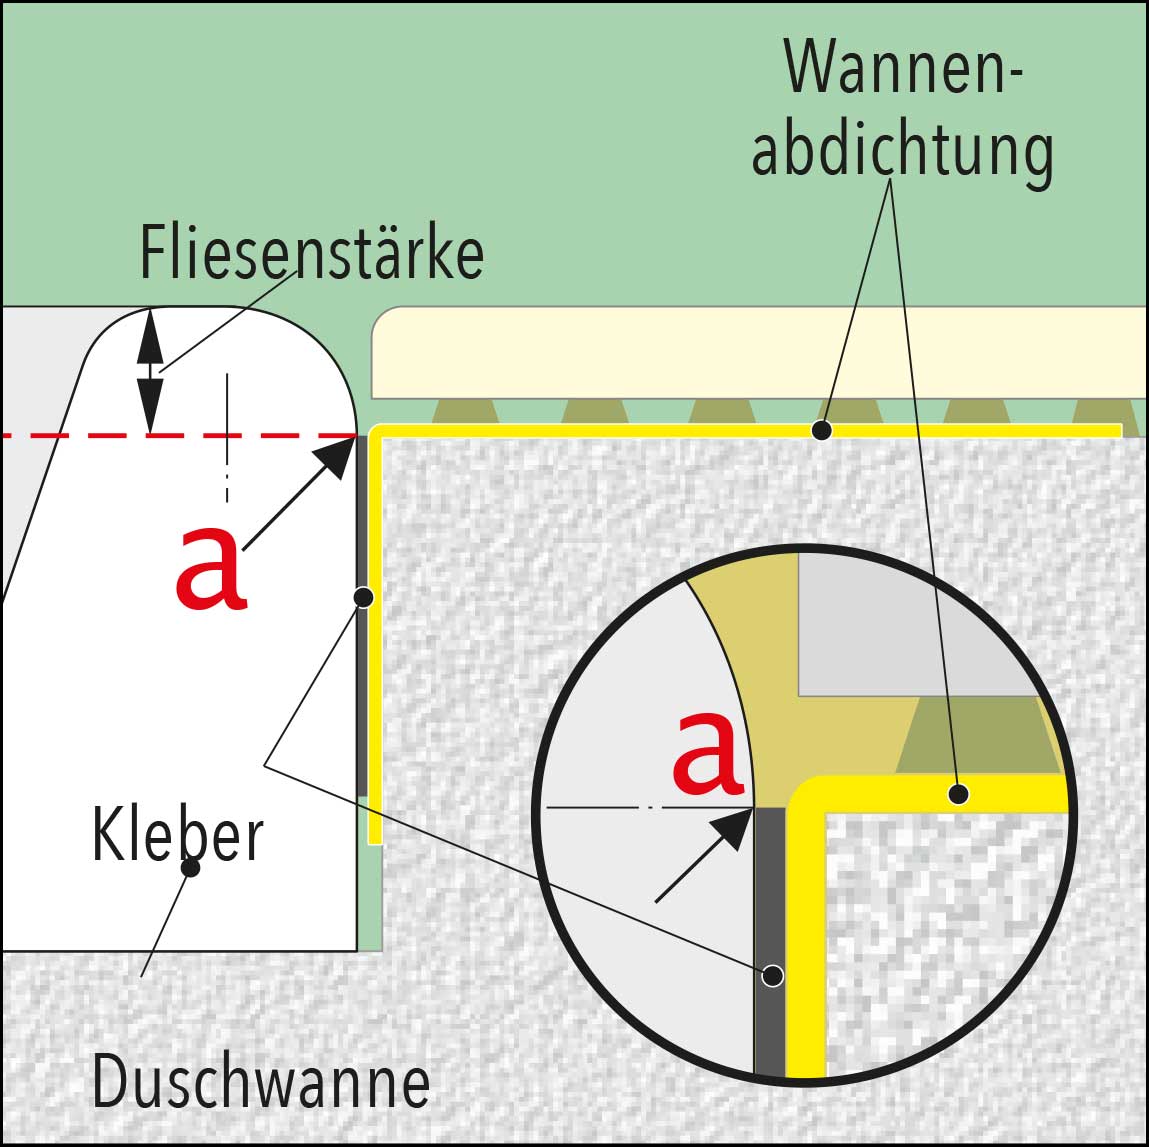
2) Place the tube joint tape with the upper edge of the gray tub adhesive on the marking line (OKFFB minus tile thickness) (a).
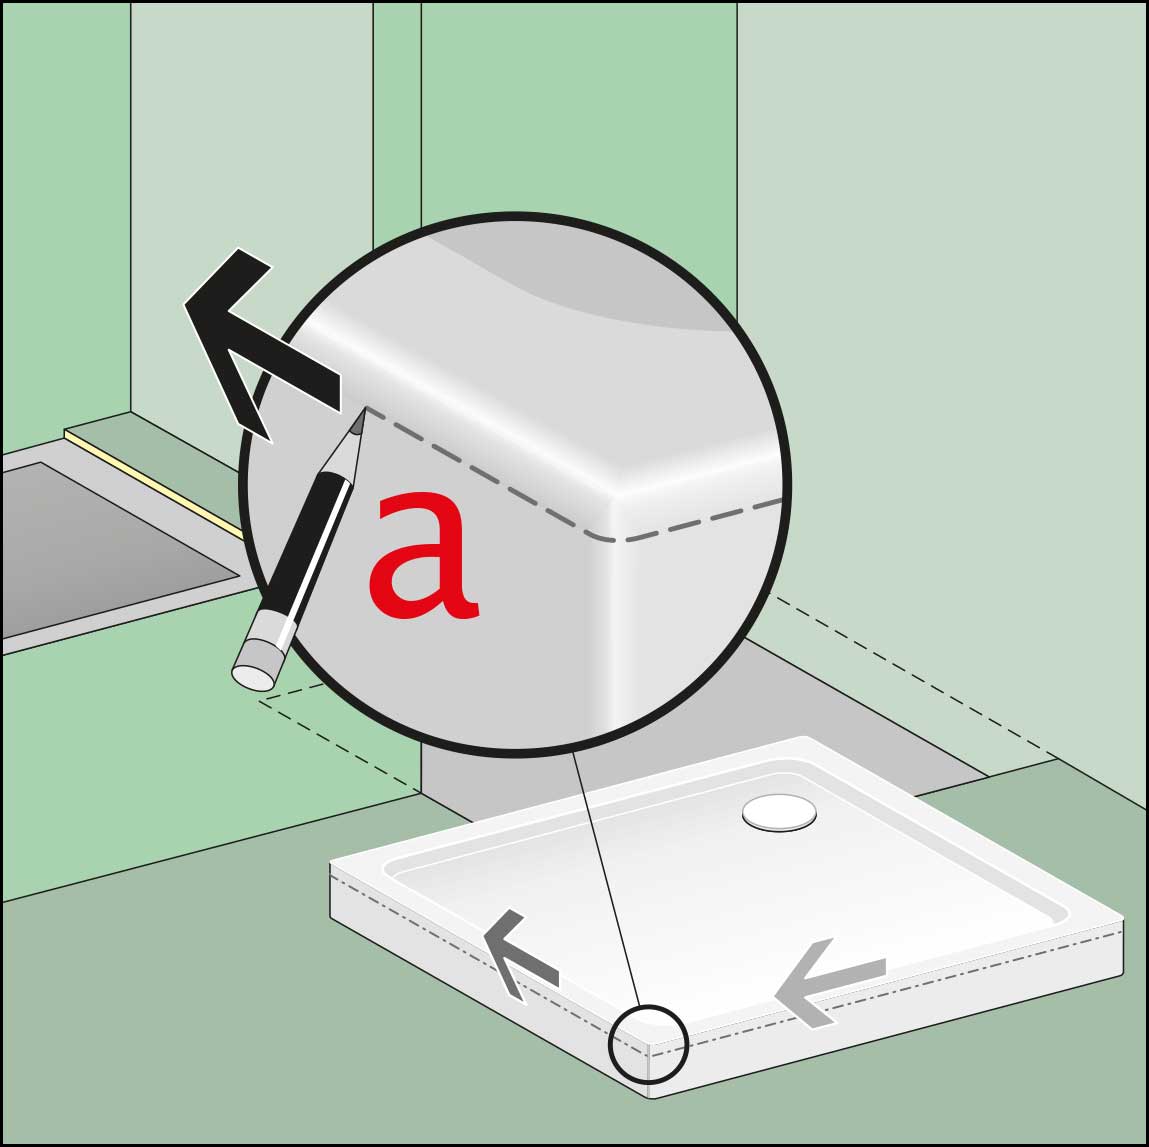
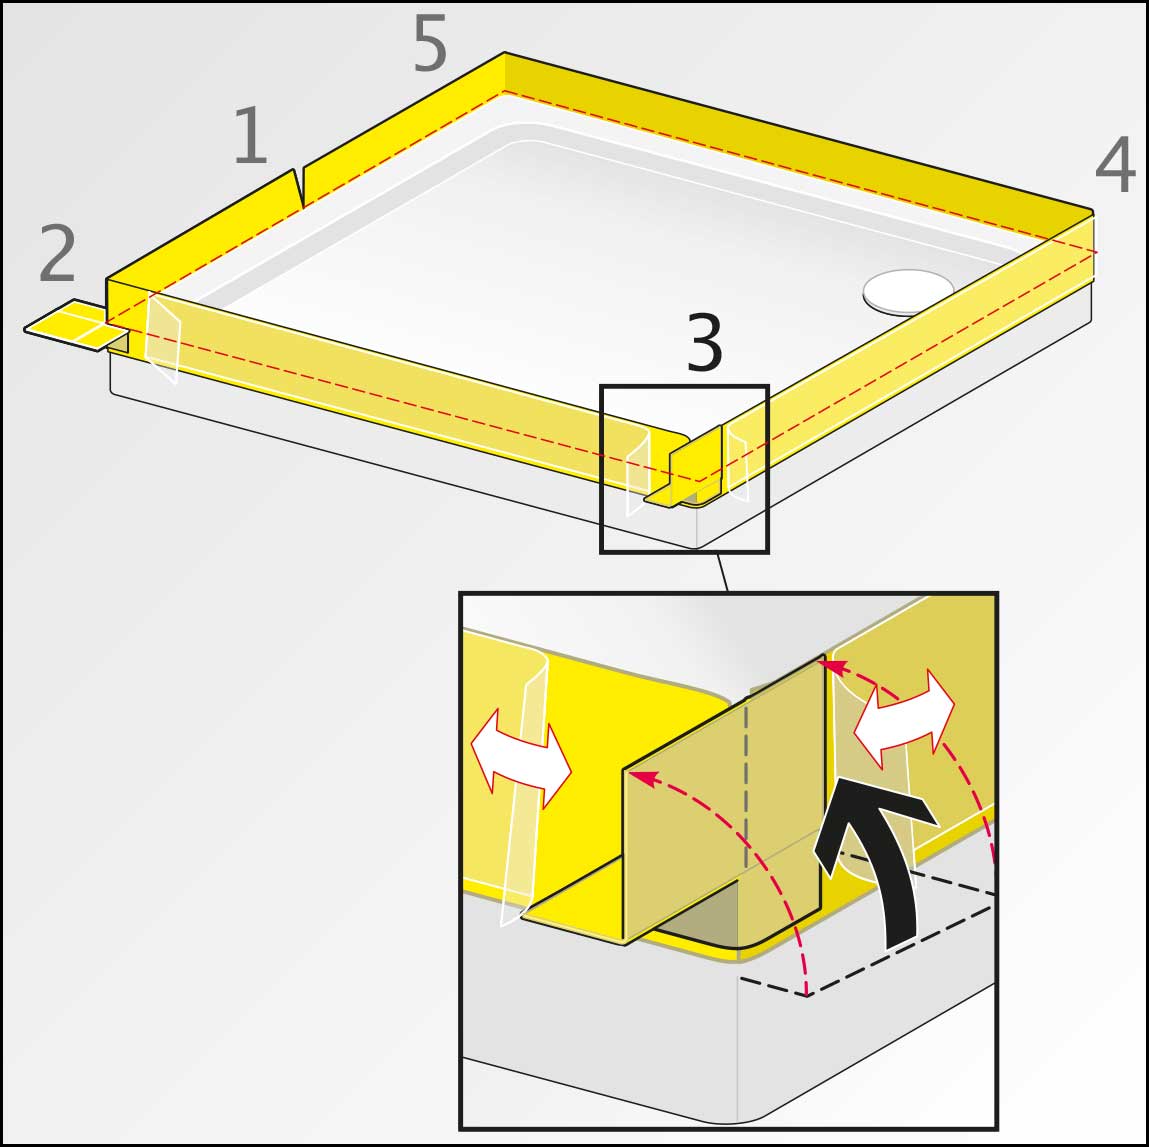
3 ) Draw a marking line all the way around from the top edge of the tray minus the tile thickness (see Fig. 6).
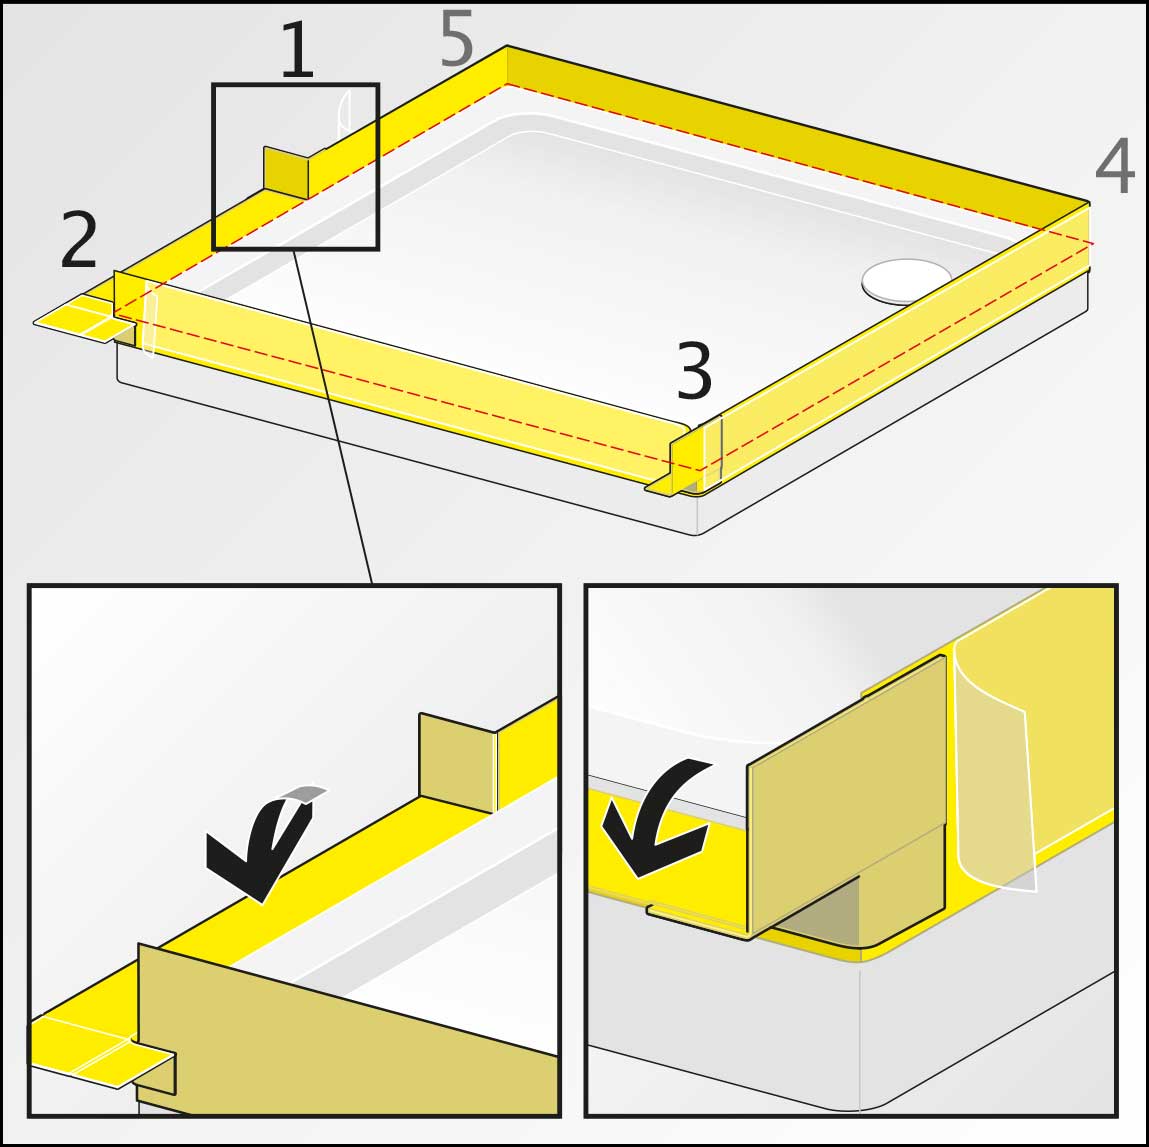
4) Gradually remove the protective film from the front of the gray tub adhesive (1). Stick the tube joint tape exactly to the marked line on the edge of the tray (2). Press on lightly with the squeegee, adjust if necessary (3) . Press firmly onto the vertical edge of the tray with the squeegee (4)!
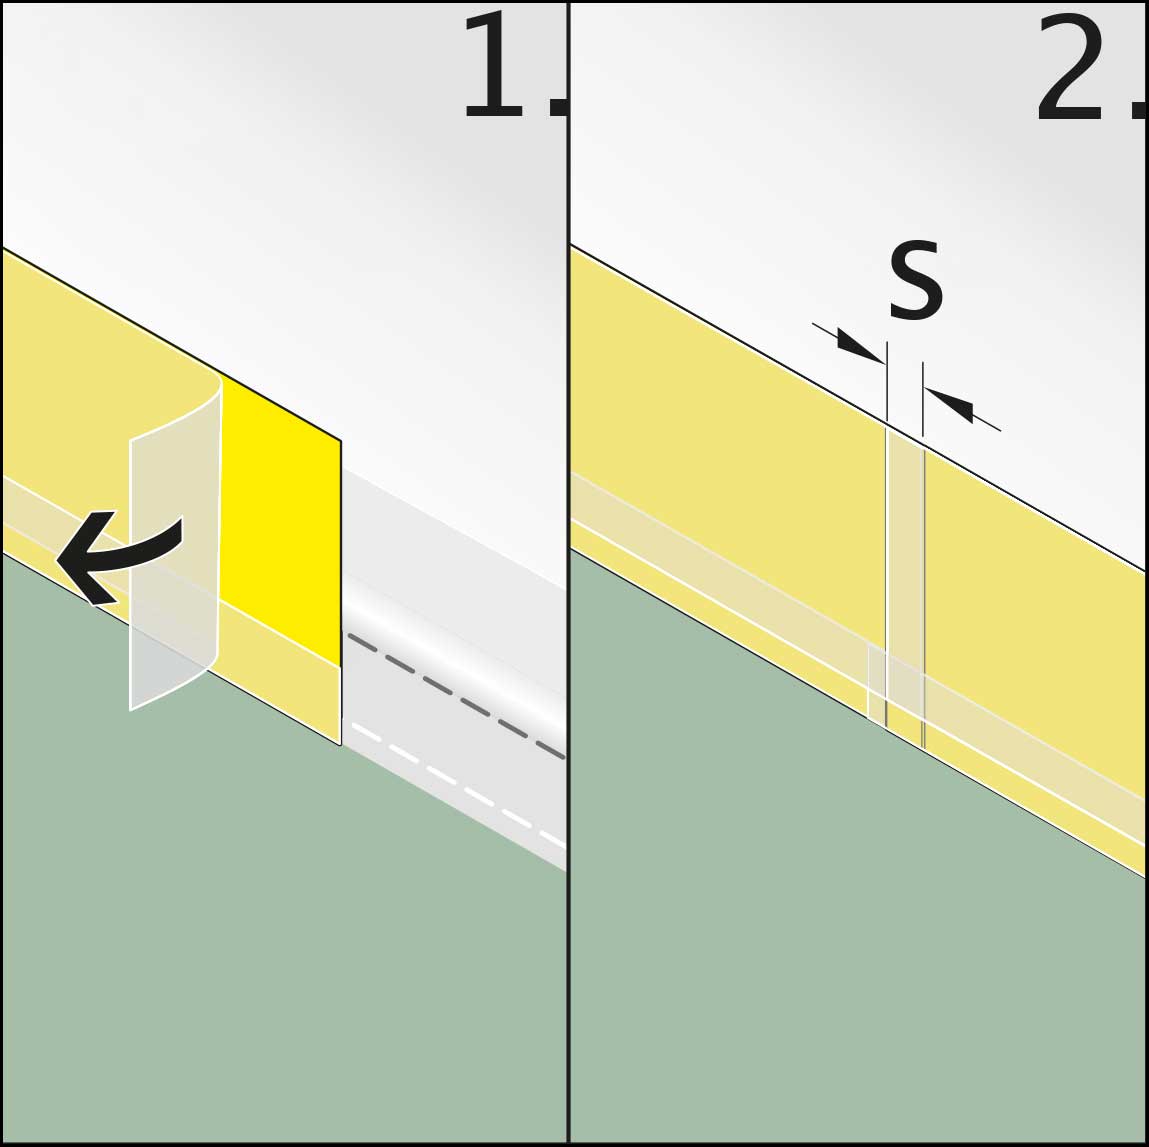
5 ) Peel off a piece of the protective film at the start of the tube joint tape (1), then stick the end of the tube joint tape onto the start, overlapping (s ), and press down firmly! Close the protective film again.
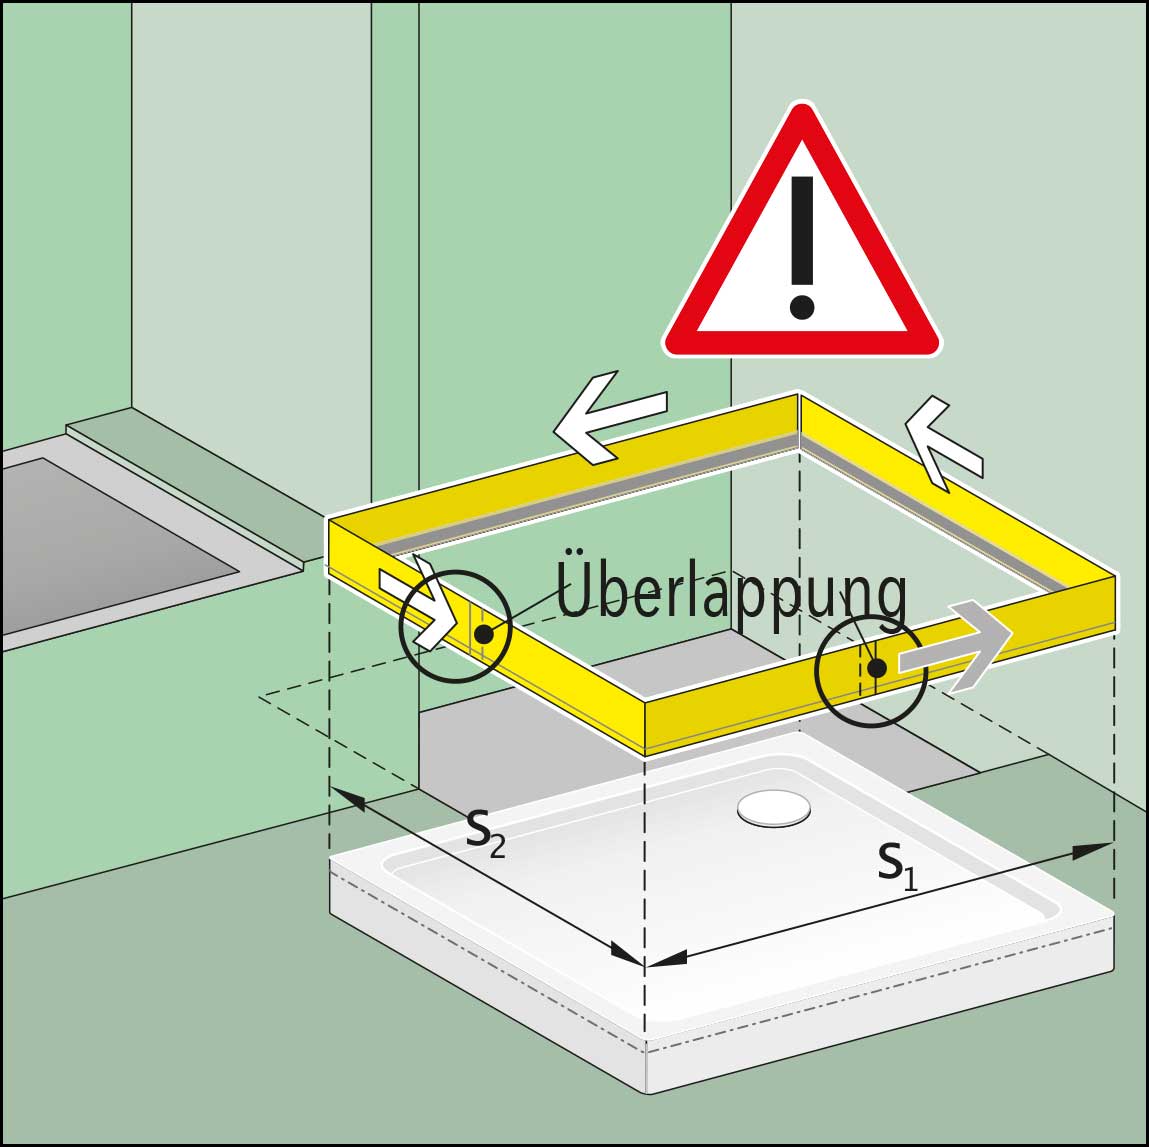
6) Floor-level installation / overlap only on the long side! Measure the shower tray (s1+s2) x2, attach the tube joint tape and glue all the way around. If an extension is required, the tube joint tape can be applied overlapping on the long sides.
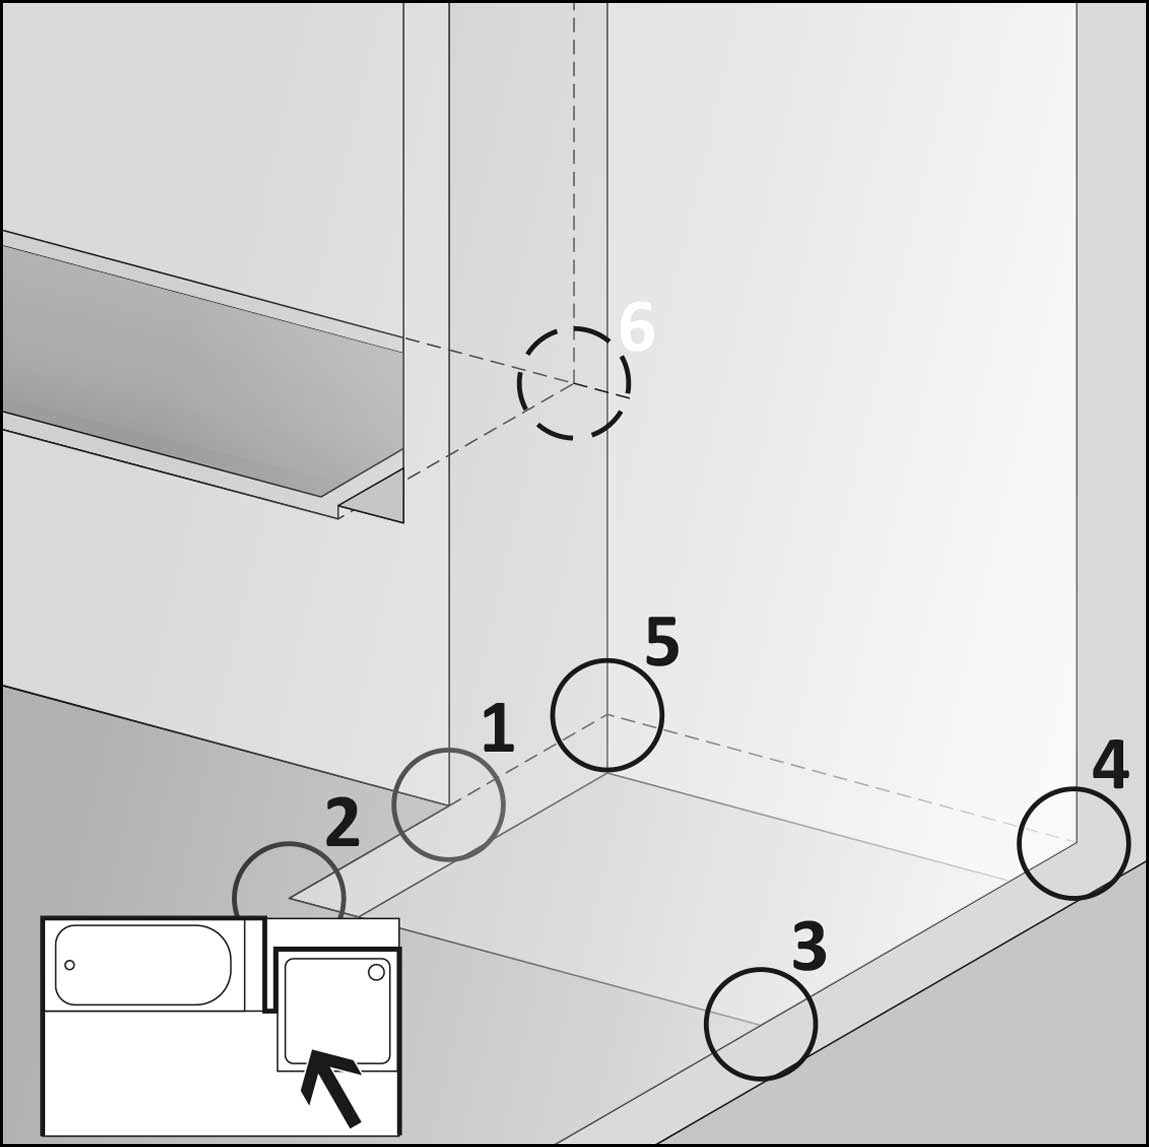
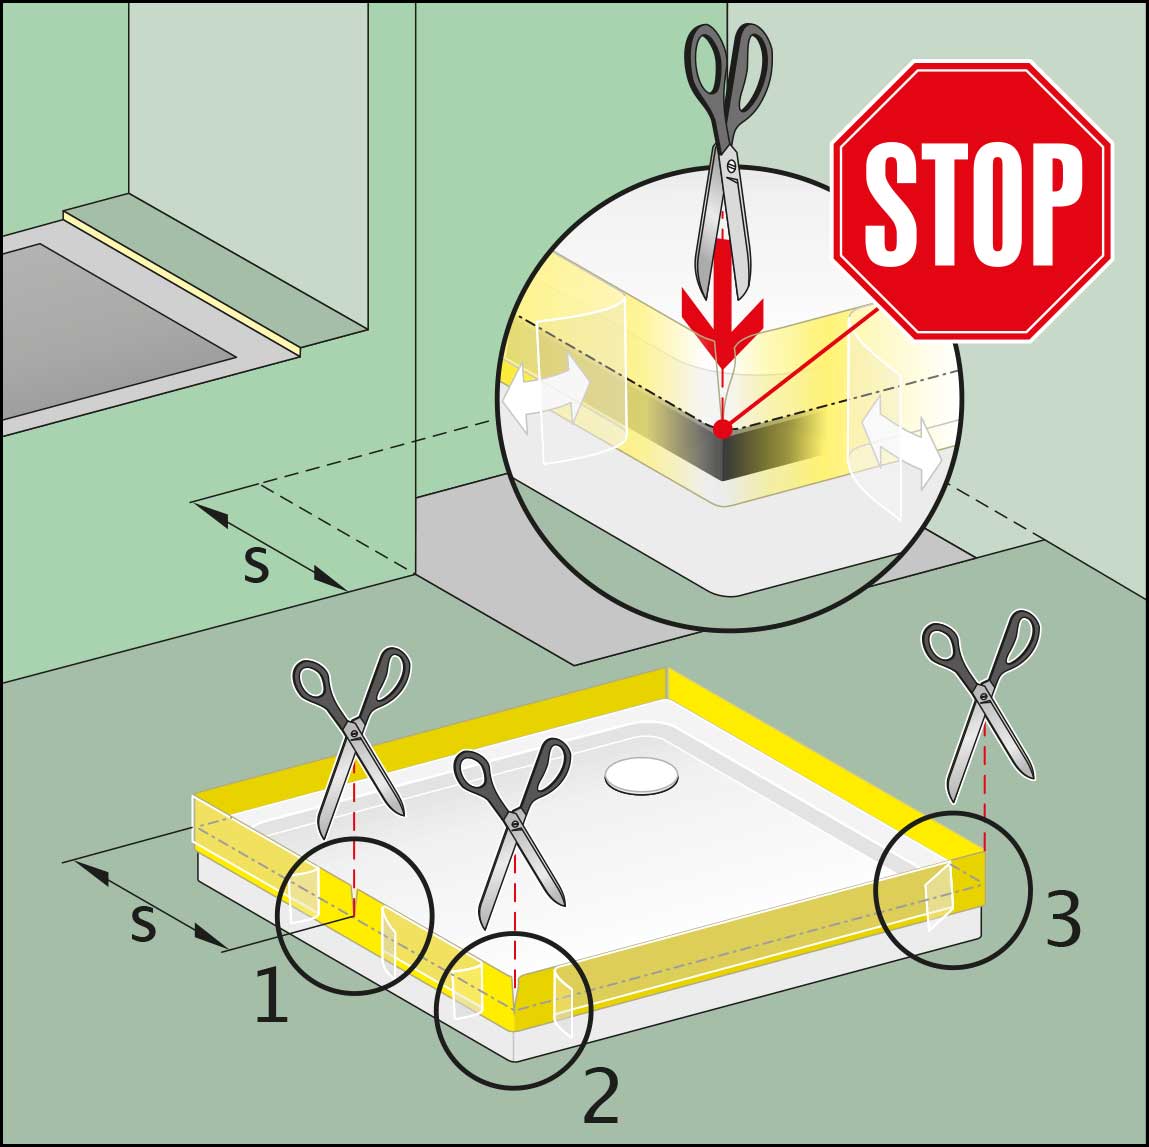
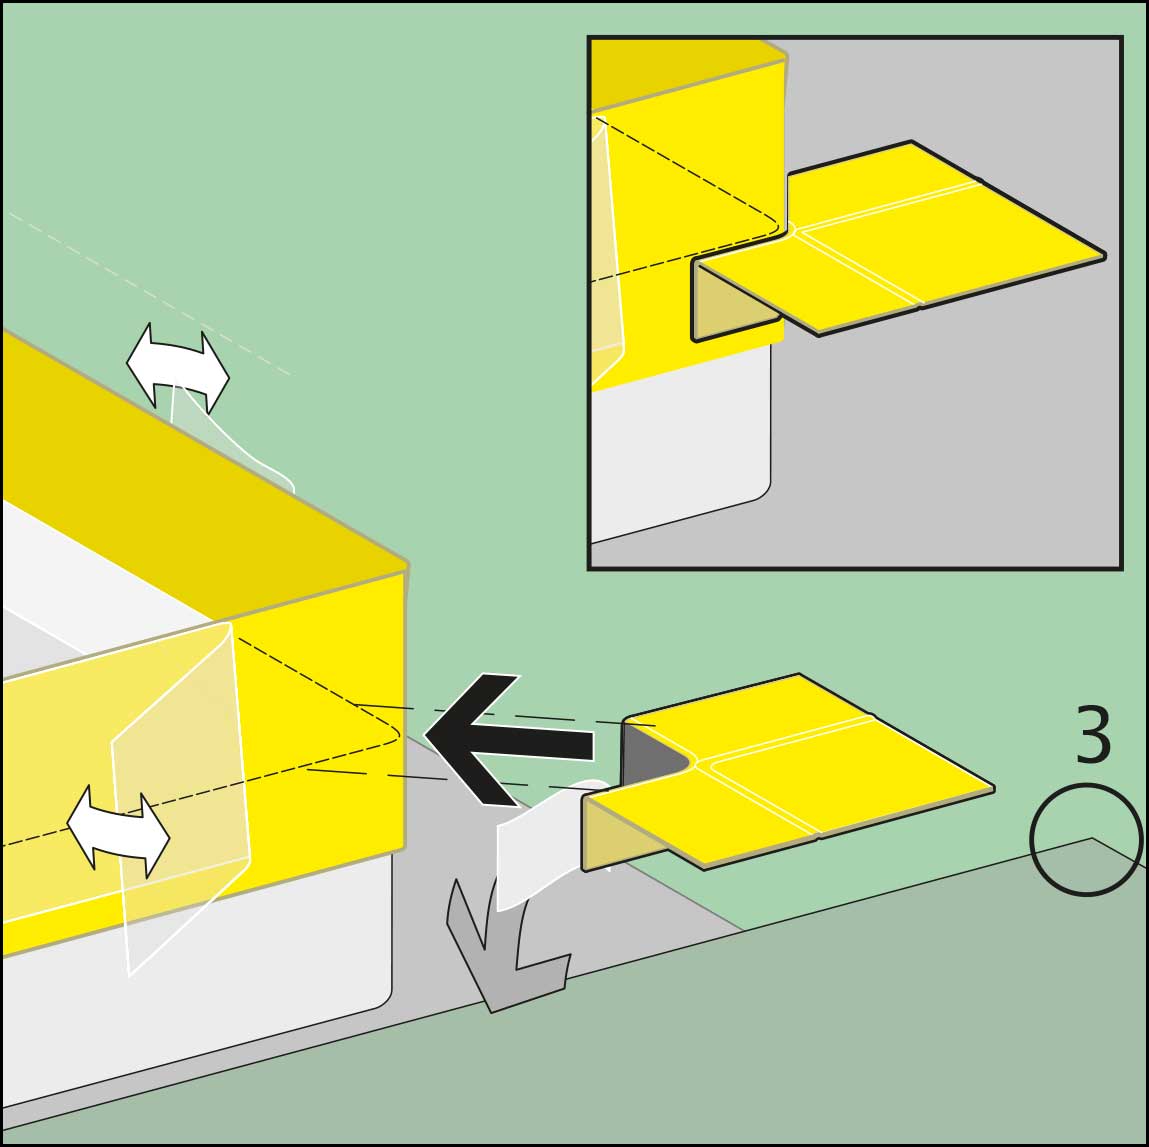
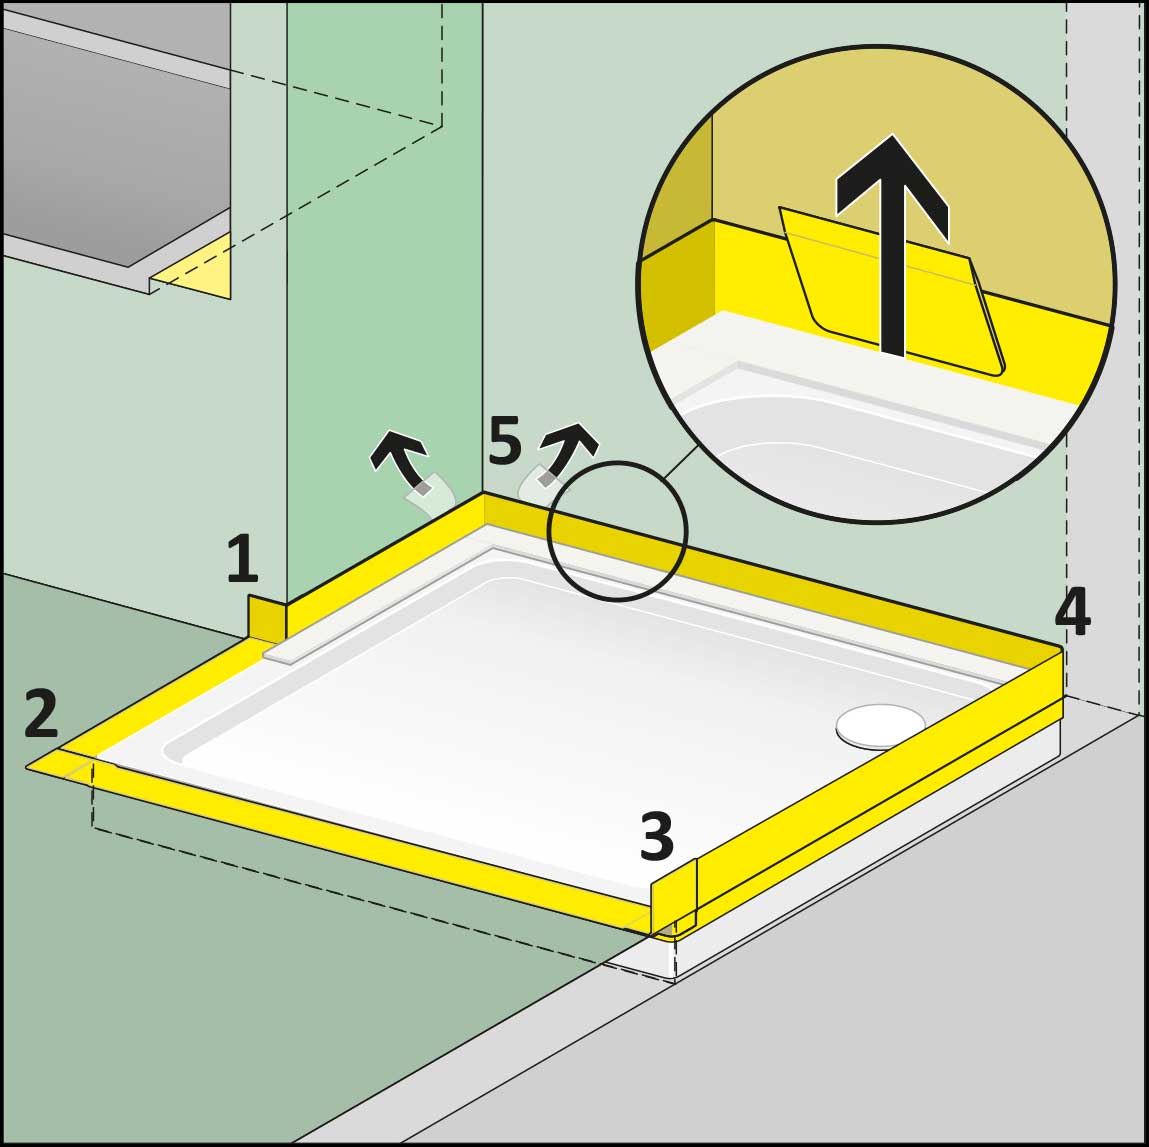
6 ) Cut the tube joint tape at 1 and corners 2 and 3 up to the top of the gray tub adhesive, do not cut through! Peel off the cover foil strip of the tube joint tape until the sealing corners can be positioned. After fitting the sealing corners, press the protective film back on!
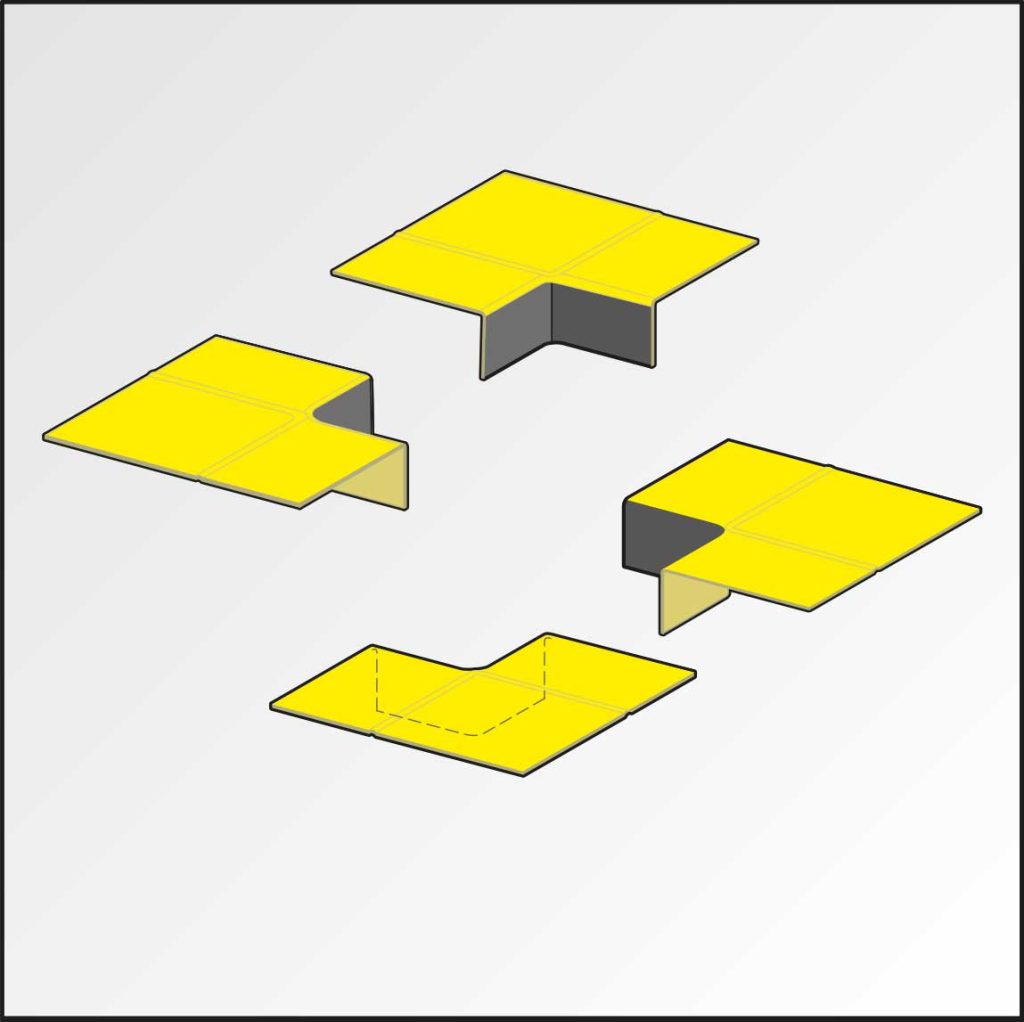
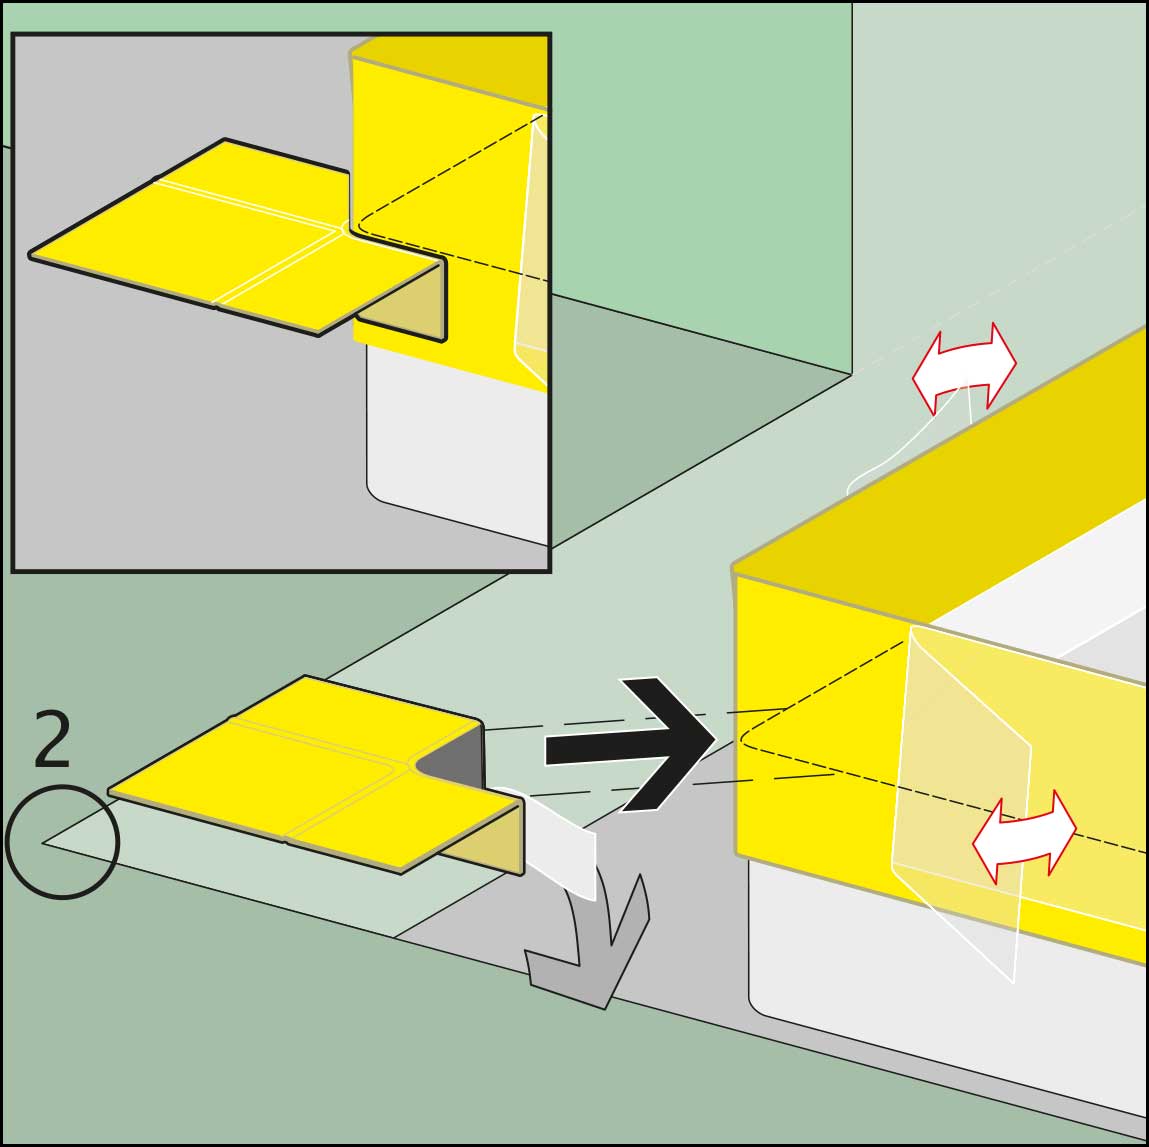
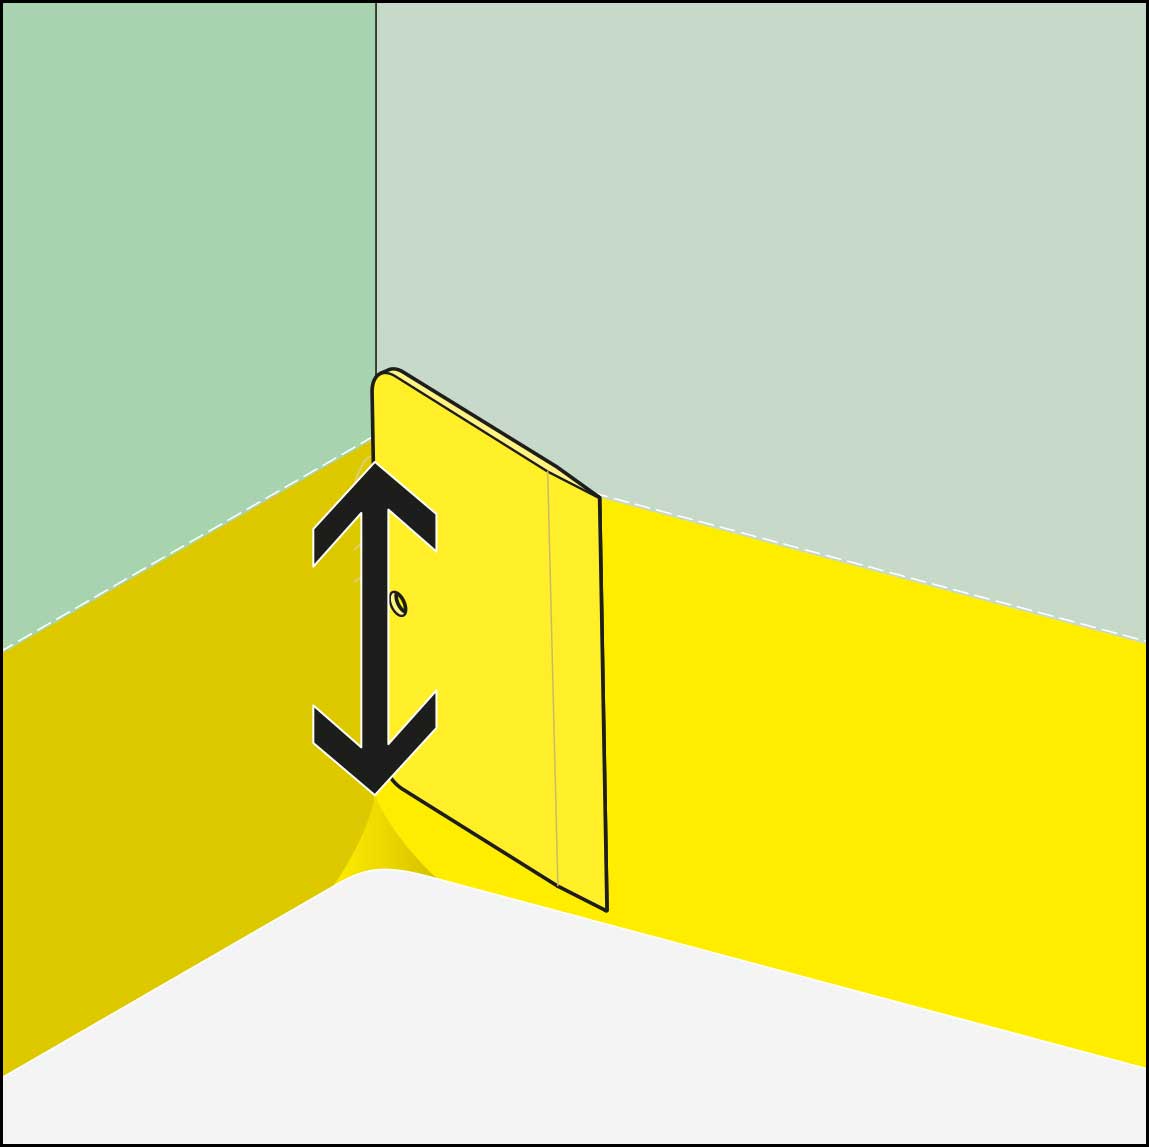
7) Flexible sealing corner for corner 2:
8) Flexible sealing corner for corner 2 (floor/floor connection). Remove the protective film from the tub adhesive (black) of the sealing corner, position on the back of the tube joint tape and press on. Press on the protective film of the tub sealing+ tape again!
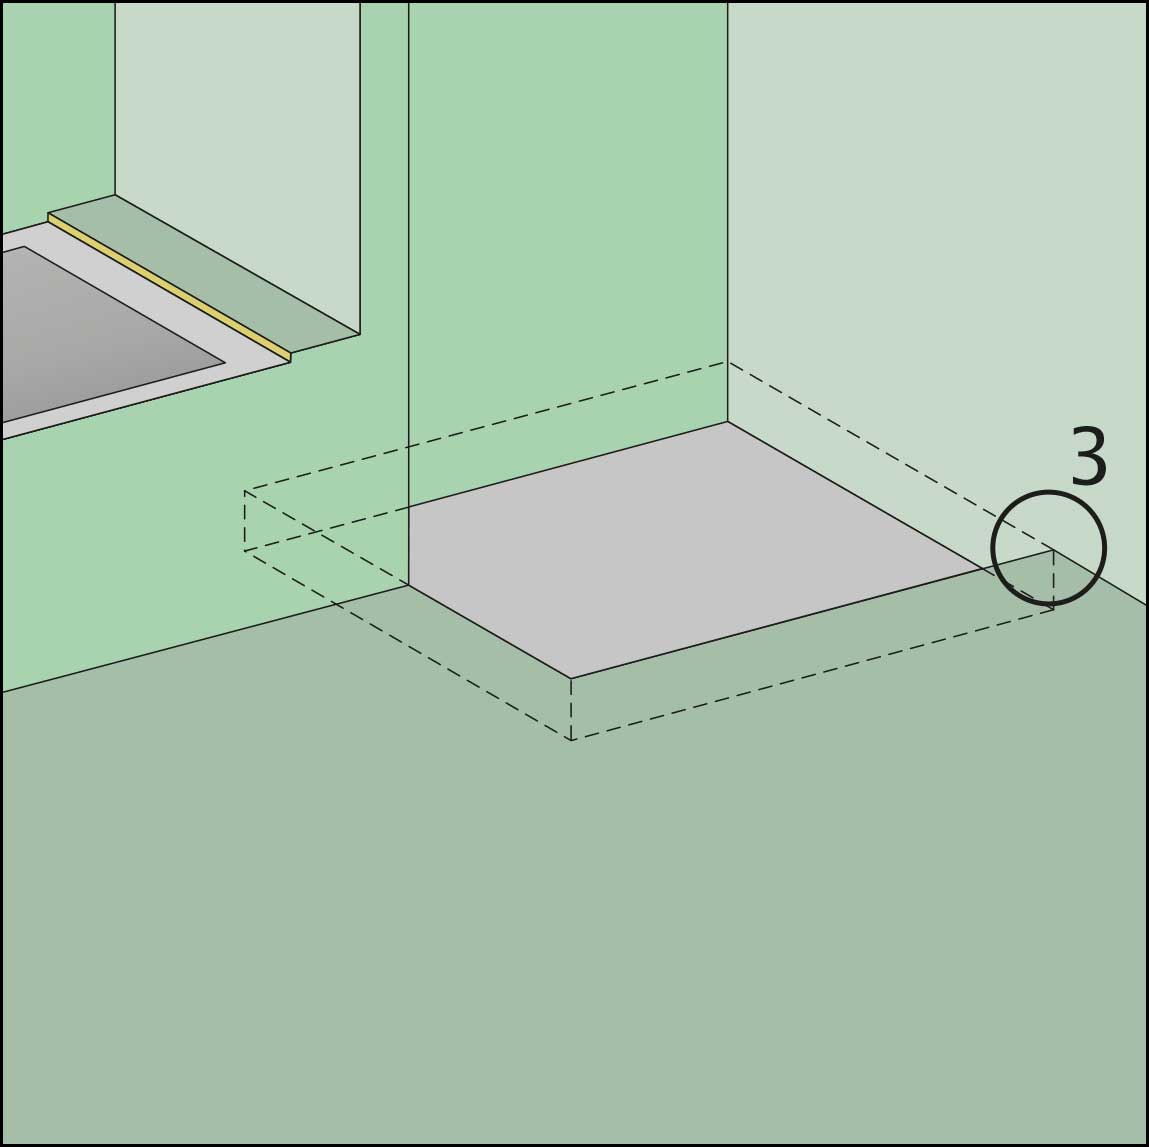
9) Flexible sealing corner for corner 3:
10) Flexible sealing corner for corner 3 (wall/floor connection). Remove the protective film from the tub adhesive (black) of the sealing corner, position on the back of the tube joint tape and press on. Press on the protective film of the tube joint tape again!
11) Raise corners 2 and 3 and glue them to the tube joint tape. Press on the protective film of the tube joint tape again!
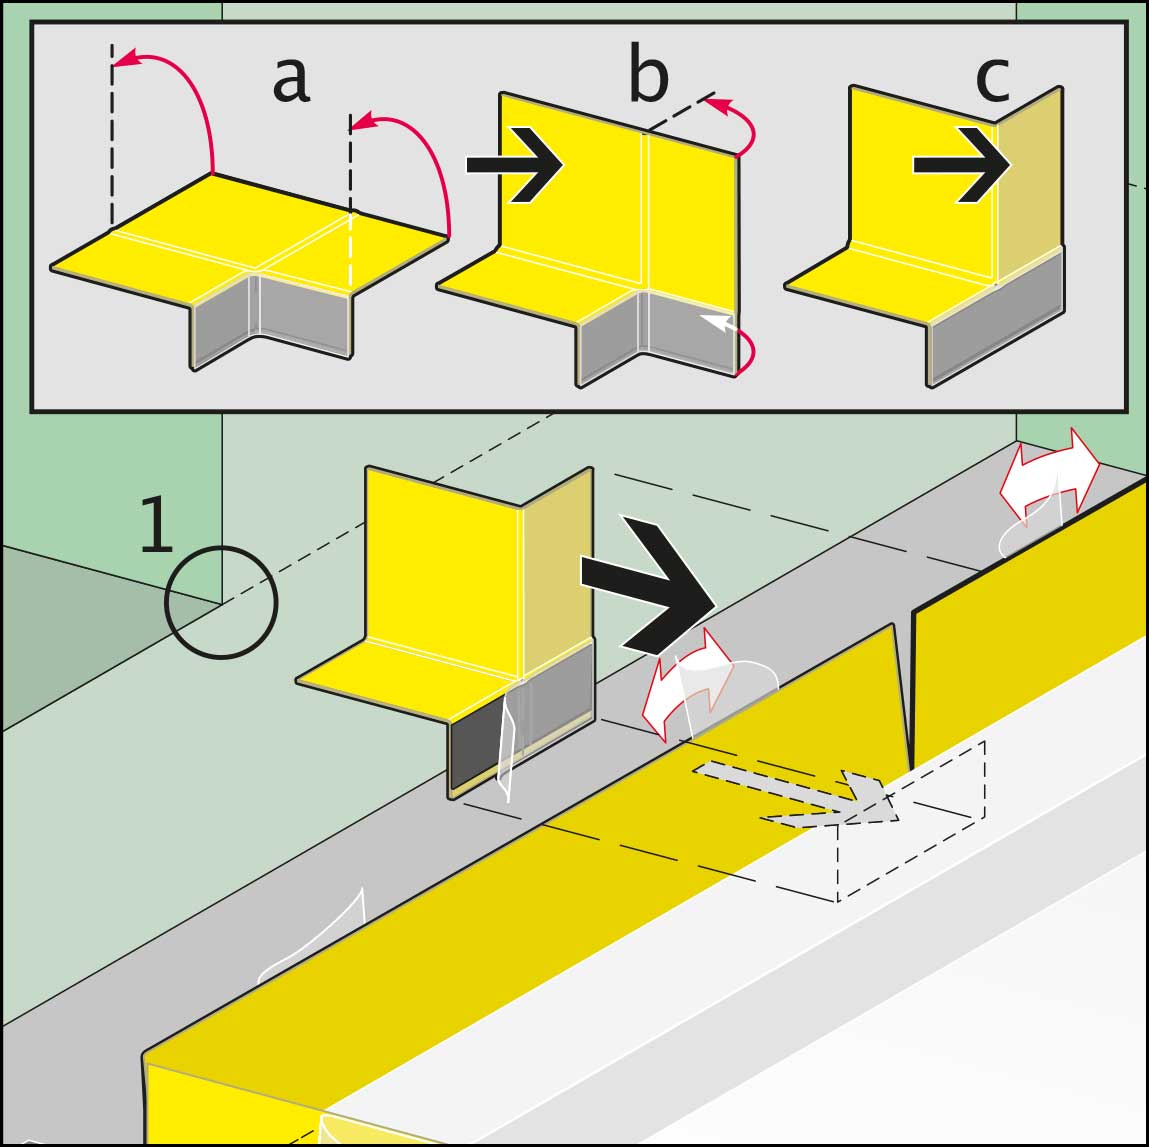
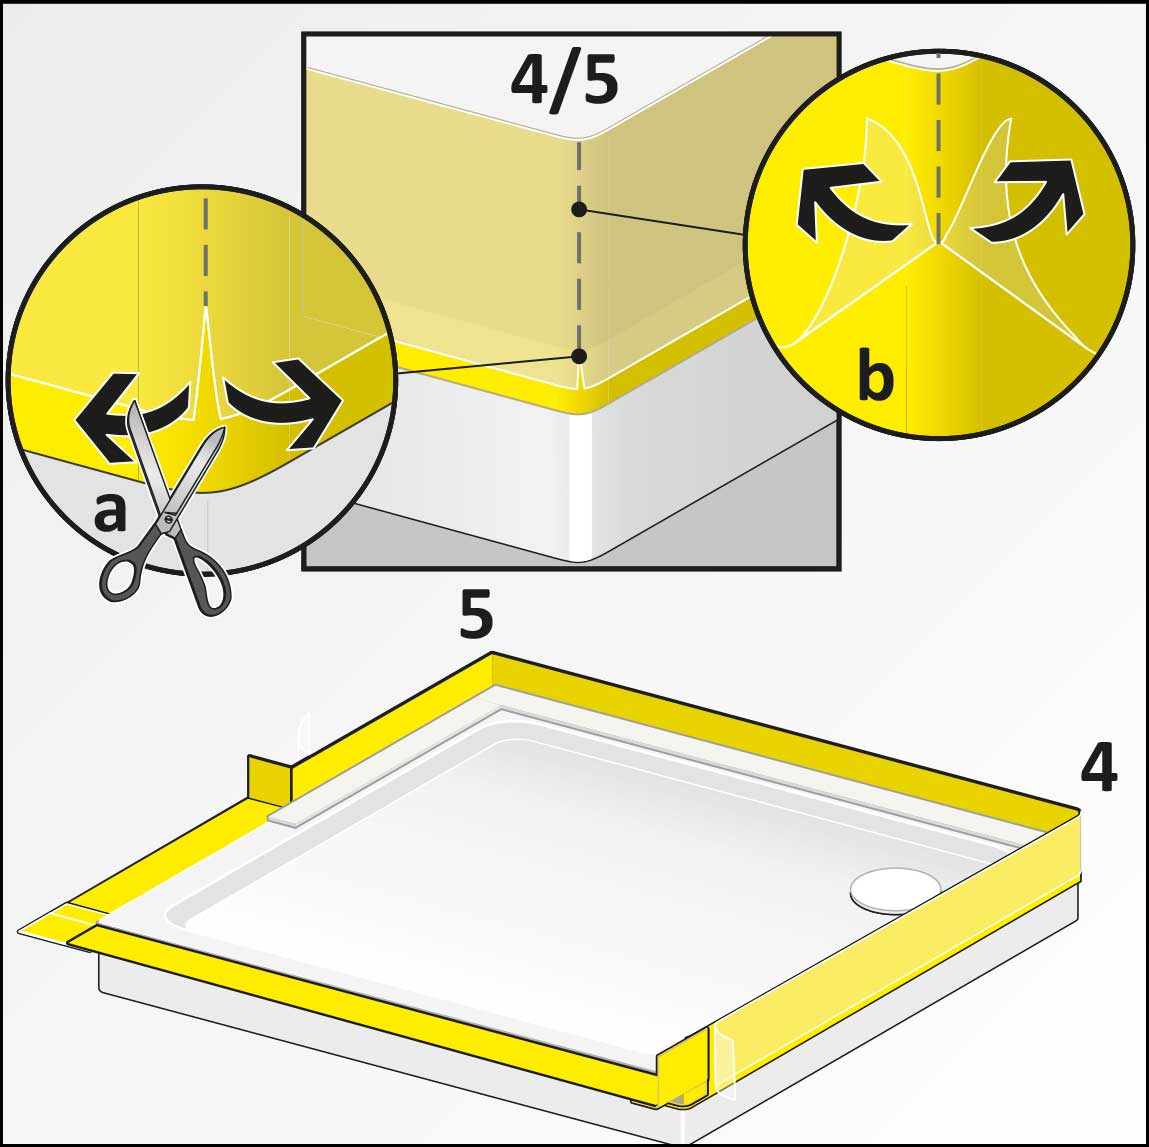
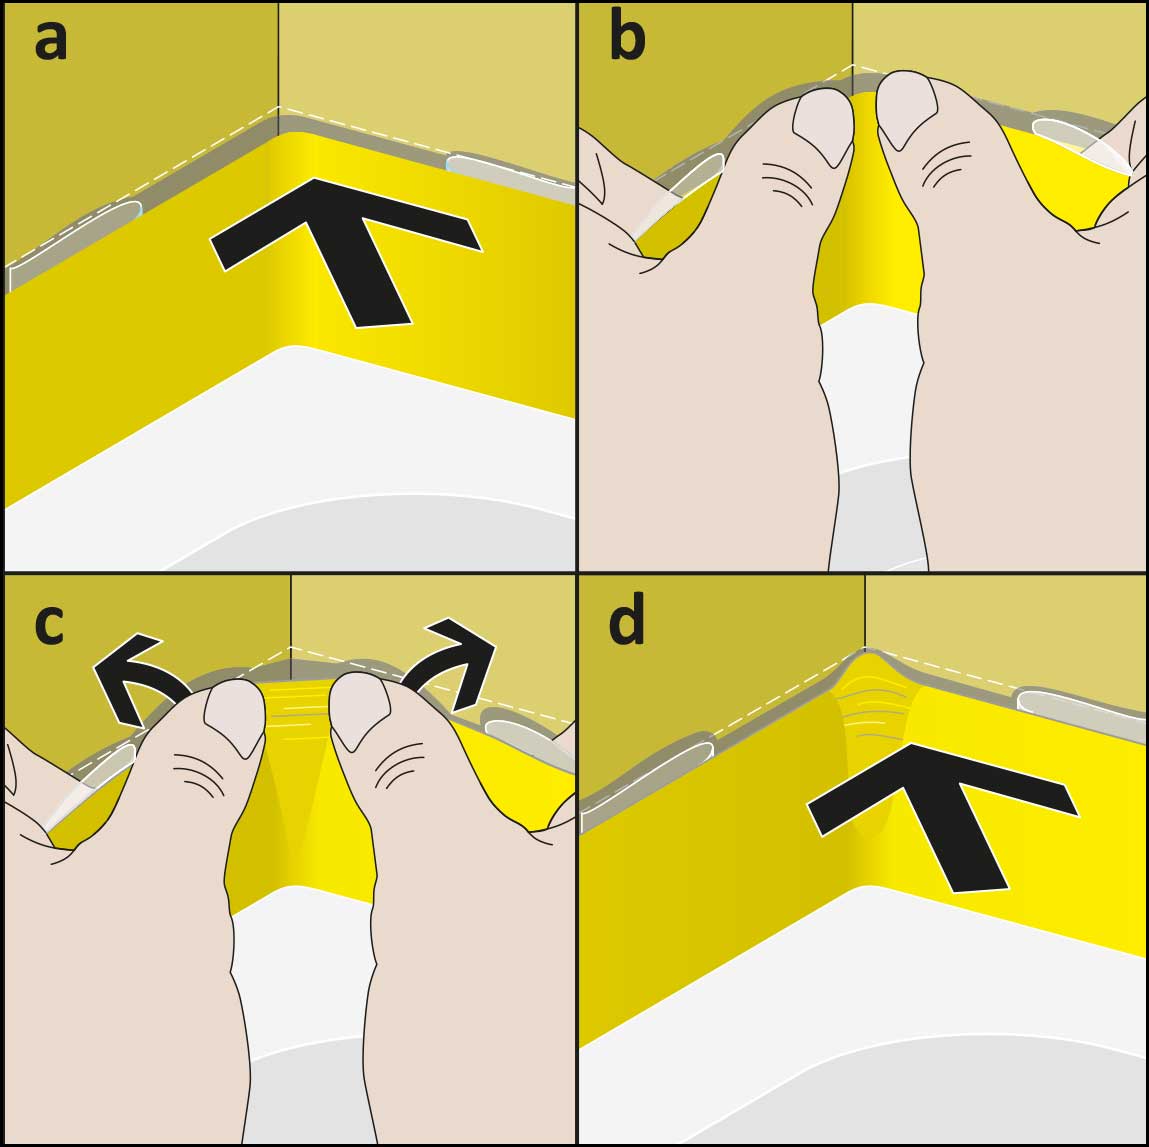
12) Flexible sealing corner for corner 1:
13) Adjust the flexible sealing corner at corner 1 ( wall/wall/floor transition) by folding a and b to form c and stick it to the marked position on the tube joint tape. Press on the protective film of the tube joint tape again!
14 ) Fold over the sealing corner attached to corner 1 and press it onto the sealing tape.
15 ) Corners 4 and 5 must be cut upwards by approx. 10 mm from the bottom at the edge of the tab of the cover film (a). Then tear the foil upwards(b).
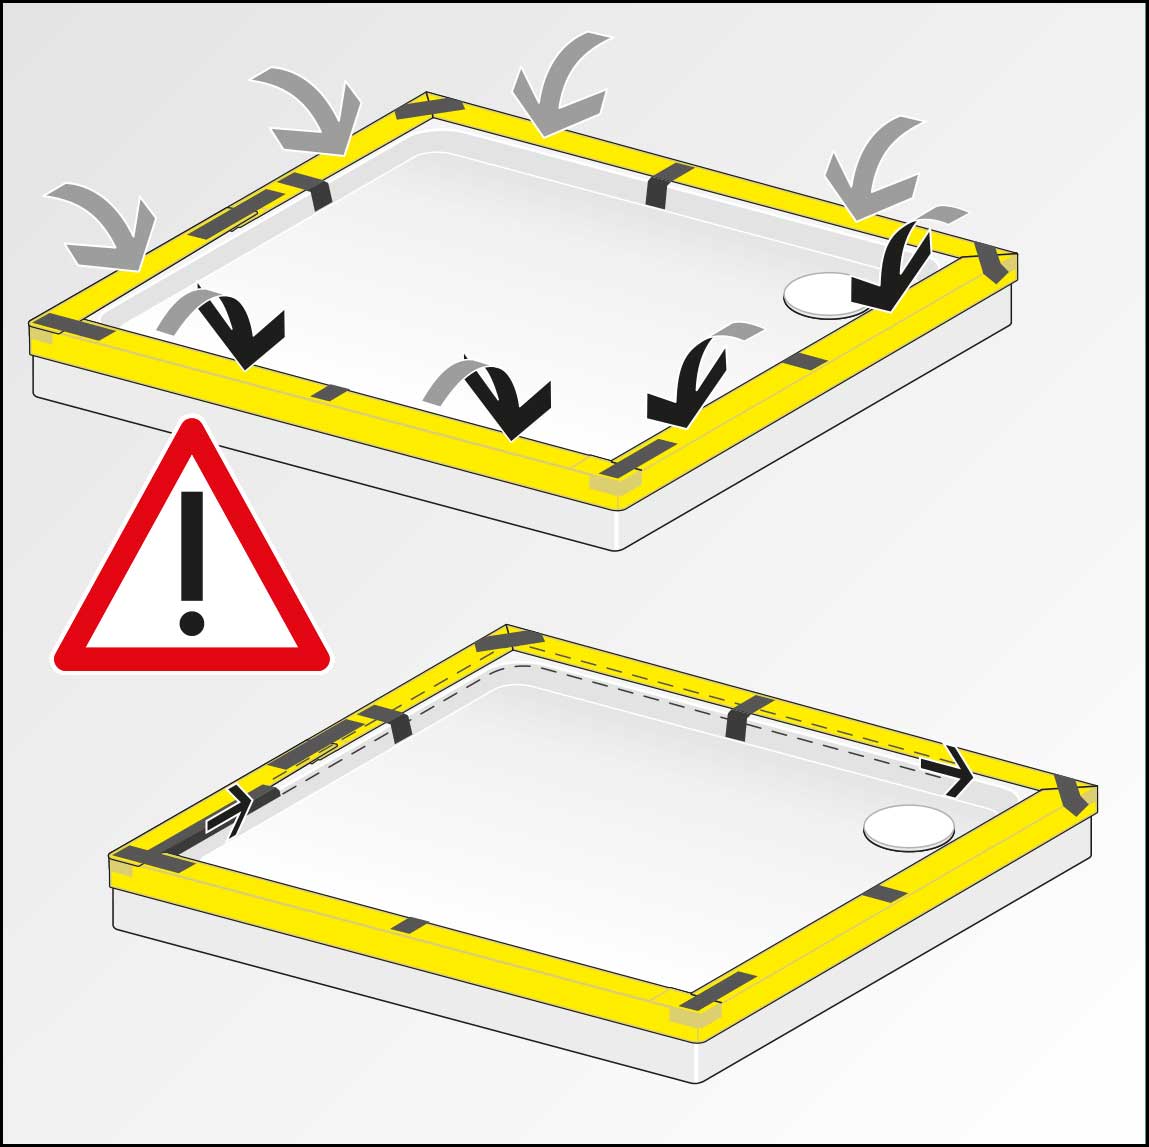
16 ) Fold the circumferential tube joint tape together with the corners by 90° and fix in place with adhesive tape. Then finish all the way around the edge of the bathtub. This protects the tube joint tape from soiling.
17) Remove the “dust protection” and the tube joint tape can now be glued to the wall and floor as shown in Fig. 22-25 .
18 ) After positioning the shower tray, corners 4 and 5 must be stretched . Remove the protective film.
19 ) Use the squeegee to press the tube joint tape exactly into the 90° corner.
20 ) After removing all protective film from corners 4 and 5, press the tube joint tape and the remaining corners 1 to 3 onto the floor and wall using the squeegee (Fig. 23). Brush from bottom to top.
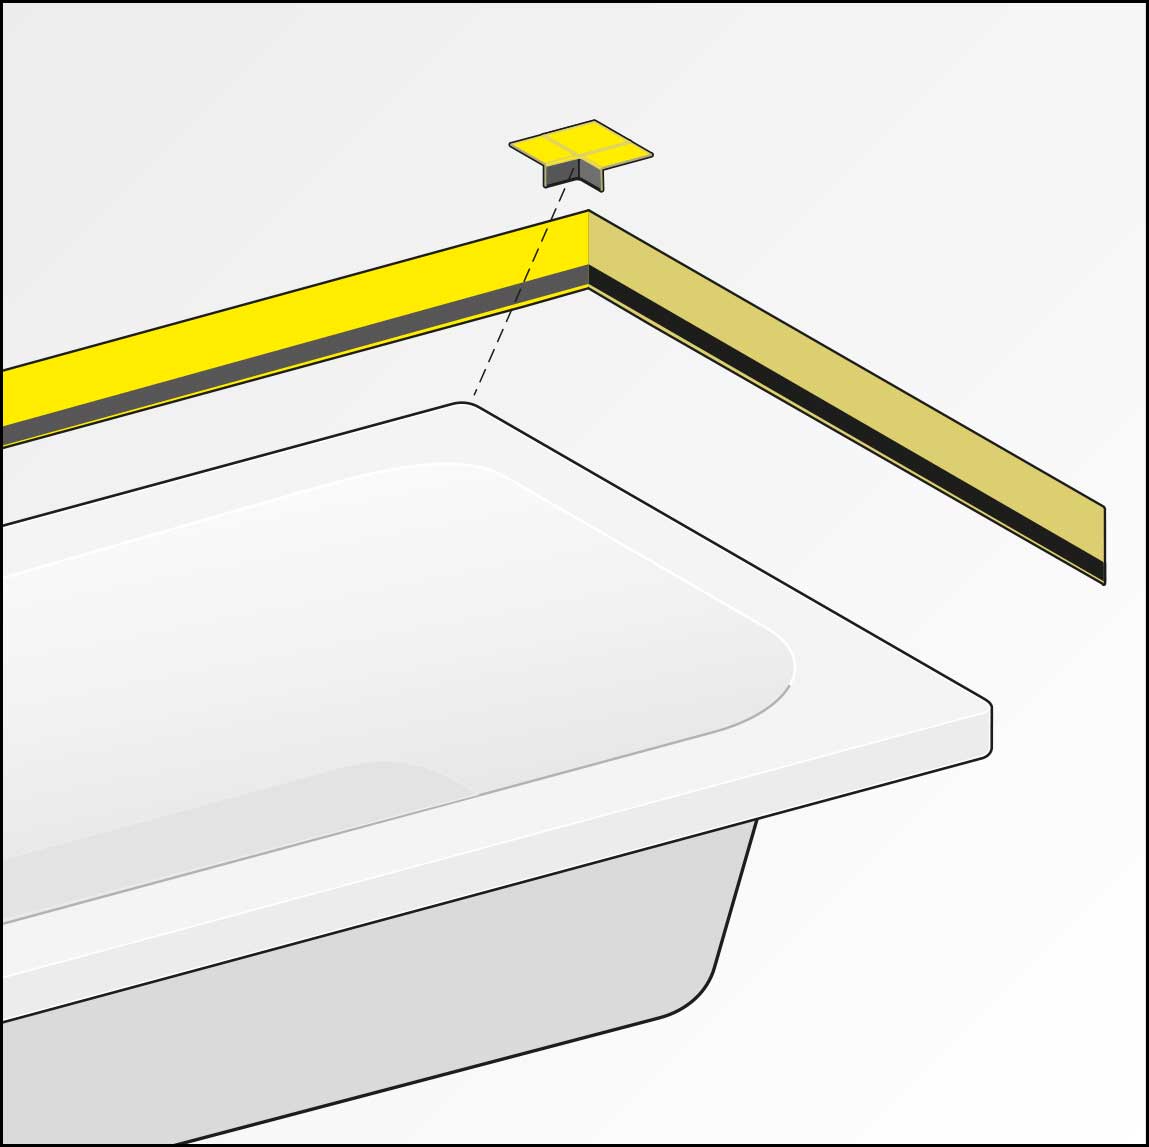
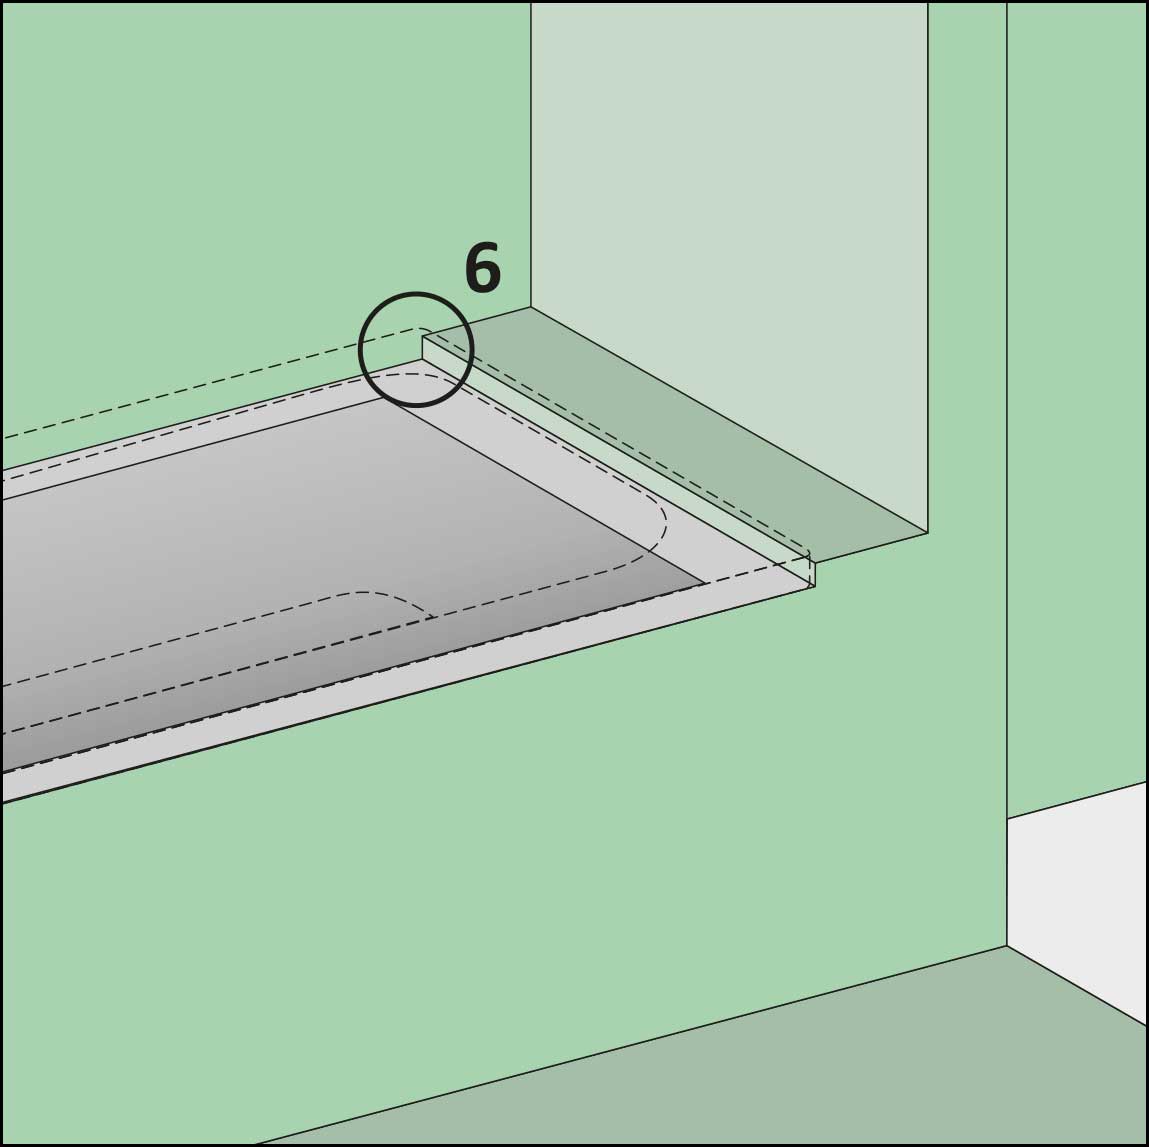
Processing the bathtub
1)Mark the height of the bathtub seal and install as for the shower tray. Cut the corner to the top of the tray.
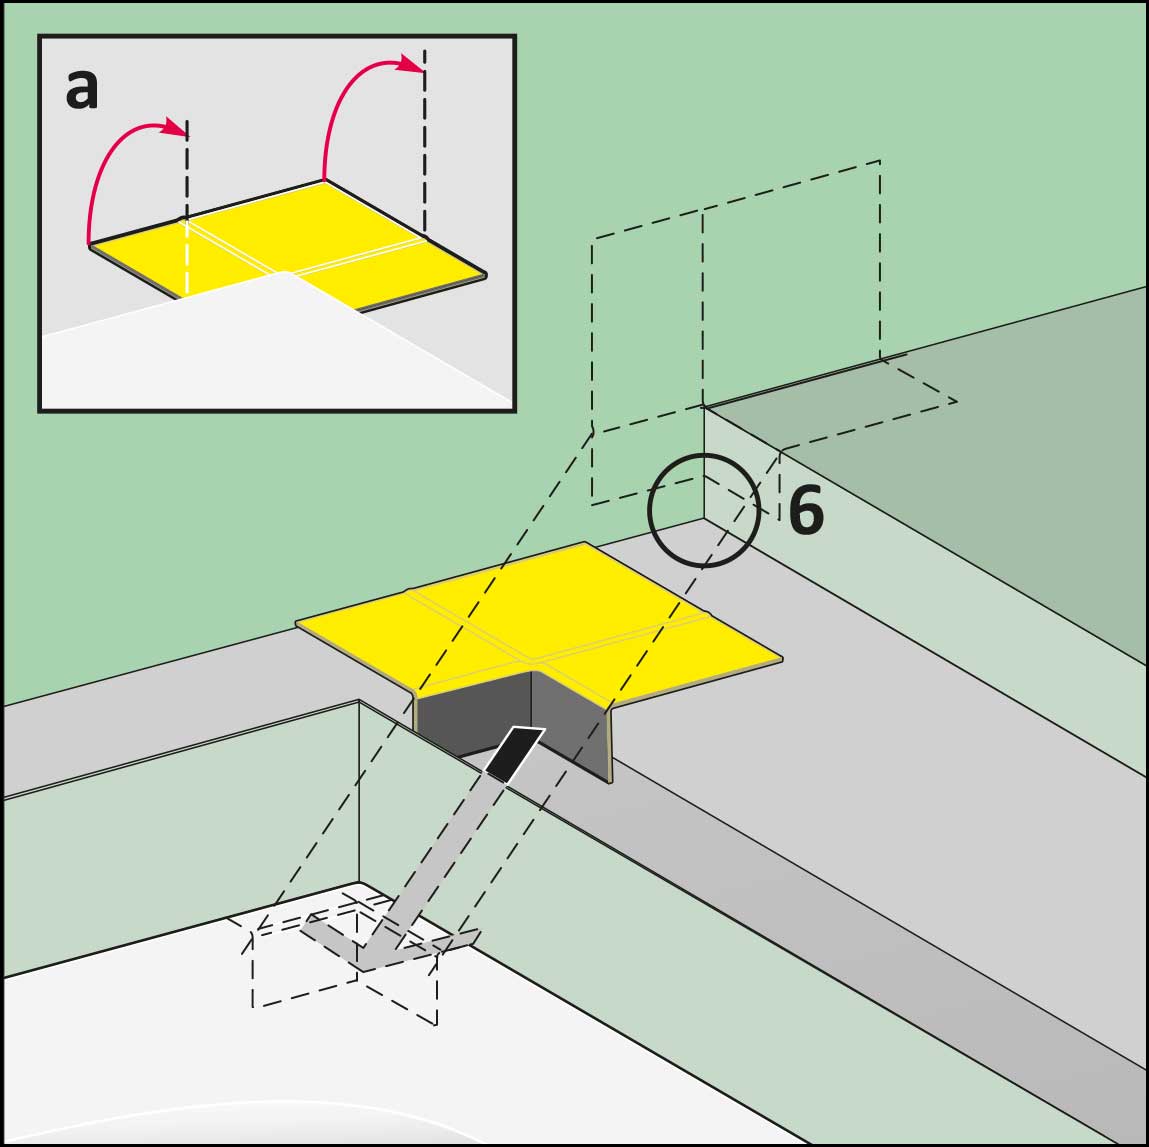
2) Flexible sealing corner for corner 6.
3) Position the flexible sealing corner on the back of the tube joint tape, fold up the sealing corner (a) and glue it to the tube joint tape.
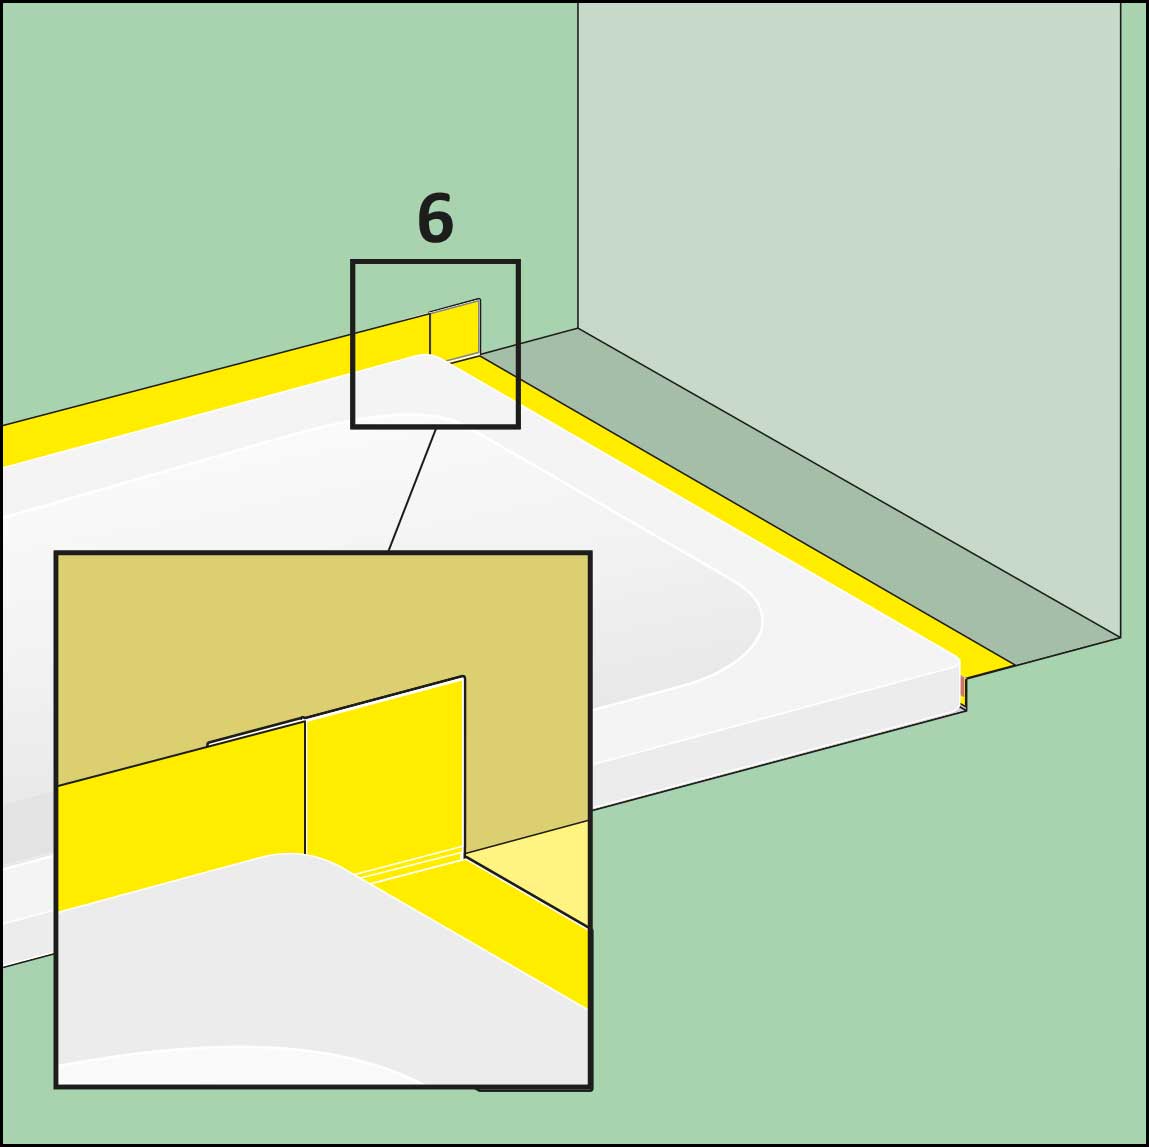
4) Remove all protective film, press the corner and tube joint tape firmly into place.
DO NOT MISS ANY NEWS
EXCITING PRODUCTS
0+
ASSORTMENTS
0+
#Frag Thierry
Wir helfen Ihnen bei allen Fragen rund um unsere Produkte und antworten Ihnen während unserer Geschäftszeiten umgehend.
#Ask Thierry
We will help you with any questions you may have about our products and will respond promptly during our business hours.