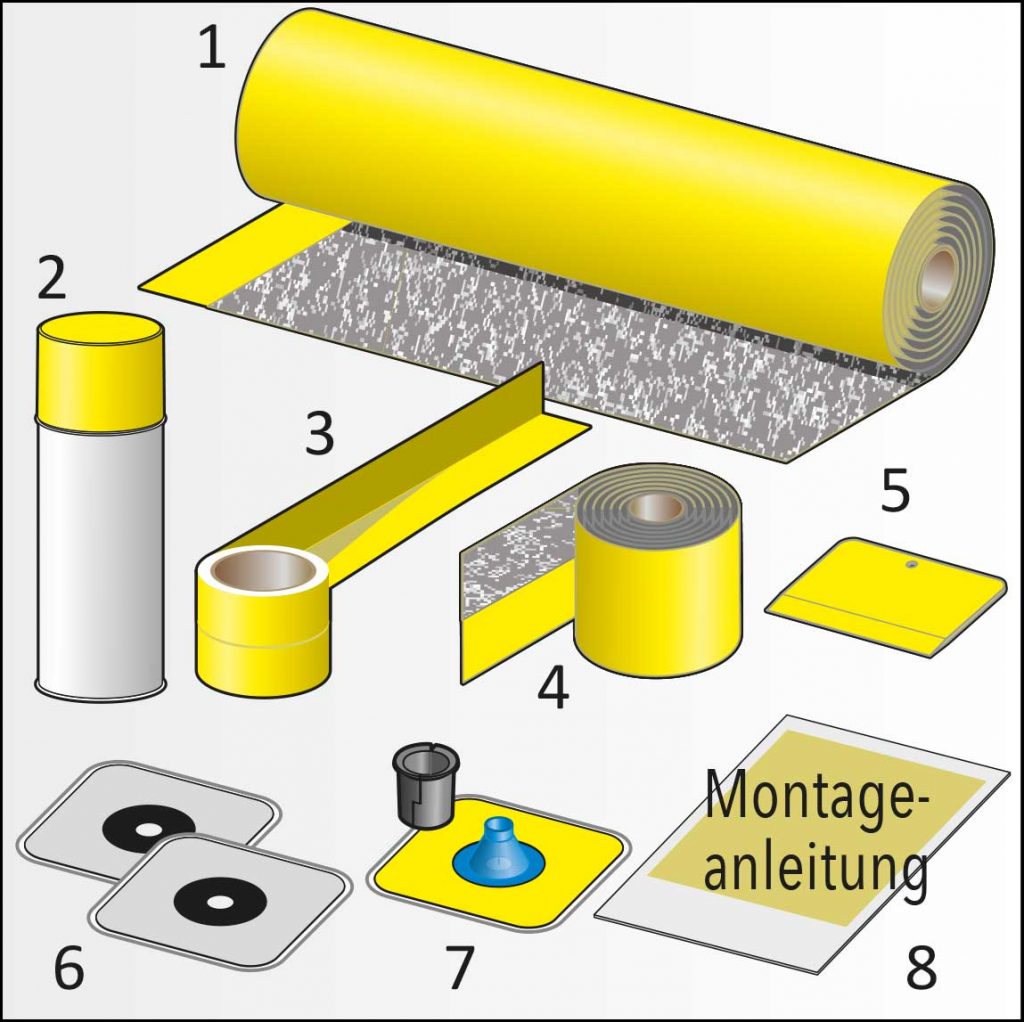
Self-adhesive wall sealing set for dry wall and floor sealing.
1 waterproof membrane 1 m x 30 m; 2 spray primer; 3 corner sealing tape 120 mm x 50 m; 4 base sealing tape 50 m; 5 Installation aid: squeegee; 6 2x 1/2″ pipe collars; 7 Drip protection sleeve; 8 Installation instructions.
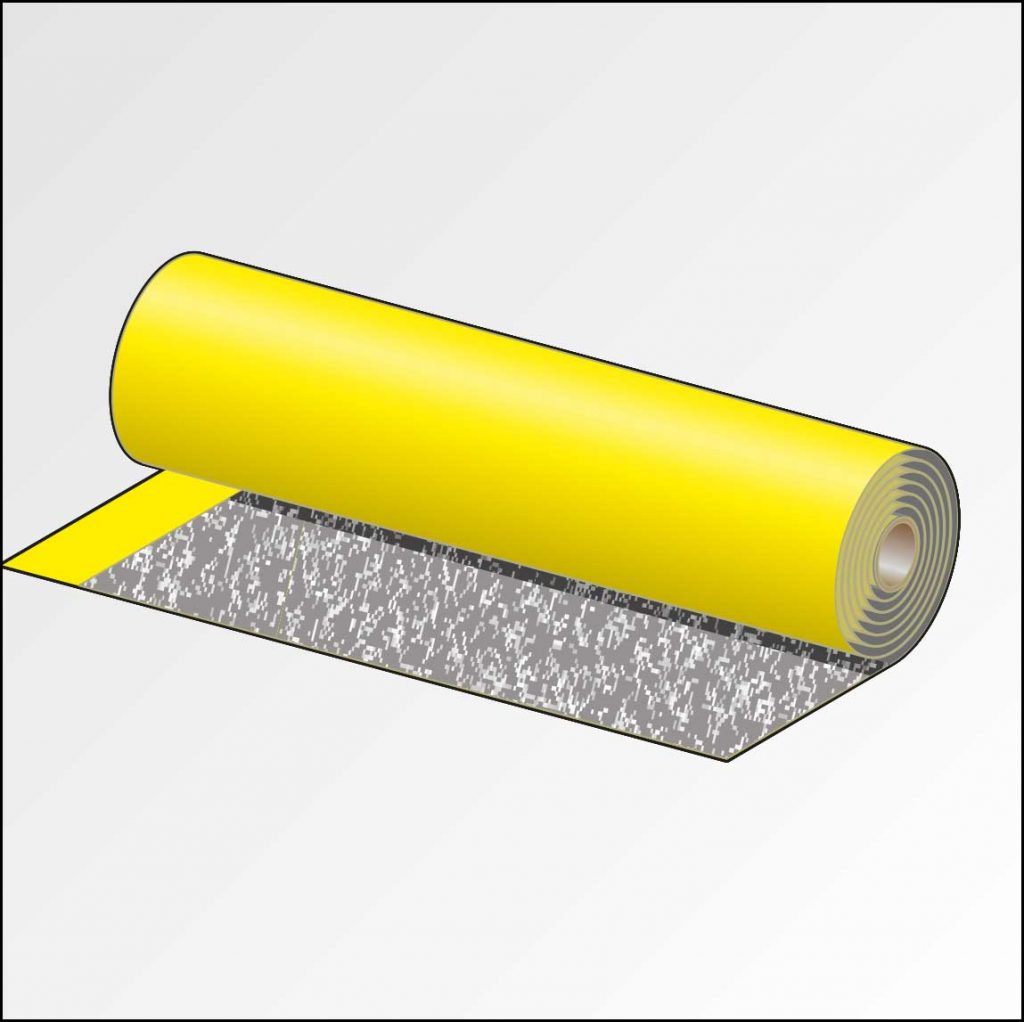
waterproof membrane
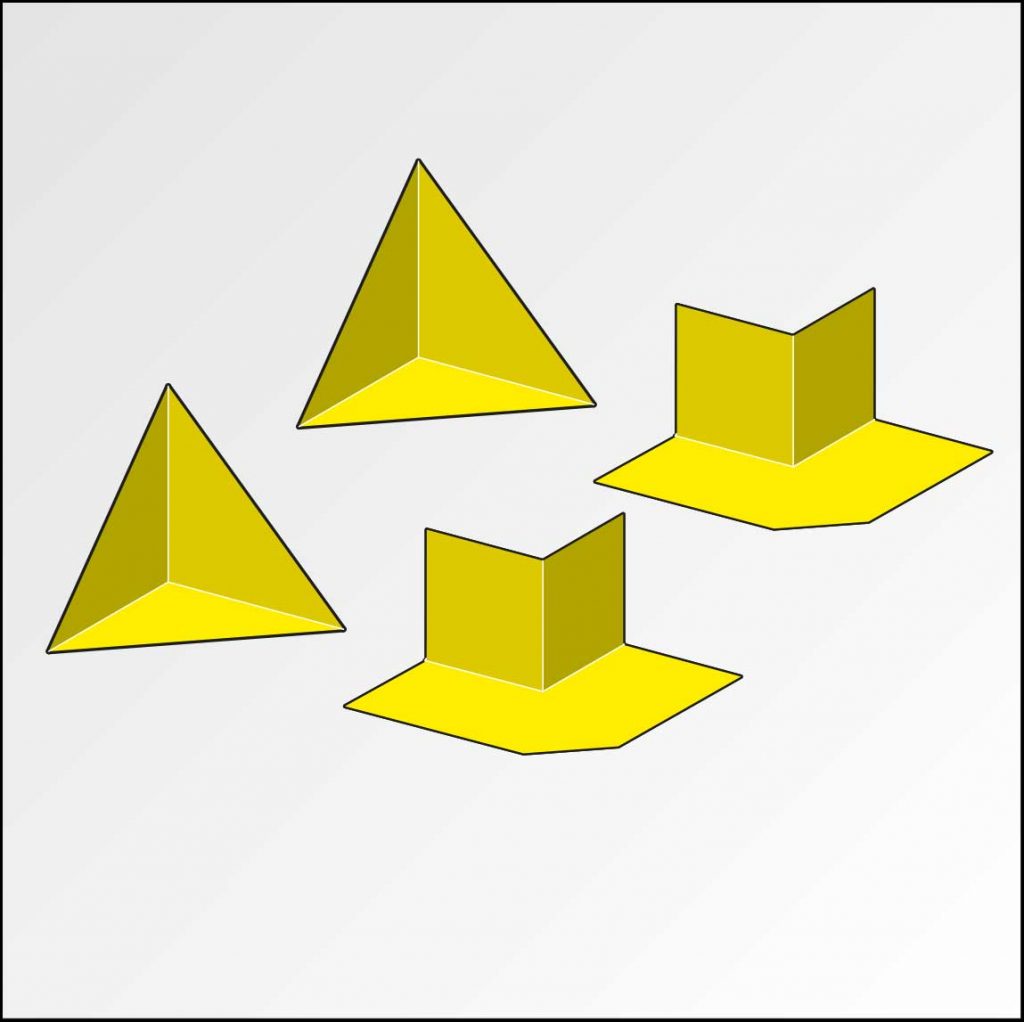
Internal and external corners
Plinth seal
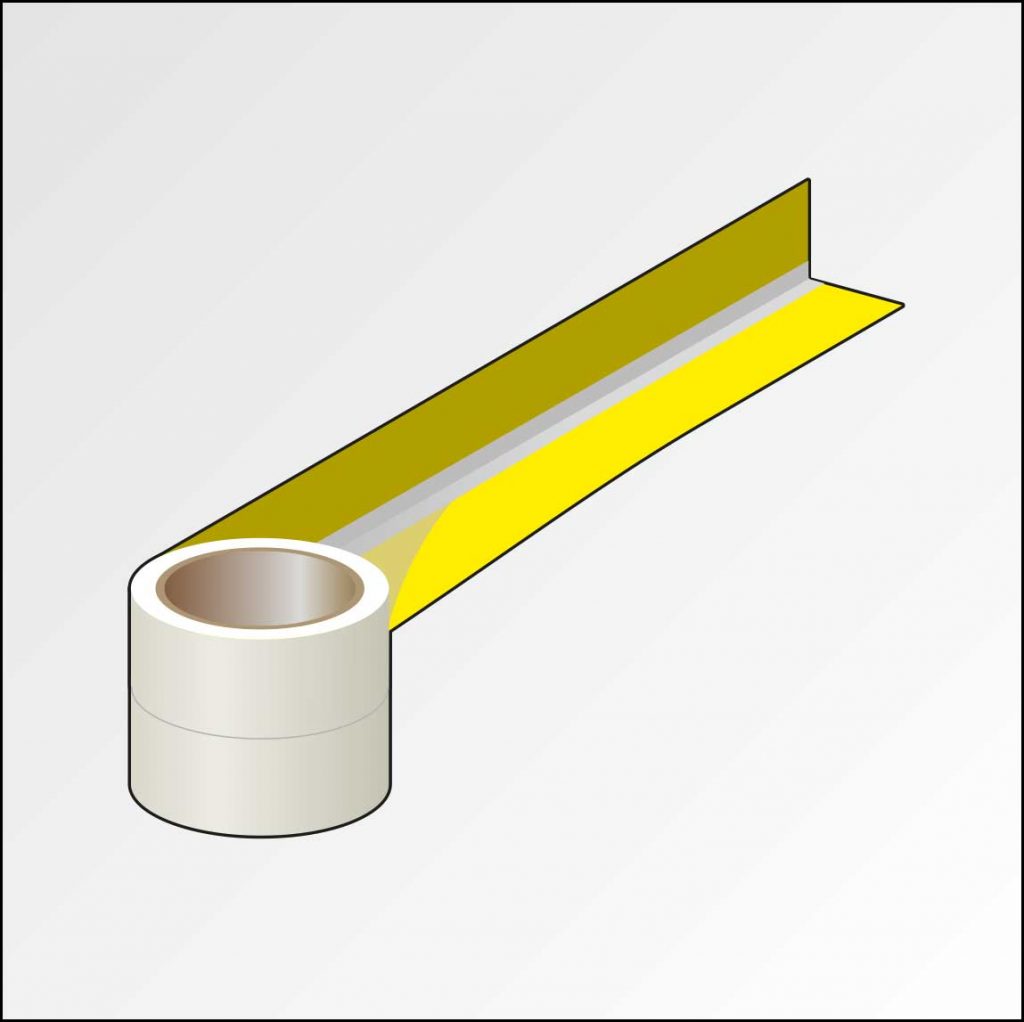
Corner adhesive tape with trowel protection
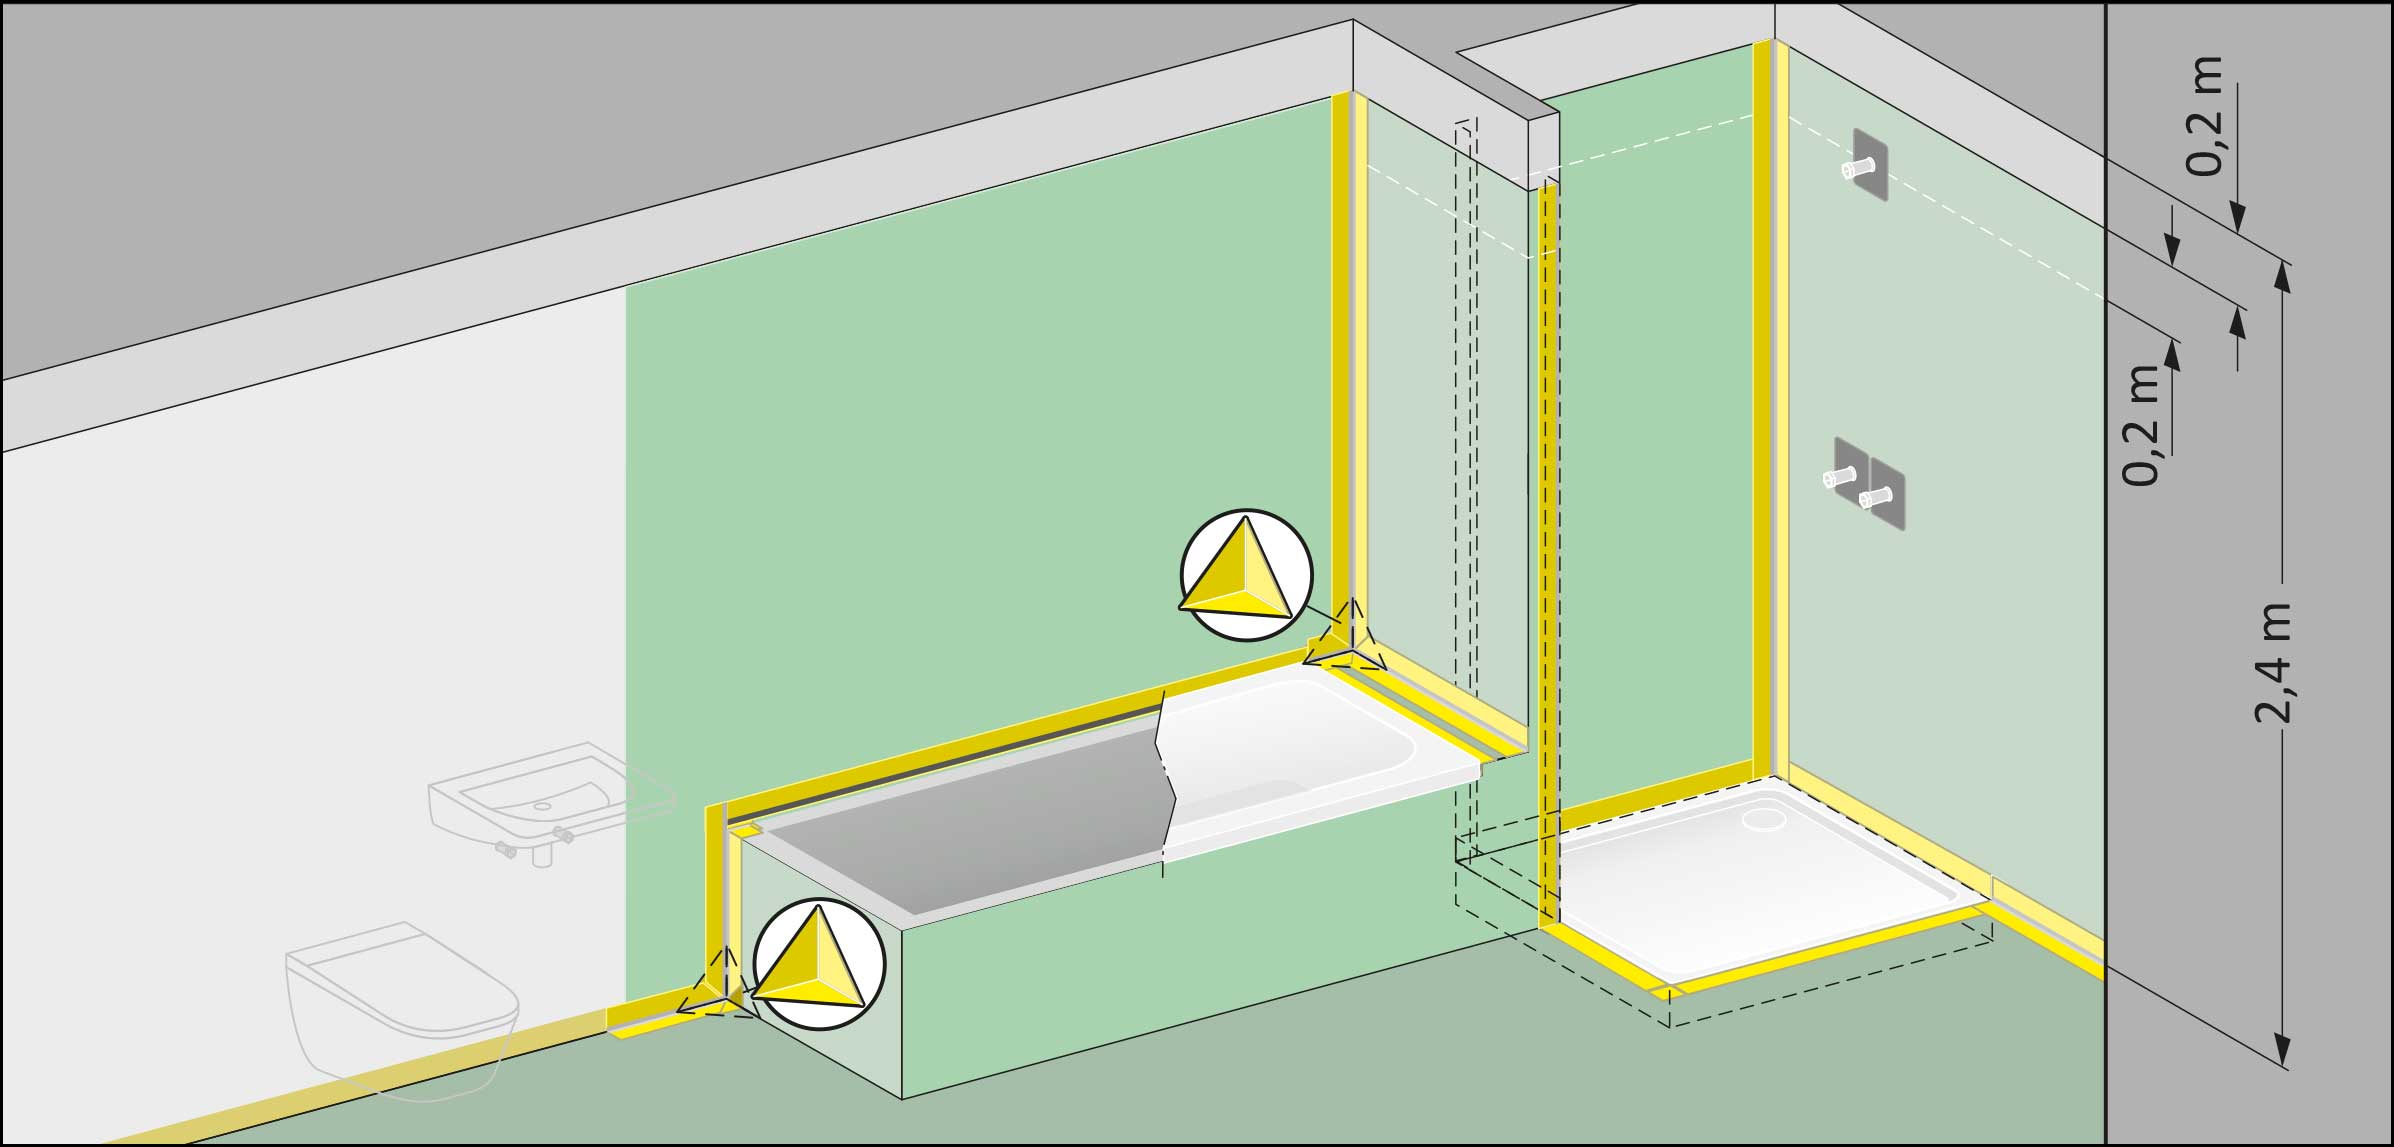
B Sealing the transitions between wall/wall and wall/floor with internal/external corners and corner tape.
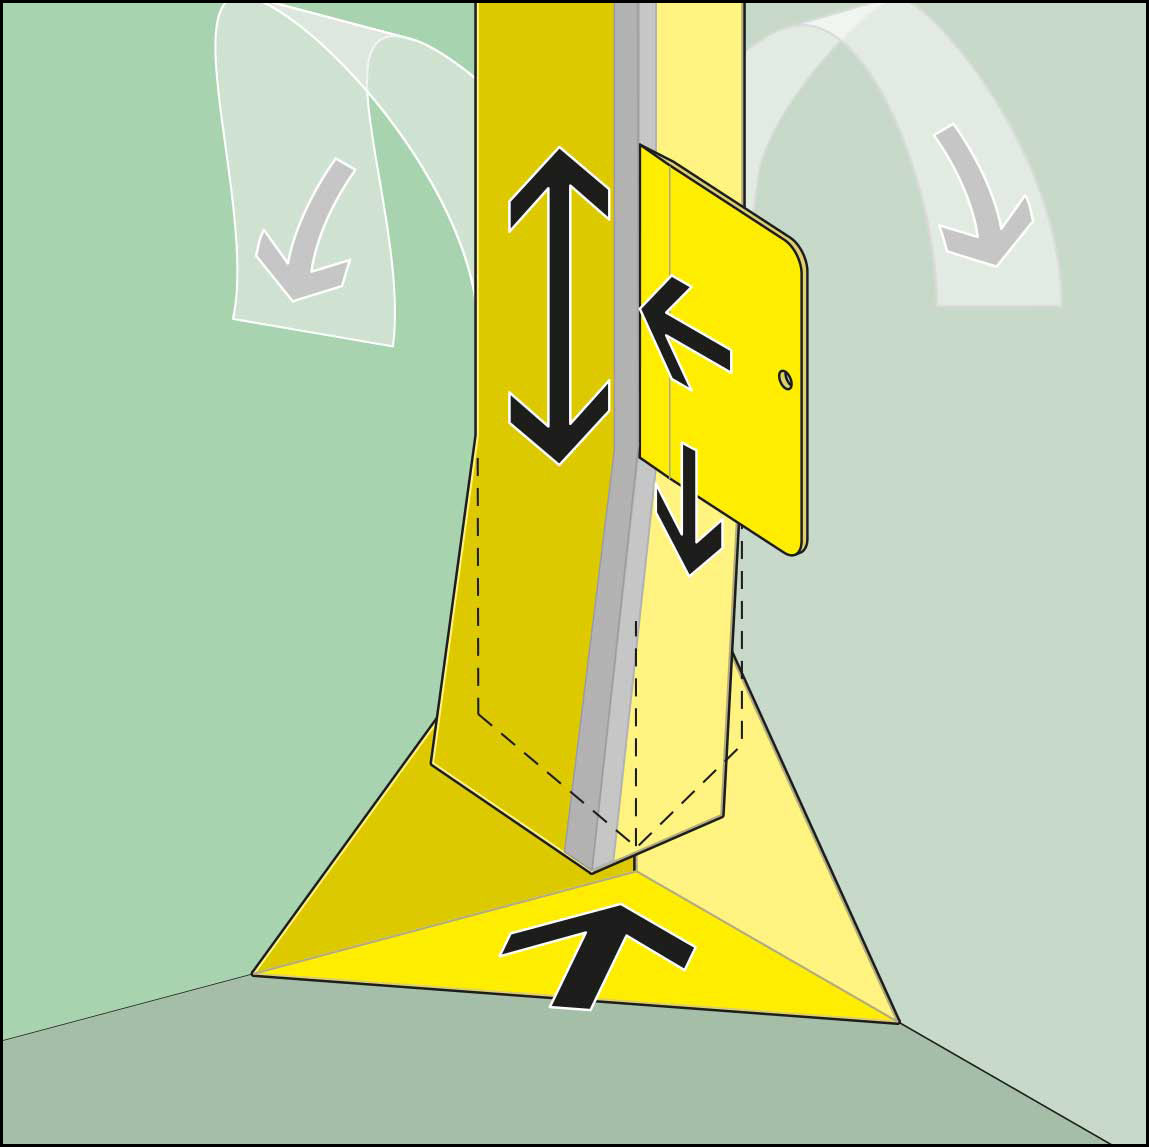
Attach the self-adhesive internal and external corners and the corner tapes.
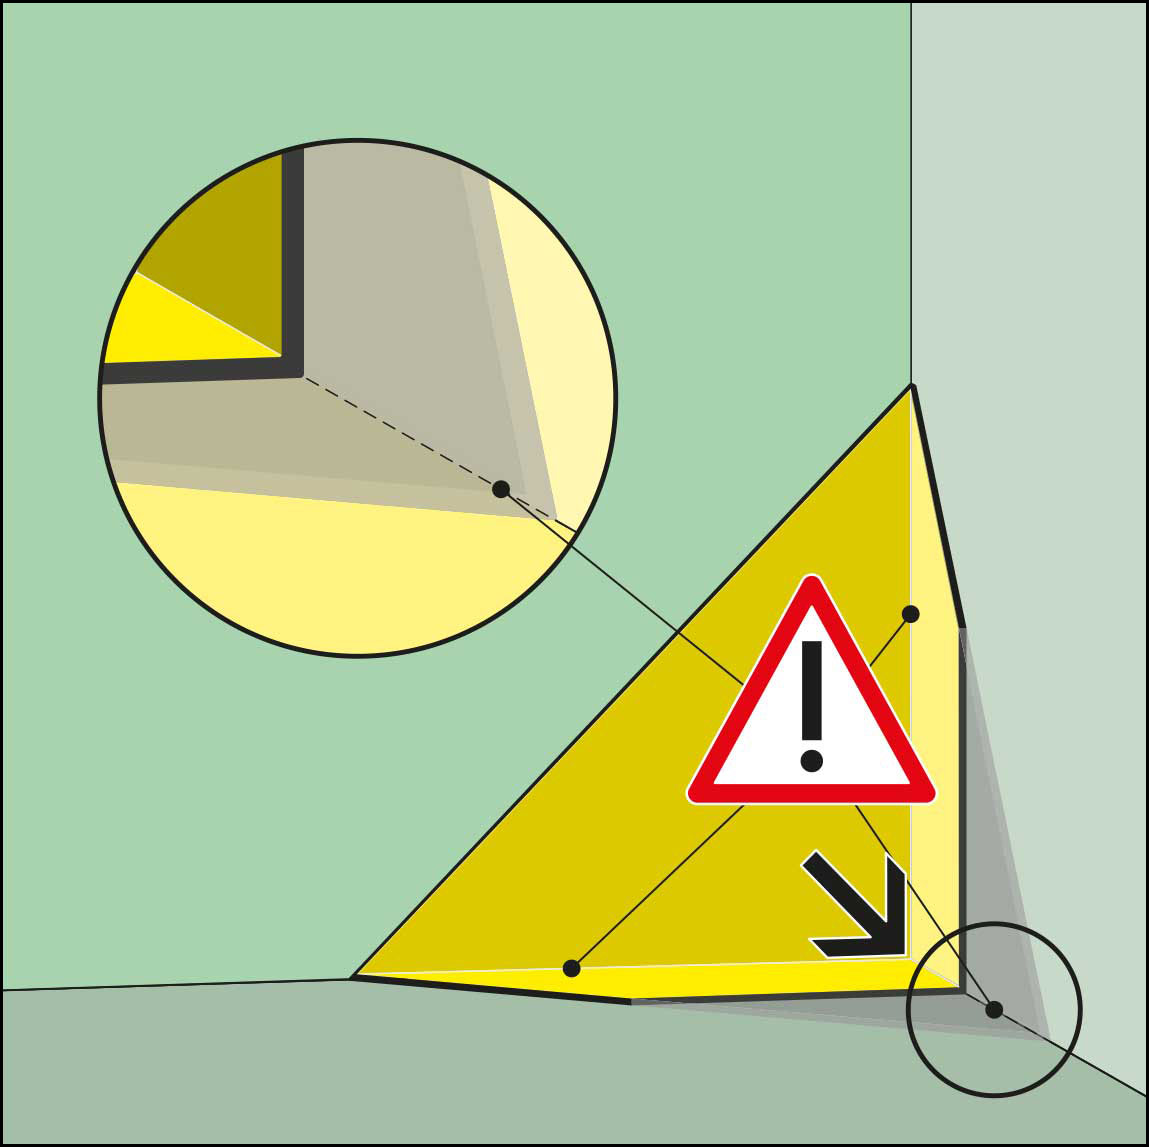
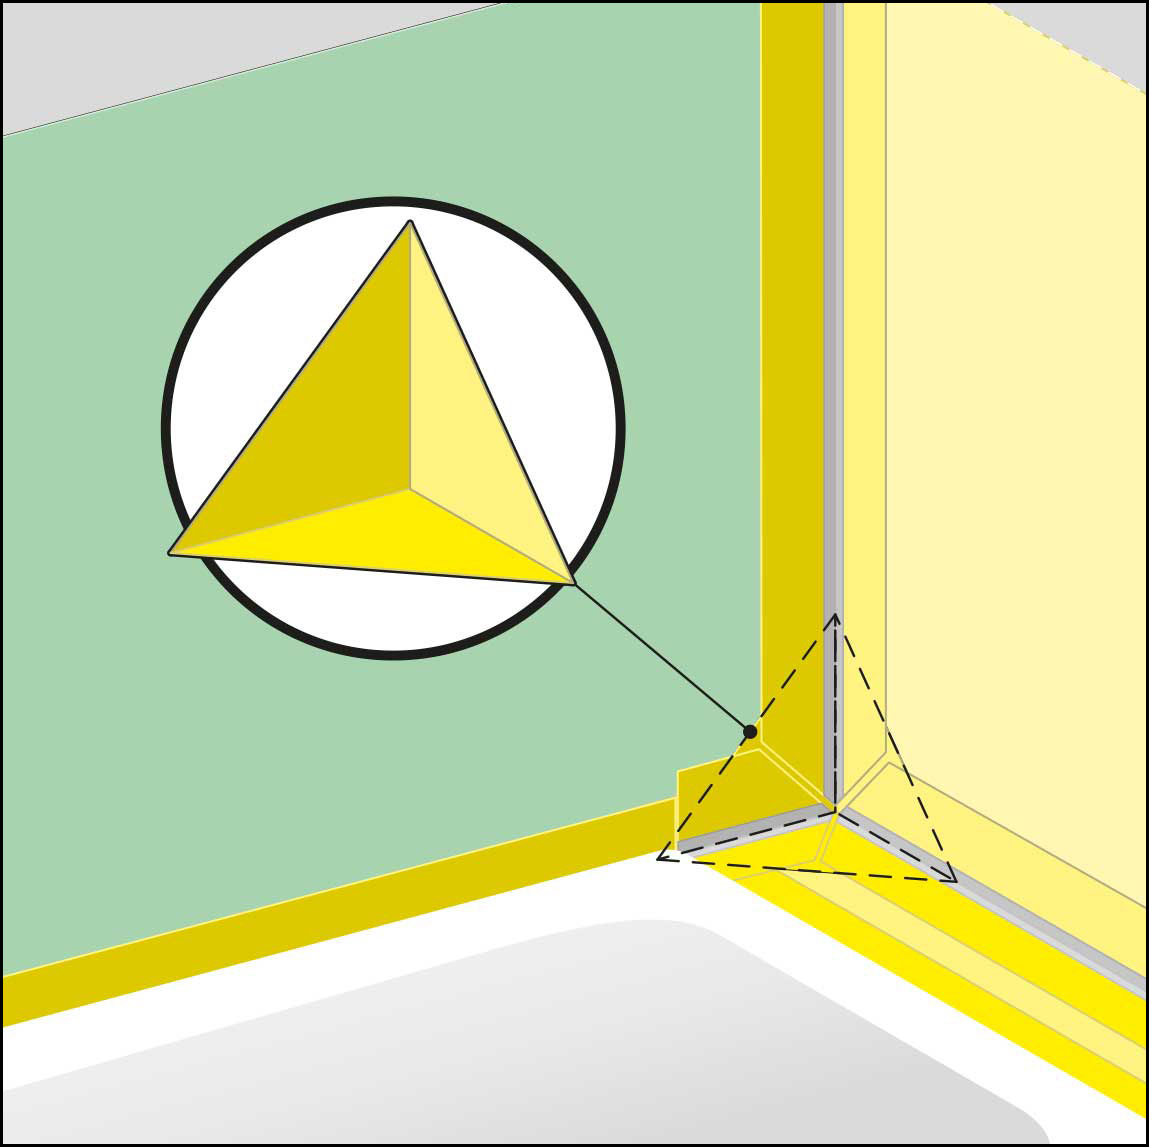
The internal corners (a) ensure absolute tightness at the intersection of the overlapping corner tapes (b) in the area of the remaining fillet (c) . The flexible PE foam compensates for unevenness.
in the wall and floor area.
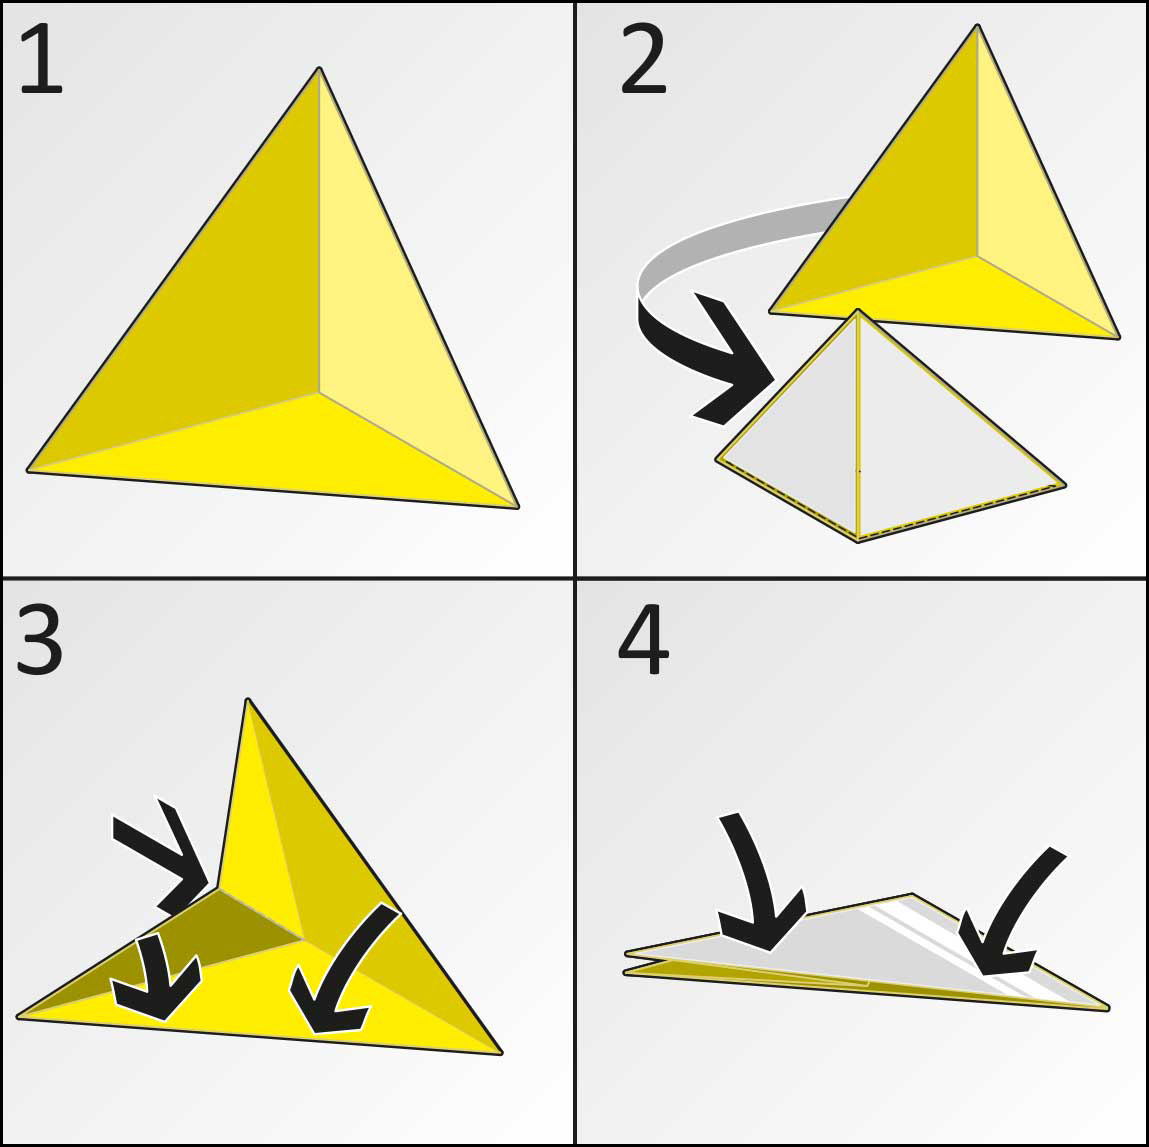
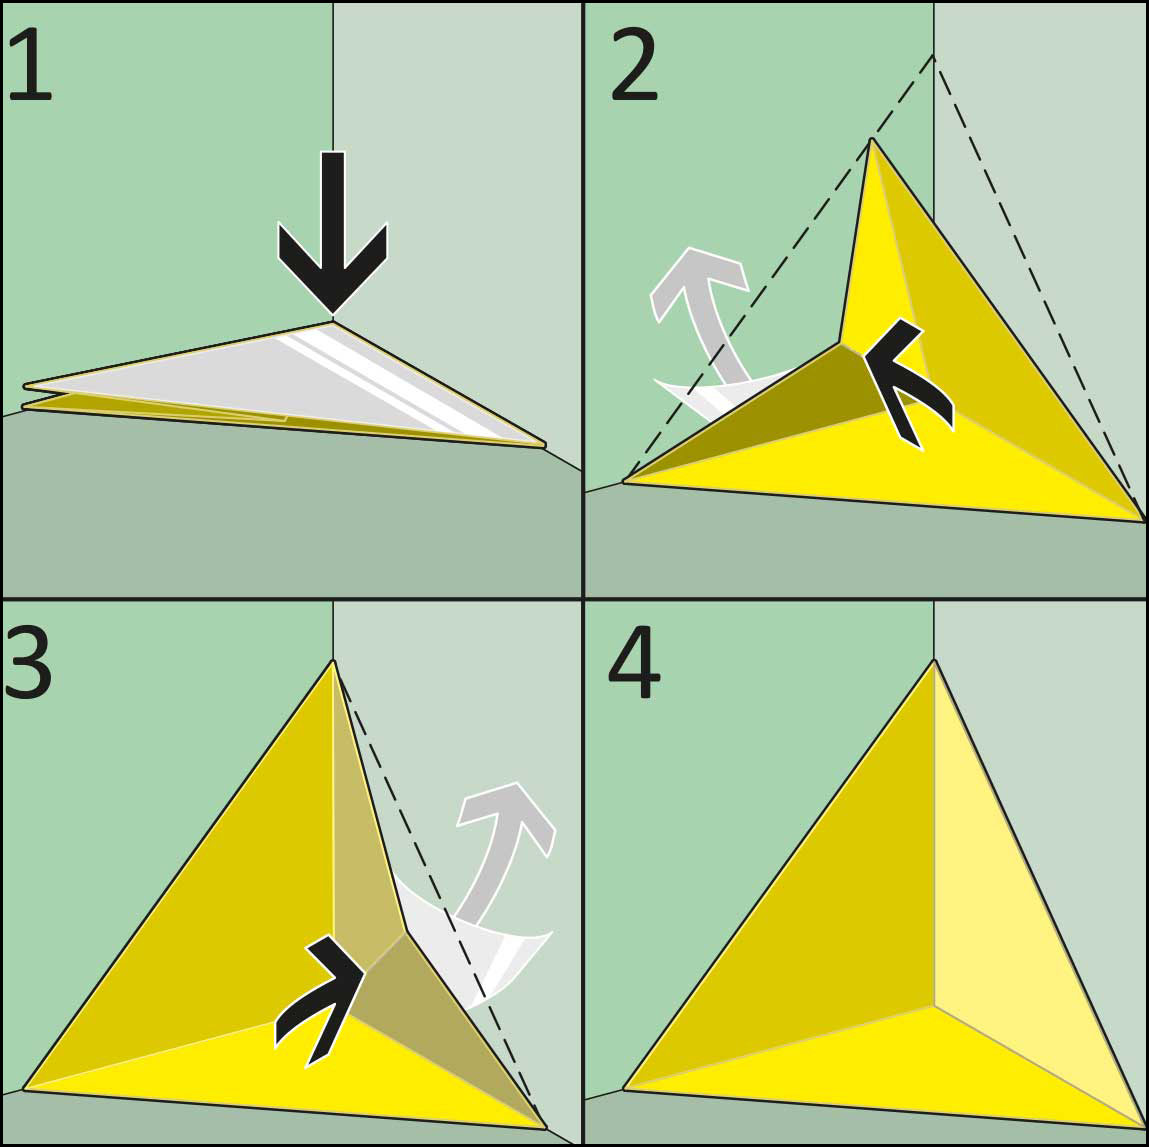
2. the internal corner is folded (1-4) and shortened if necessary (see Fig. B 3).
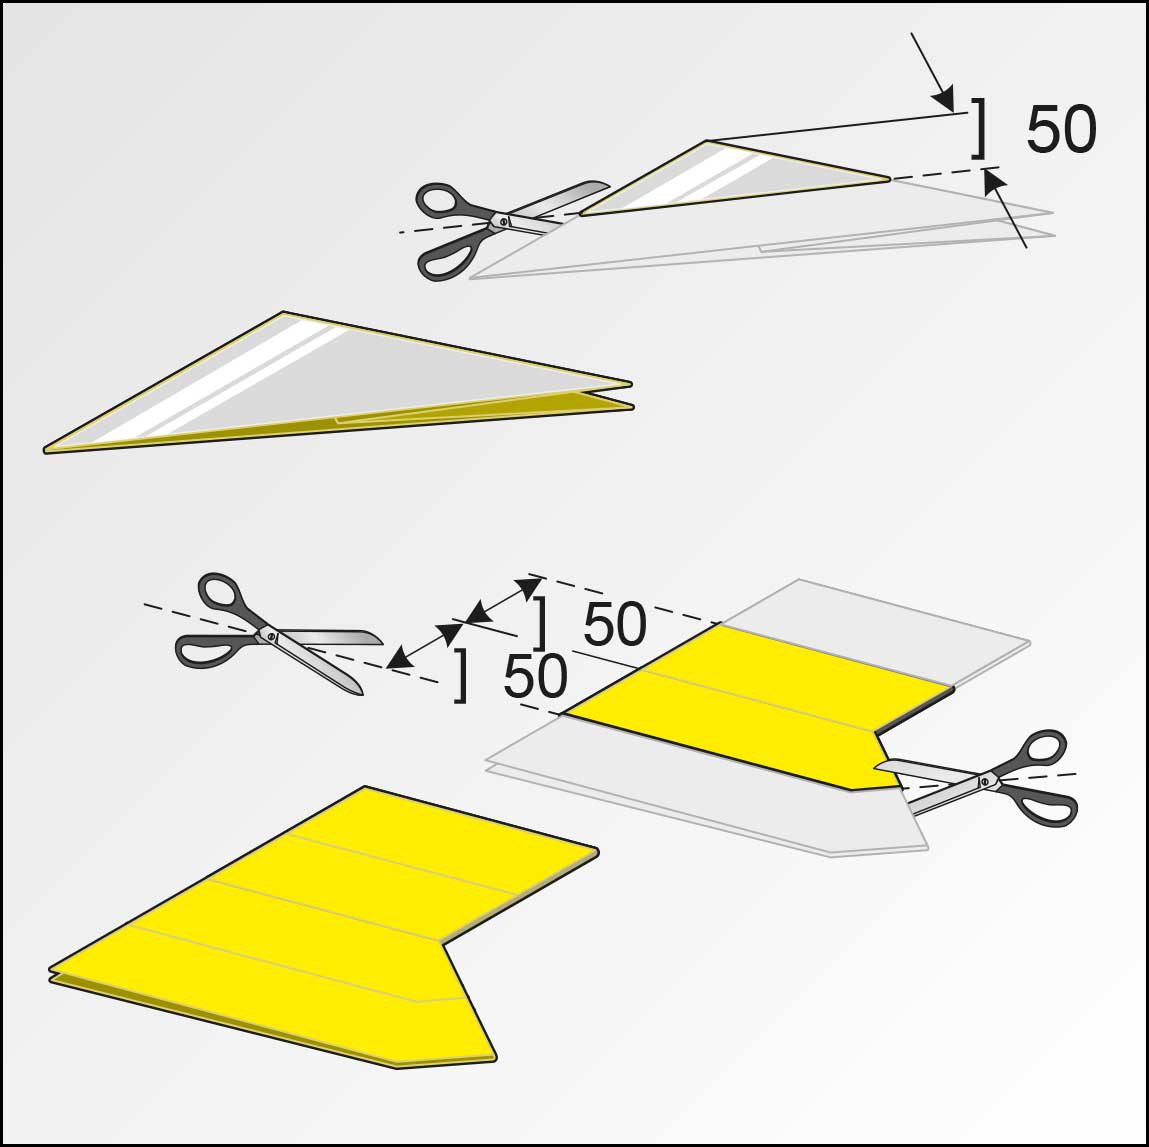
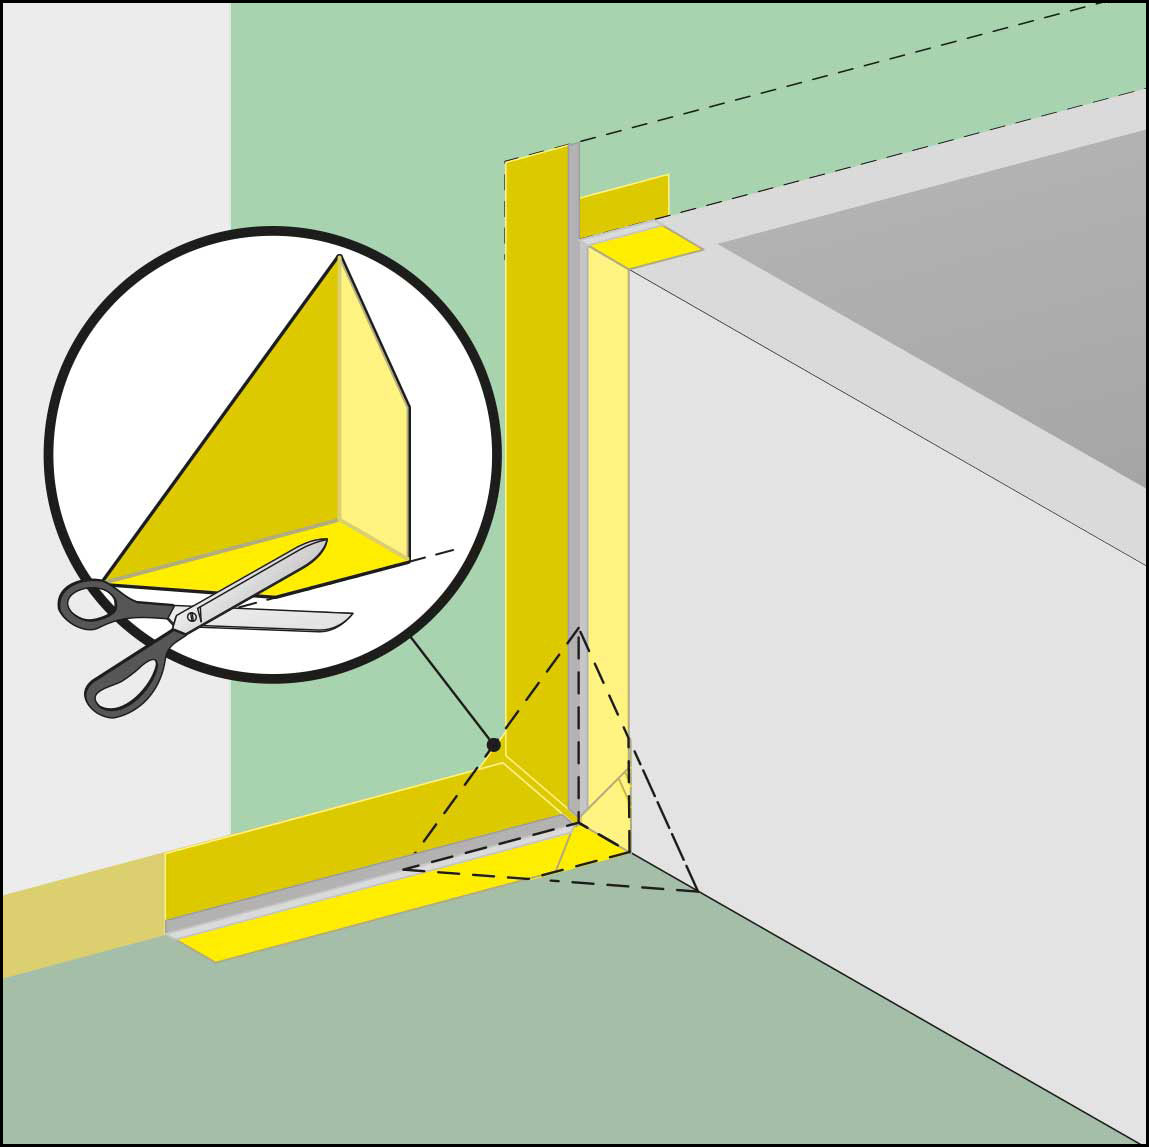
3. self-adhesive internal and external corners can be shortened to 50 mm all round.
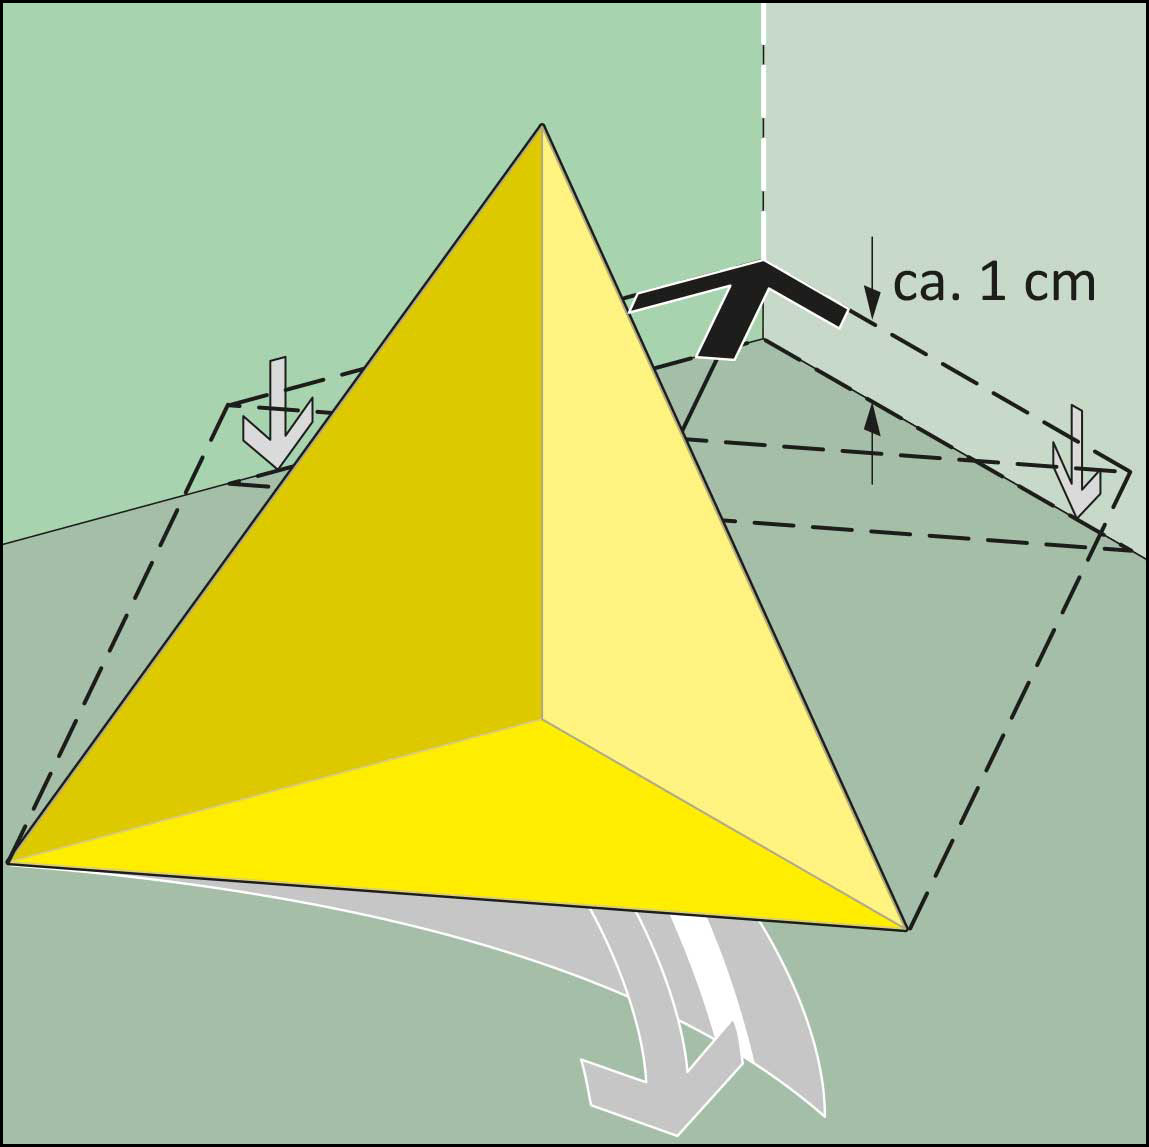
4. push the pyramid in the corner down to approx. 1 cm above the floor, remove the covering foil at the bottom. Slide the pyramid all the way down the wall and press it onto the floor.
5 . the 3 edges of the internal corners must fit snugly in the corner of the room! The tip of the internal corner can be shortened if necessary.
6 . then remove the cover foils from the side panels (2+3) and glue the raised internal corner to the two walls (4).
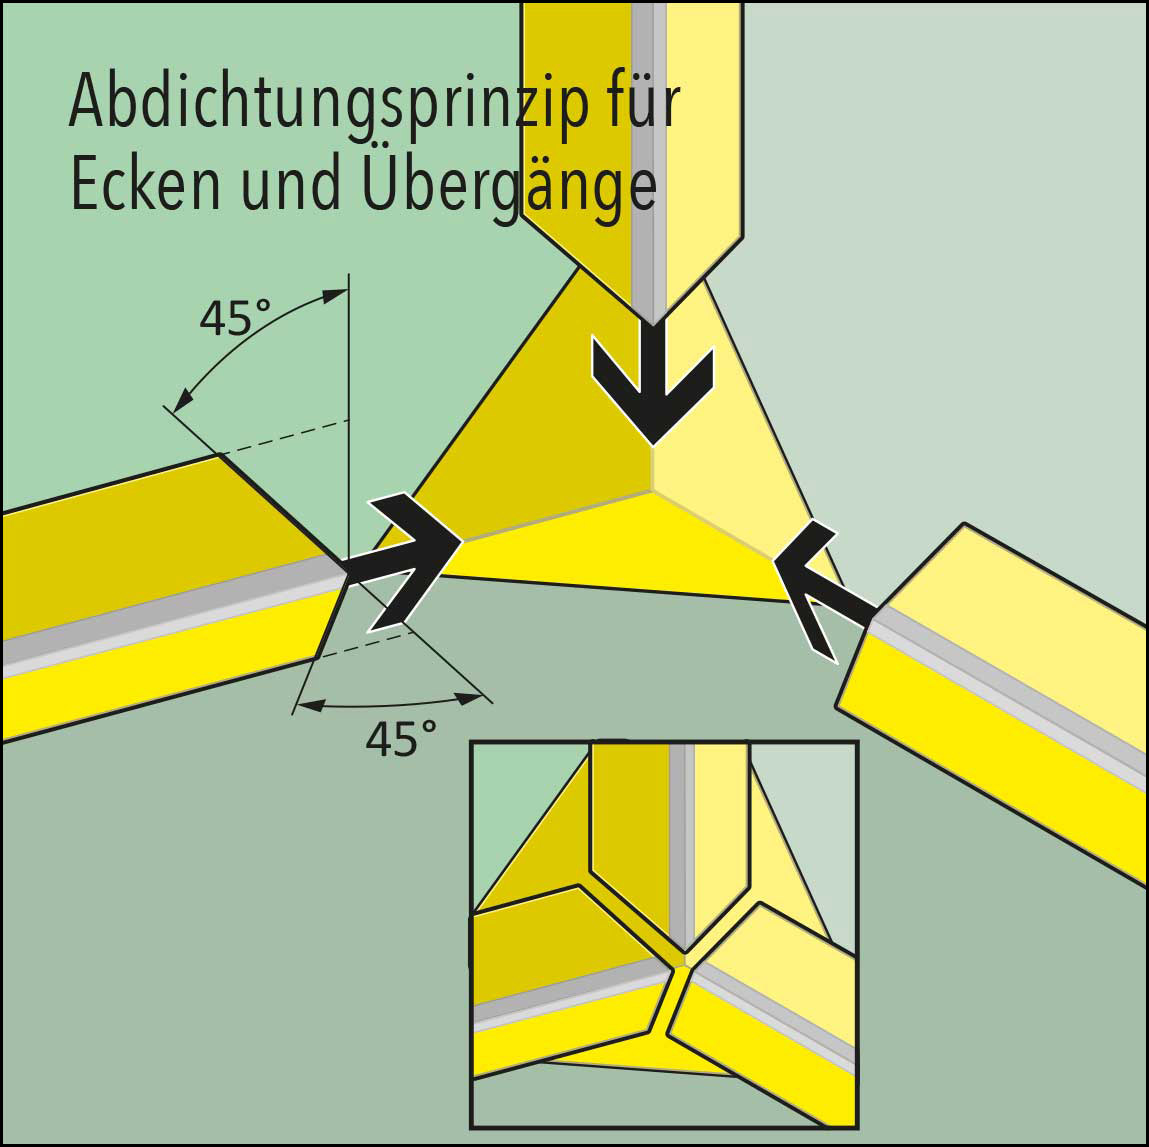
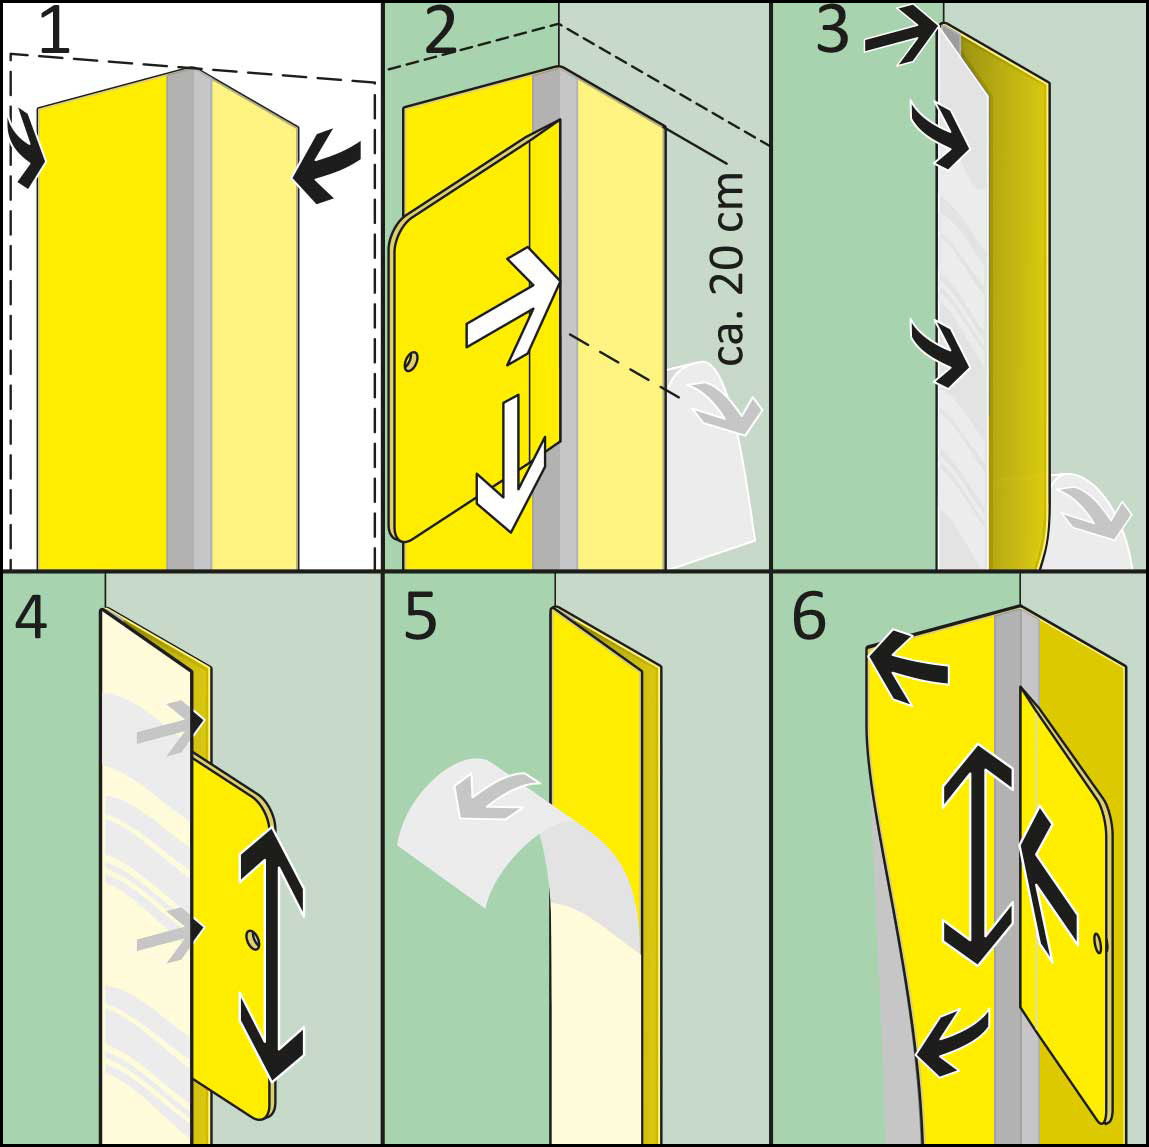
7. fold the corner adhesive tape (1). Slightly peel off the protective film at the top left ( 2). Lay the corner tape halves on top of each other, place the fold in the top corner of the room (3) and press down. Press on the left half of the corner adhesive tape with the squeegee (4). Remove the right-hand protective film (5) and press on the corner adhesive tape with the squeegee (6).
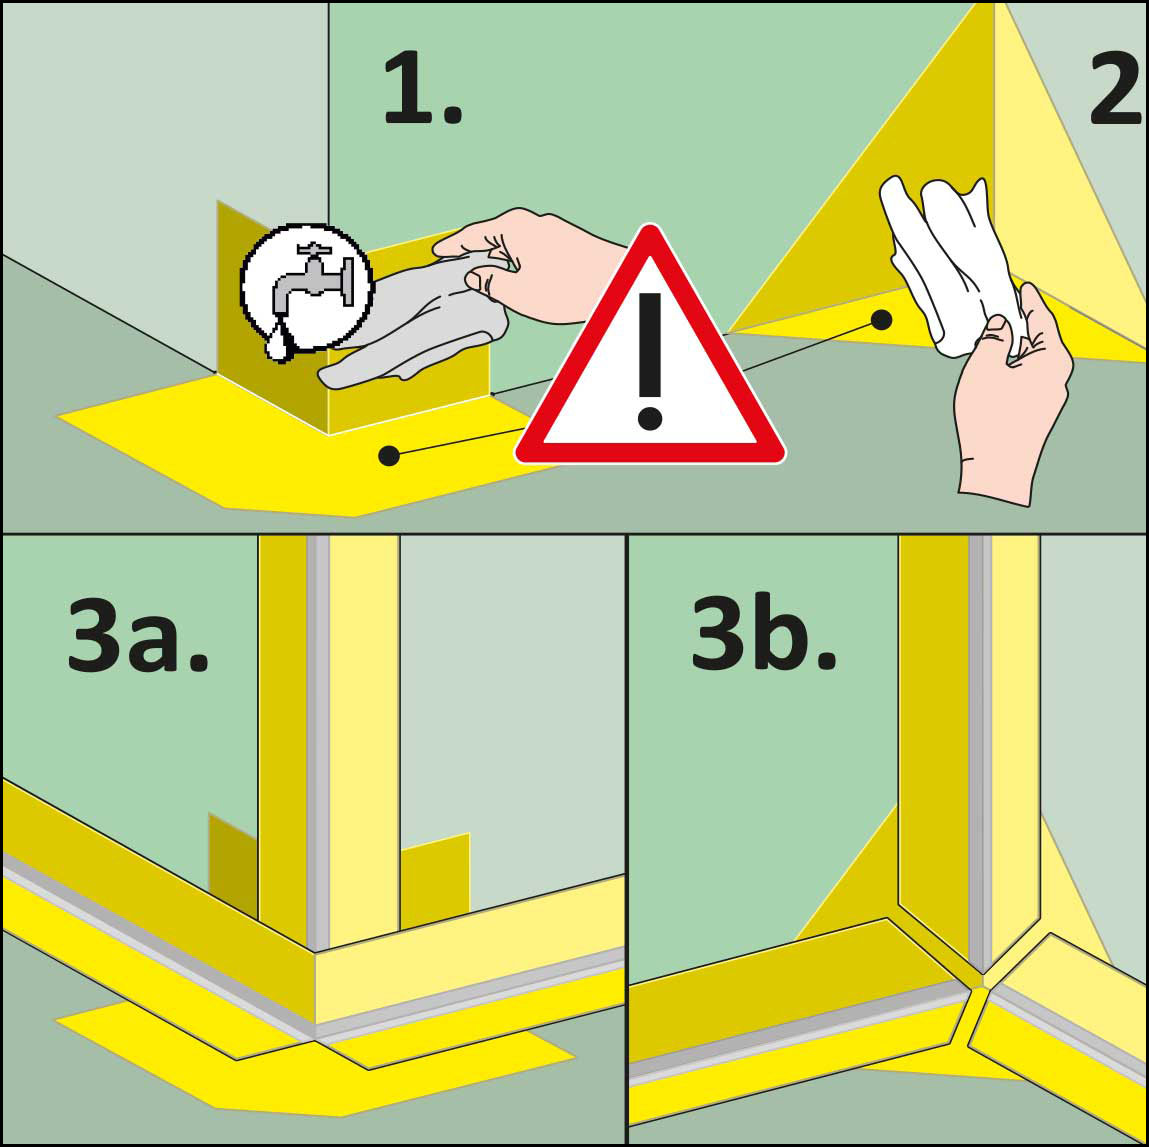
8. 1. wet wipe the outer or internal corner. 2. wipe dry. 3a or 3b Bonding the waterproof membrane to the external or internal corner.
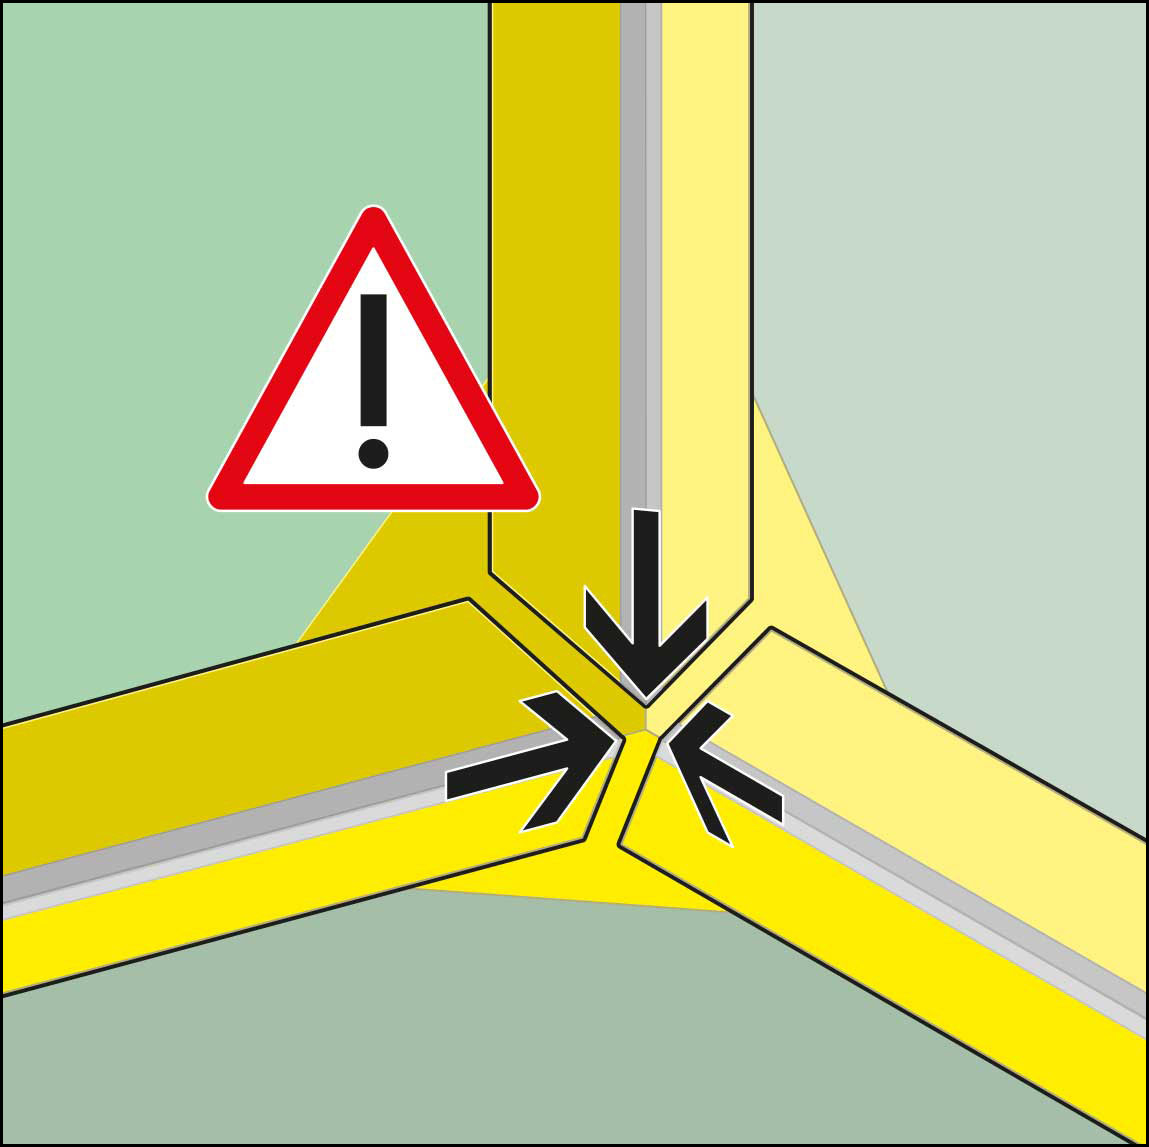
9 Attach the corner adhesive tape: The corner adhesive tapes must be mitered at 45° at each of the internal corners (see Fig. B1). The corner adhesive tapes must not overlap! (Too high installation height!)
10. example: Attach self-adhesive internal corner in the wall/wall/niche floor corner, shorten beforehand if necessary, see B 5.
11 Example: Attach self-adhesive internal corner in the wall/tub/floor corner. If necessary, the self-adhesive internal corner can be cut to fit.
12. attach the internal corner starting at the top. Peel off the cover film downwards. Apply the corner adhesive tape as shown in Fig. B 7. Press on with a squeegee.
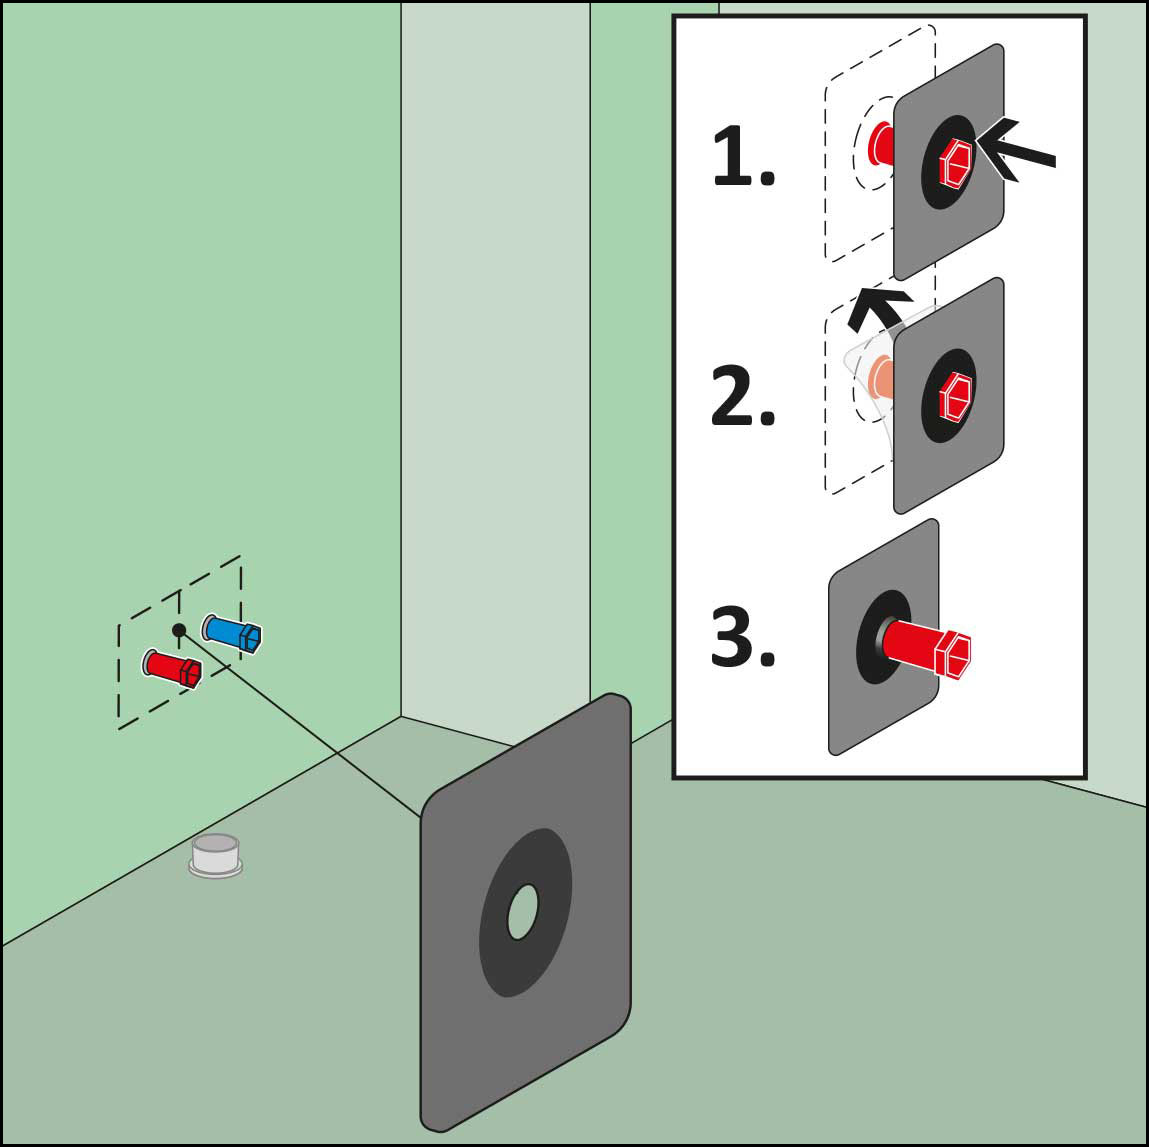
13. all pipe penetrations (e.g. 1/2) are secured with pipe collars: 1. place the collar with membrane over the protective plug 2. remove the covering film 3. press on the collar without bubbles.
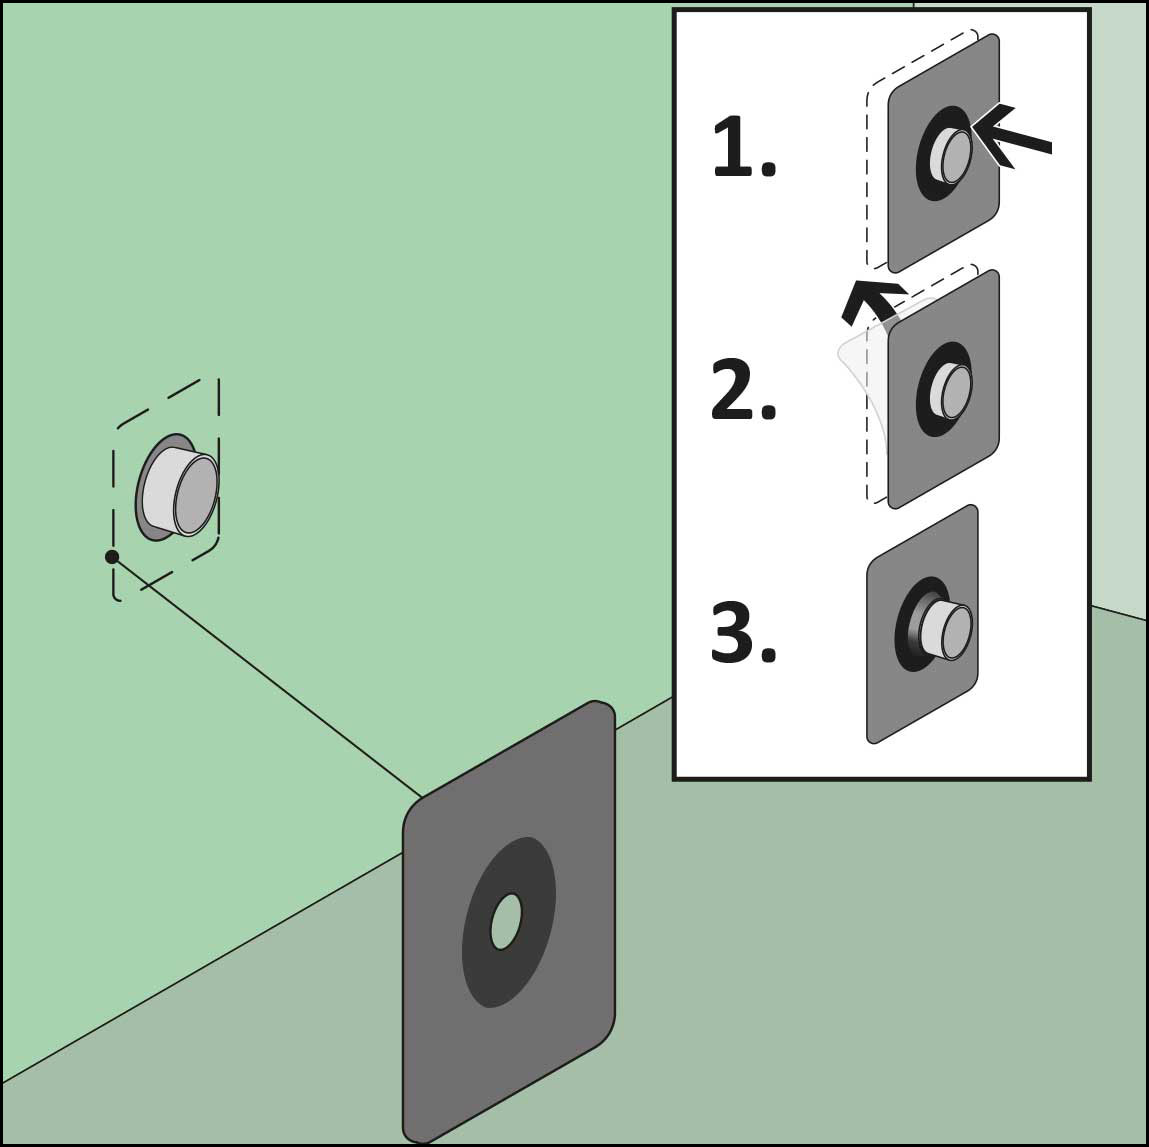
14. all pipe penetrations (e.g. DN50) are secured with pipe collars: 1. place the collar with membrane over the protective plug 2. remove the cover film 3. press on the sleeve without bubbles.